

This post shows students and new users how to remove the Linux Subsystem for Linux (WSL) from Windows 11. In Windows, one can install or uninstall WSL easily with a few clicks. When you have WSL running on Windows 11 and decide to remove or uninstall it, reference the steps below to get that done.
Windows Subsystem for Linux lets developers run a GNU/Linux environment directly in Windows without setting up a virtual machine or dual-boot, including most command-line tools, utilities, and applications.
You can use WSL to run Linux OS without investing in additional machines or installing virtualization software like VirtualBox or VMware. Once WSL is installed, you can install your favorite Linux OS inside Windows.
Below are some helpful posts on WSL on Windows 11
- How to Backup Linux OS inside WSL
- How to check WSL versions in Windows 11
- How to install WordPress on WSL
- How to login as root on WSL with Linux OS
How to Uninstall Linux OS on WSL from Windows 11
As mentioned above, Windows allows users to install or uninstall WSL with a few clicks. You can uninstall Linux OS and WSL components from Windows 11 using the steps below.
To remove a Linux OS from the WSL environment, go to the Start menu > Settings > Apps > Apps & Features.
Apps and features will list all available apps installed on your Windows machine.
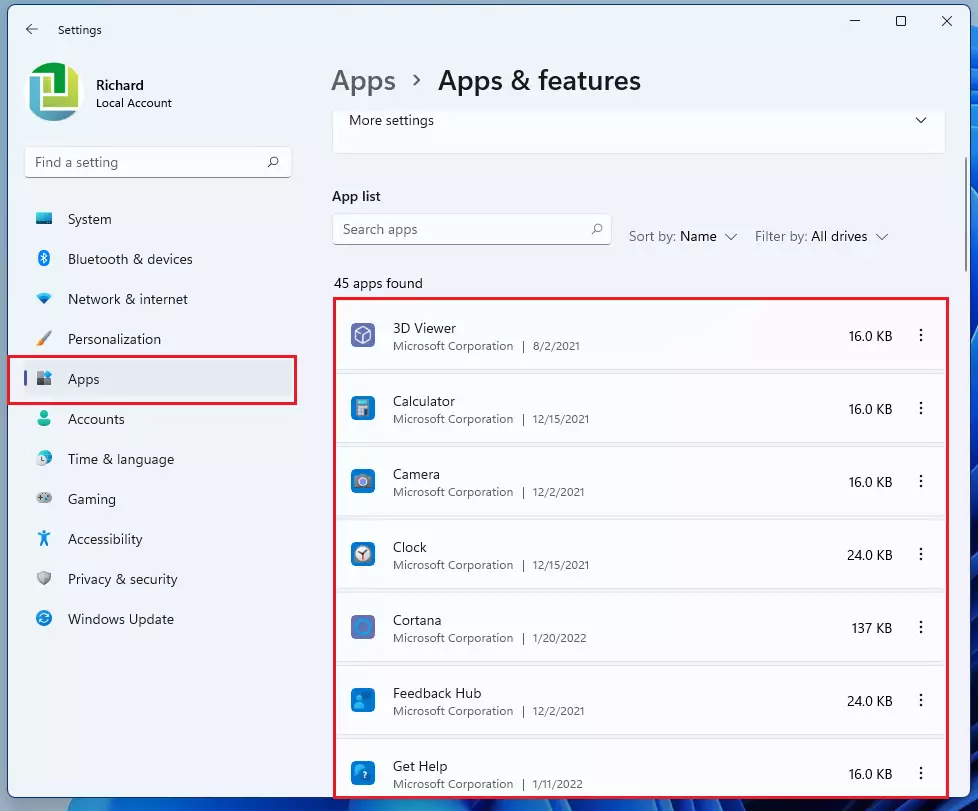
Under the App list, scroll down to find your installed Linux distribution. Next to the distribution, click the 3 dots (ellipses) option on the right and select Uninstall.
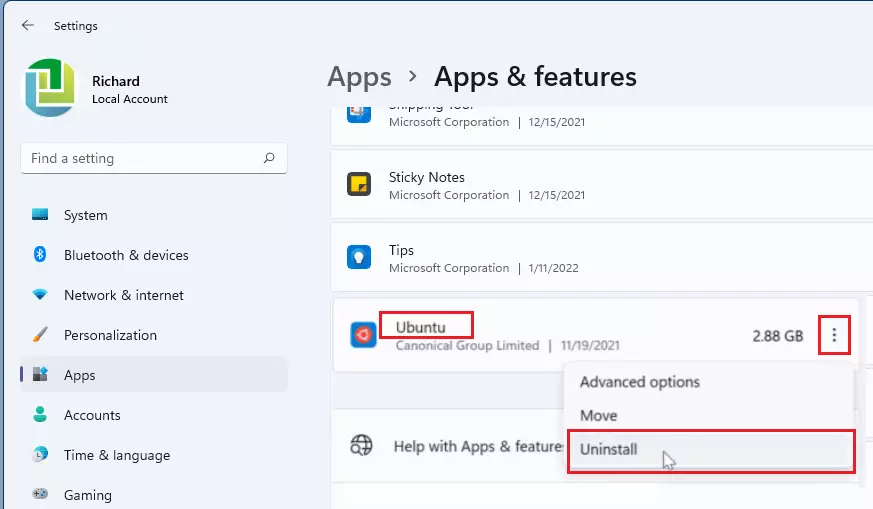
Wait for the Linux distribution to be removed.
Uninstall Windows Subsystem for Linux components on Windows 11
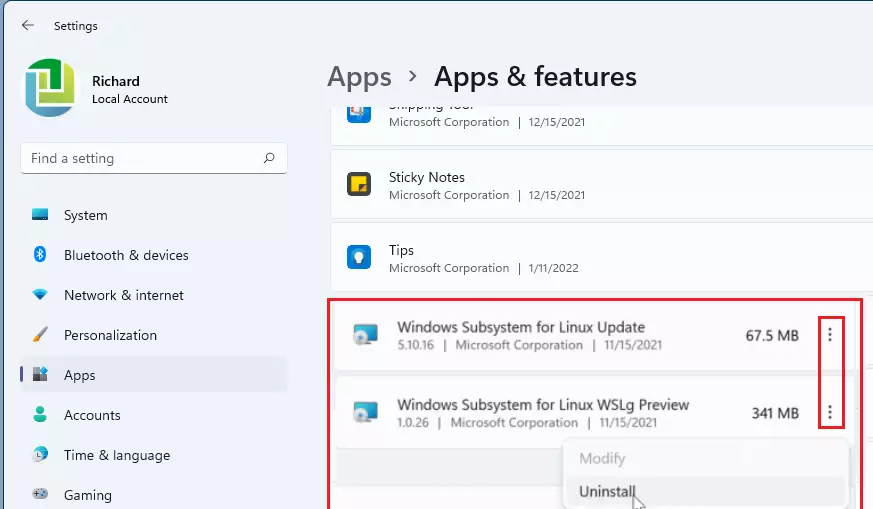
After uninstalling the Linux distribution, remove the Windows Subsystem for Linux components. To do that, go back to the Apps & features windows.
Go to the Start button > Settings > Apps > Apps & feature.
Under the App list, scroll down to find your installed Linux distribution. Next to Windows Subsystem for Linux WSLg Preview and Windows Subsystem for Linux Update, click the 3 dots (ellipses) option on the right and select Uninstall.
Uninstall Windows Subsystem for Linux on Windows 11
After removing the Windows Subsystem for Linux components above, remove WSL from Windows. This step should altogether remove WSL and related components from Windows 11.
To do that, go to Starts > Settings > Apps > Apps & features > Optional features.
Under Related settings, click More Windows features on the Optional features windows.
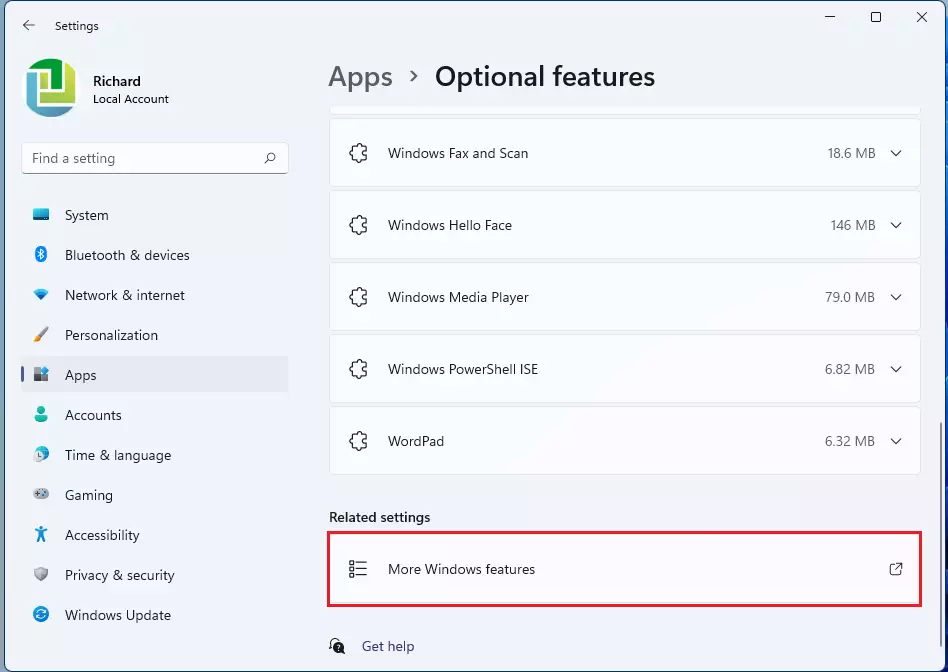
On the More Windows Features window, scroll down the list of available features, uncheck both Virtual Machine Platform and Windows Subsystem for Linux, and click OK.
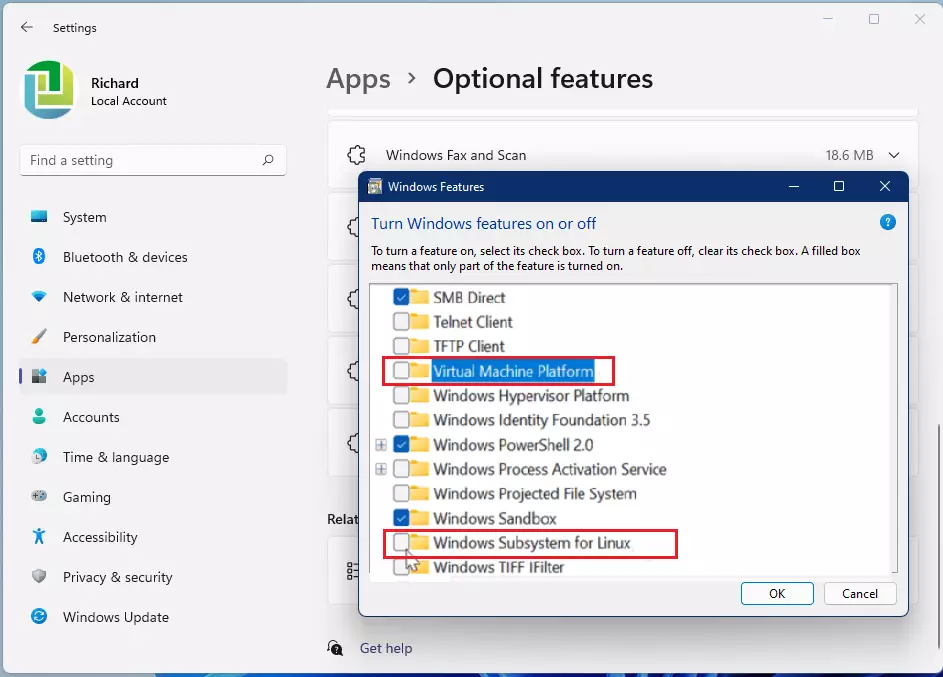
When you do that, Windows will remove all WSL components and prompt you to restart your computer.
Do that, and you’re done!
Conclusion:
- Uninstalling the Windows Subsystem for Linux is a straightforward process that can be completed in a few steps.
- It’s important to first remove your Linux distribution from the Apps & Features settings.
- After removing the distribution, you should also uninstall the associated components of WSL.
- Lastly, disable WSL and the Virtual Machine Platform from the Optional Features section to complete the uninstallation.
- Ensure to restart your computer after the process to finalize the changes.
- If you decide to use WSL again in the future, the installation process is equally simple and user-friendly.


Leave a Reply