This article explains enabling or disabling “Translation & language auto-detection” on Skype on Windows 11.
Skype is a popular video chat and messaging application by Microsoft. It allows users to make voice and video calls, send instant messages, and share files with other Skype users for free over the internet.
One can configure many settings with Skype, including stopping and starting background services, disabling auto start-ups, turning Global hotkeys on or off, turning on or off web searches, enabling location sharing, and more.
Another setting one can turn on or off is “Translation & language auto-detection” in Skype. This feature allows you to overcome language barriers by translating your calls in real-time as you talk.
Enabling this feature in Skype can be very useful for people who communicate with others in different languages. It can translate your calls and messages in real time, making communicating with people who speak a different language easier.
It can also help you understand what is being said during the call or chat, even if you are unfamiliar with the language. Overall, language translation in Skype can help break down language barriers and make communication more effective and efficient.
Enable or disable “Translation & language auto-detection” in Skype
As mentioned above, when you use Skype, you can turn on the translation and language auto-detection to translate your calls as you talk in real-time.
Here’s how to turn it on or off.
First, launch the app by clicking the Start menu and selecting it on the All Apps list.

You can also launch the app from the Taskbar or Taskbar overflow.

Click the Settings and more ( …) button in the Skype window next to your profile picture and select Settings on the menu.

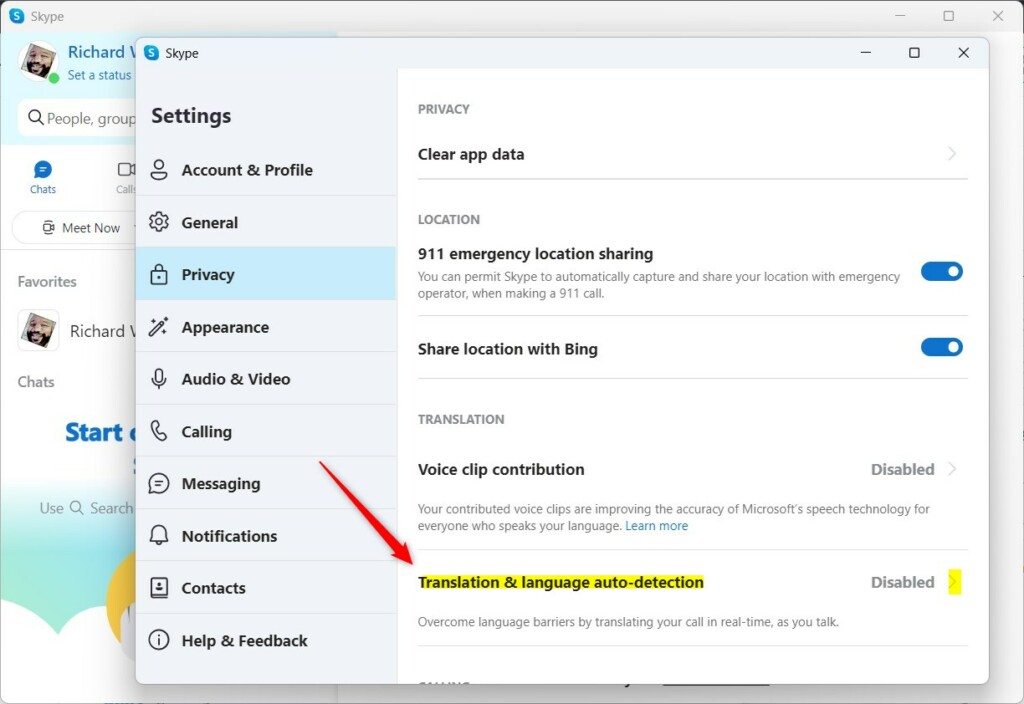
On the Settings page, select the Privacy on the left.

Select the “Translation & language auto-detection” tile on the right to expand it.

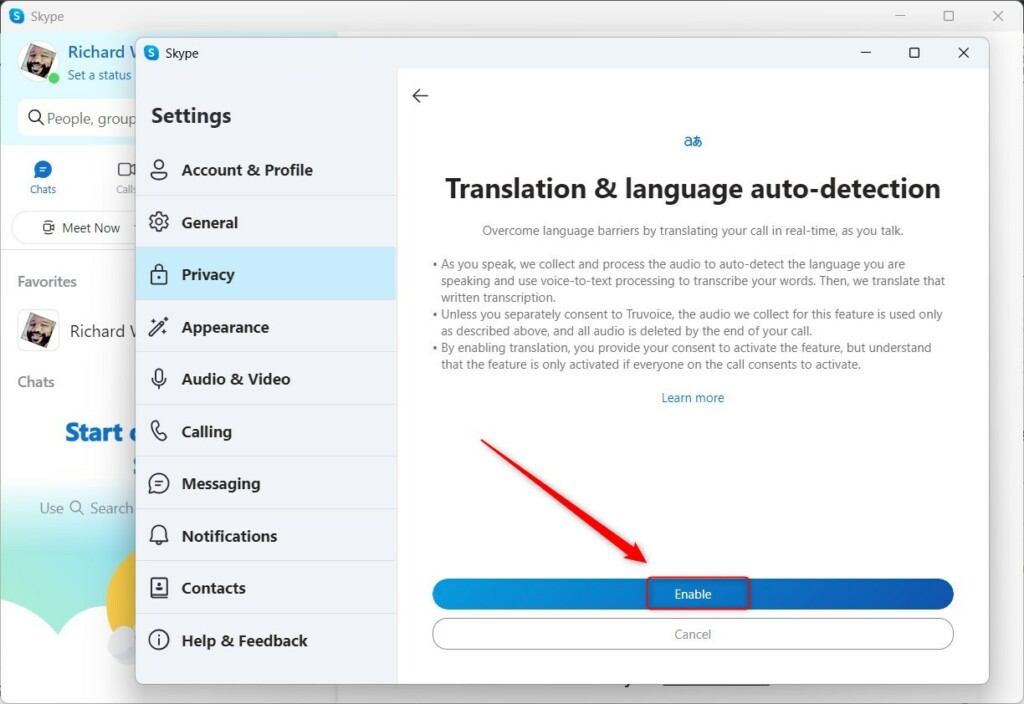
On the next screen, click the Enable button to turn on the feature.

You will get a prompt to confirm and agree to their terms when you enable the translation and auto-detection features.
To turn it off, return to Skype -> Settings -> Privacy -> Translation & language auto-detection and expand the tile. Then click the Disable button to turn it off.
Exit the Skype app when you are done.
That should do it!
Conclusion:
- Enabling translation and language auto-detection in Skype on Windows 11 can make communication with non-English speakers easier and more effective.
- This feature allows real-time translation of calls and messages, breaking down language barriers.
- Disabling the feature is just as straightforward and can be done through the Settings menu in Skype.
- Whether communicating with international clients or non-native-speaking colleagues, this functionality can significantly enhance the user experience of Skype on Windows 11.

Leave a Reply