This article explains how to turn “Reduce data usage” on or off in Skype on Windows 11.
Skype is a popular video chat and messaging application by Microsoft. It allows users to make voice and video calls, send instant messages, and share files with other Skype users for free over the internet.
One can configure many settings with Skype, including turning contact-only Skype calls on or off, hiding or unhiding the Today tab, turning Auto-download photos and files on or off, pasting copied messages as quotes, changing text size, sending messages with Enter key, showing the mini menu when selecting text, turning notifications on or off, showing or hiding your account in Skype search results, enabling or disabling your phone number in search results, automatically answering incoming calls and starting videos, and more.
Skype also has a setting that allows you to “Reduce data usage” on or off in an area with poor network connectivity.
You may want to turn on the “Reduce data usage” setting in Skype if you are in an area with poor network connectivity or want to conserve your bandwidth usage. When this setting is turned on, Skype will reduce the amount of data it uses during a call, which can help improve call quality and reduce the risk of dropped calls.
However, it’s important to note that turning on this setting may also reduce the video quality during a call. So, if you have a stable internet connection, turning this setting off is recommended for better call quality.
Turn “Reduce data usage” on or off in Skype
As mentioned above, users can turn “Reduce data usage” on or off in Skype to help conserve bandwidth usage during calls, which can help improve call quality when in an area with poor network connectivity.
Here’s how to do it.
First, launch the app by clicking the Start menu and selecting it on the All Apps list.

You can also launch the app from the Taskbar or Taskbar overflow.

Click the Settings and more ( …) button in the Skype window next to your profile picture and select Settings on the menu.

On the Settings page, select the Calling on the left.
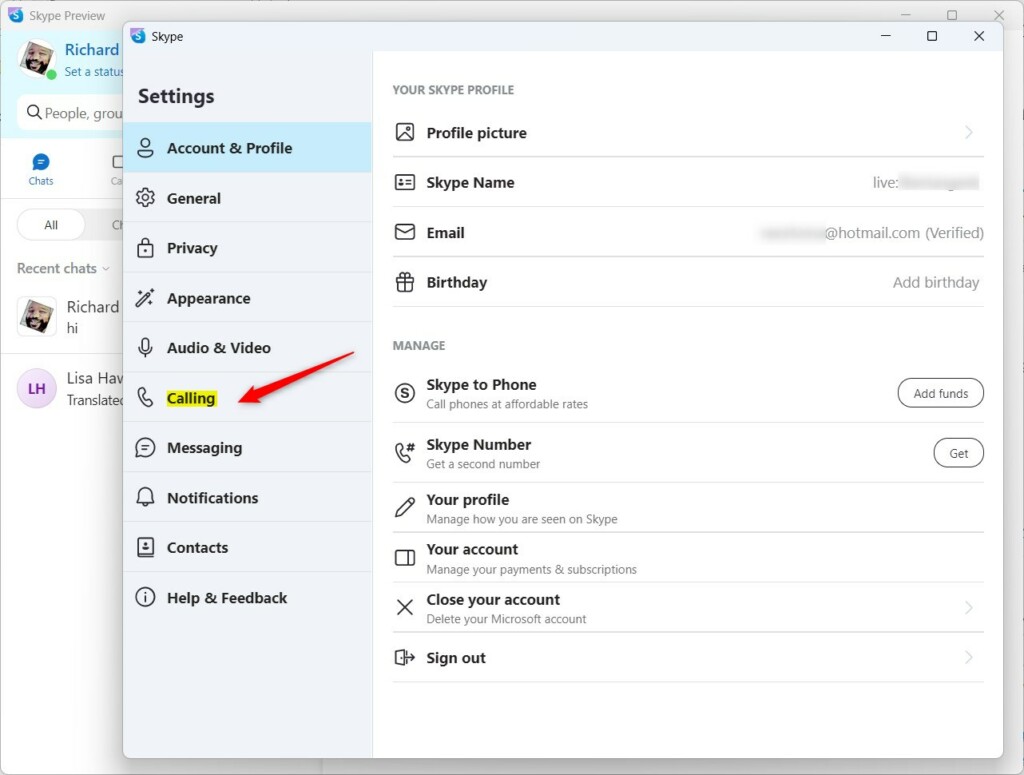
Next, select the Reduce data usage tile.
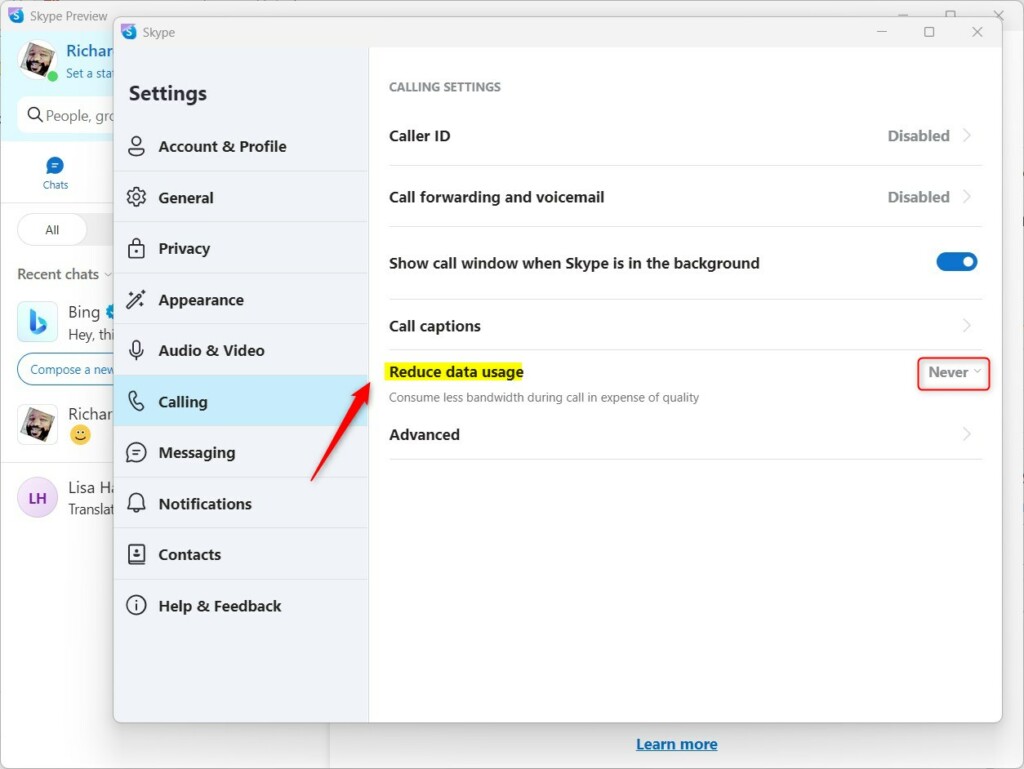
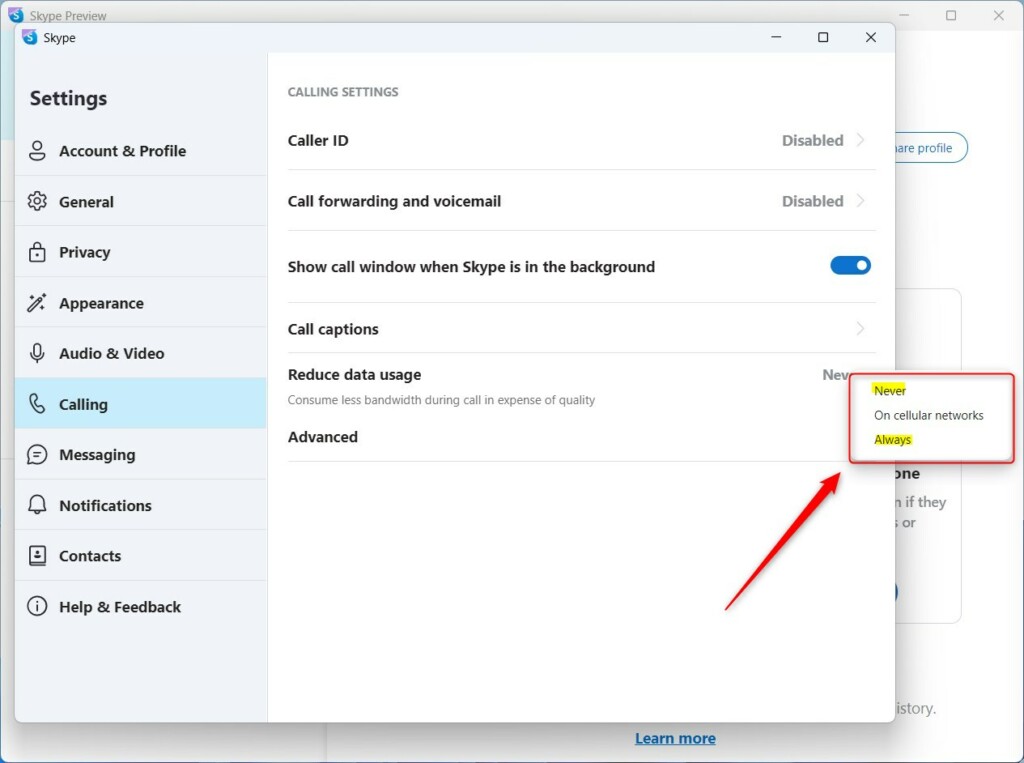
Then, use the drop-down caret to select one of the following options:
- Never
- ON cellular networks
- Always
Save your changes and exit Skype.
That should do it!
Conclusion:
- In this article, we have covered the steps to turn “Reduce data usage” on or off in Skype on Windows 11, allowing users to conserve bandwidth usage during calls, particularly in areas with poor network connectivity.
- By following these simple instructions, users can make informed decisions about when to enable or disable this setting based on their specific network conditions and preferences.
- For any feedback, corrections, or additional insights, feel free to use the comments section below for further discussion.





Leave a Reply to How to enable or disable push notifications for Skype across multiple devices on Windows 11 - Geek Rewind Cancel reply