

This article explains enabling or disabling the “Touch Indicator” in Windows 11.
The touch indicator in Windows 11 is a small circle that appears on the screen whenever you touch it with your finger or a stylus. It is designed to help you navigate and interact with the touch-sensitive elements on your device more easily.
On touchscreen devices, you can turn the indicator on or off, which shows a circle on the screen for visual feedback when you touch it.
Enabling or disabling the touch indicator in Windows 11 can be helpful, depending on your preference or device use. Some people find the touch indicator distracting or unnecessary, while others rely on it as a helpful visual cue when interacting with touch-sensitive elements.
Turning it on or off allows you to customize your device to suit your needs and improve your overall user experience.
Turn the “Touch indicator” on or off in Windows
As mentioned, users can turn the “Touch indicator” on or off using the Settings app.
Here’s how to do it.
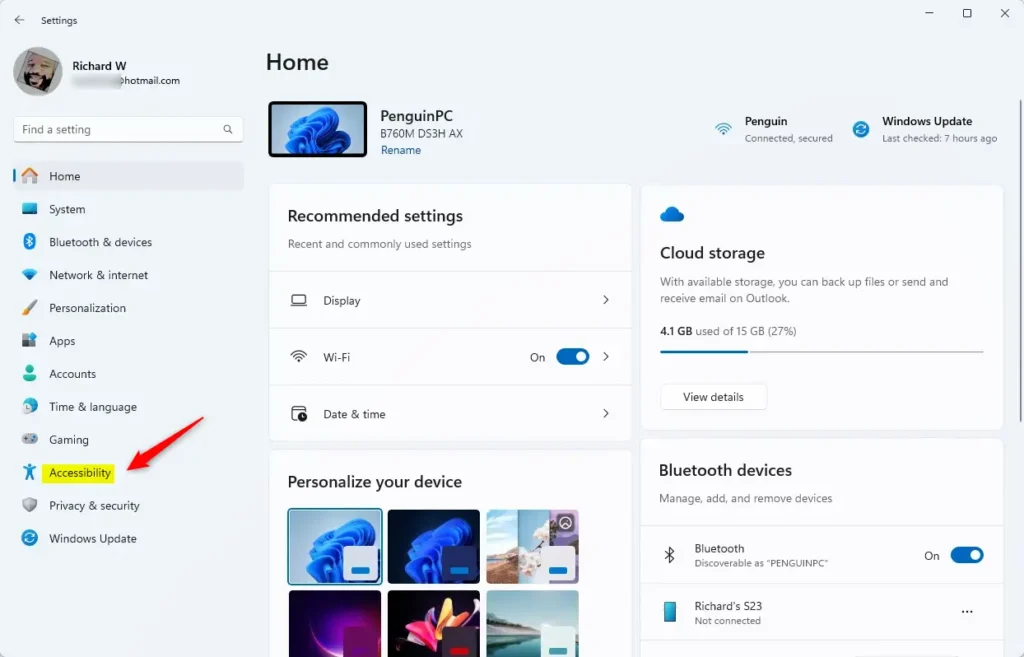
First, open the Windows Settings app.
You can do that by clicking on the Start menu and selecting Settings. Or press the keyboard shortcut (Windows key + I) to launch the Settings app.
When the Setting app opens, click the Accessibility button on the left.
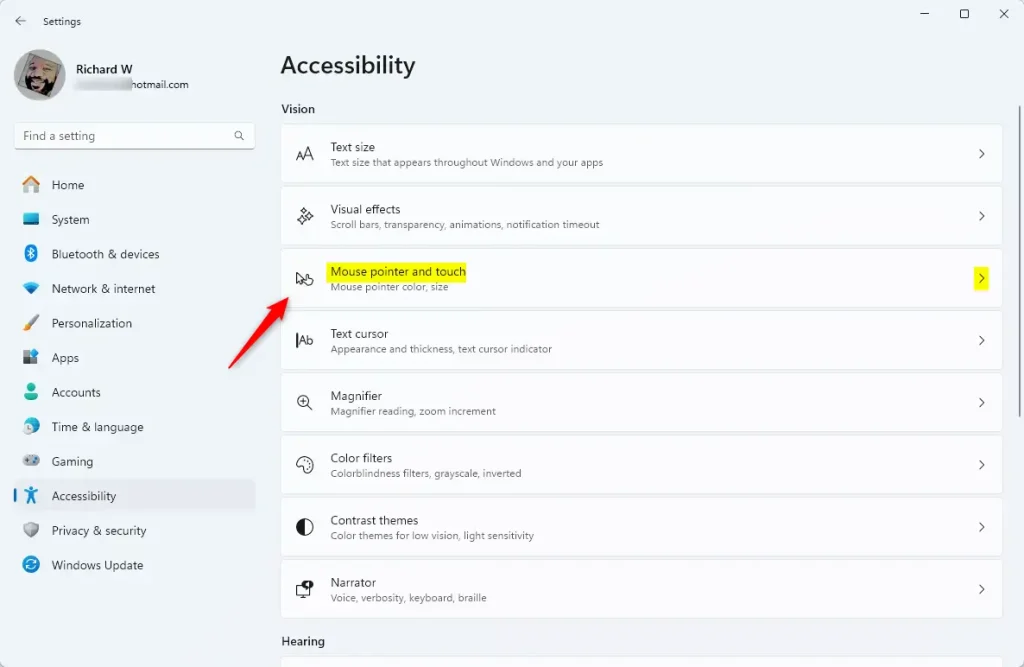
Select the “Mouse pointer and touch” tile on the Accessibility on the right to expand it.
On the Accessibility > Mount pointer and touch settings pane, under Touch indicator, select the “Touch indicator” tile. Then, toggle the switch button to the On position to enable it.
To disable it, toggle the switch button to the Off position.
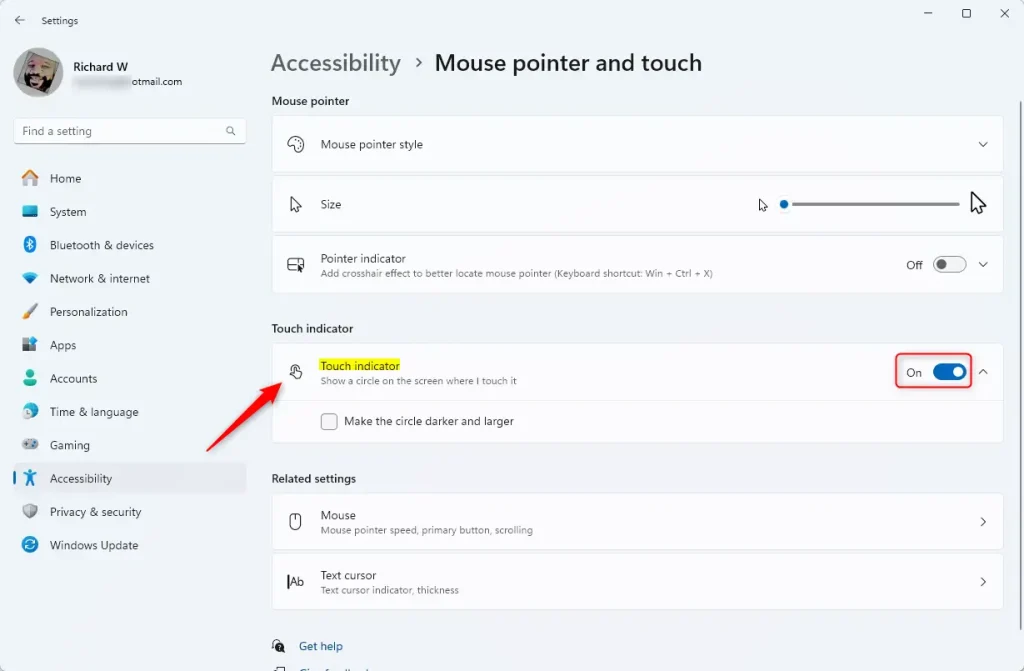
If you turn on the Touch indicator, you can check (on) or uncheck (off – default) the box next to “Make the circle darker and larger.”
Exit the setting app when done.
That should do it!
Conclusion:
- Enabling or disabling the touch indicator in Windows 11 can significantly impact your user experience, catering to individual preferences and device usage.
- Users can easily customize their devices by following the simple steps outlined in this article, enhancing accessibility and interaction with touch-sensitive elements.
- Whether you find the touch indicator helpful for visual cueing or prefer a less distracting interface, Windows 11 offers the flexibility to accommodate your needs.
- We hope this guide has been informative, and we encourage feedback or additional insights through the comments section.

Leave a Reply