
This guide will help you easily turn on or turn off the encryption for your computer’s paging file in Windows 11.
What is Paging File Encryption?
Windows uses something called a paging file (also known as virtual memory) to store information temporarily when your computer’s memory (RAM) is full. Think of it as extra storage space on your hard drive that helps your computer run smoothly.
By default, this paging file is not encrypted. This means the data stored there could be read by someone with bad intentions if they access your computer. Encrypting the paging file protects this data but might make your computer work a little harder.
How to Check and Change Paging File Encryption
You can turn this encryption on or off in three easy ways:
- Using Command Prompt or Windows Terminal
- Using the Local Group Policy Editor
- Using the Windows Registry
1. Use Command Prompt or Windows Terminal
Follow these simple steps:
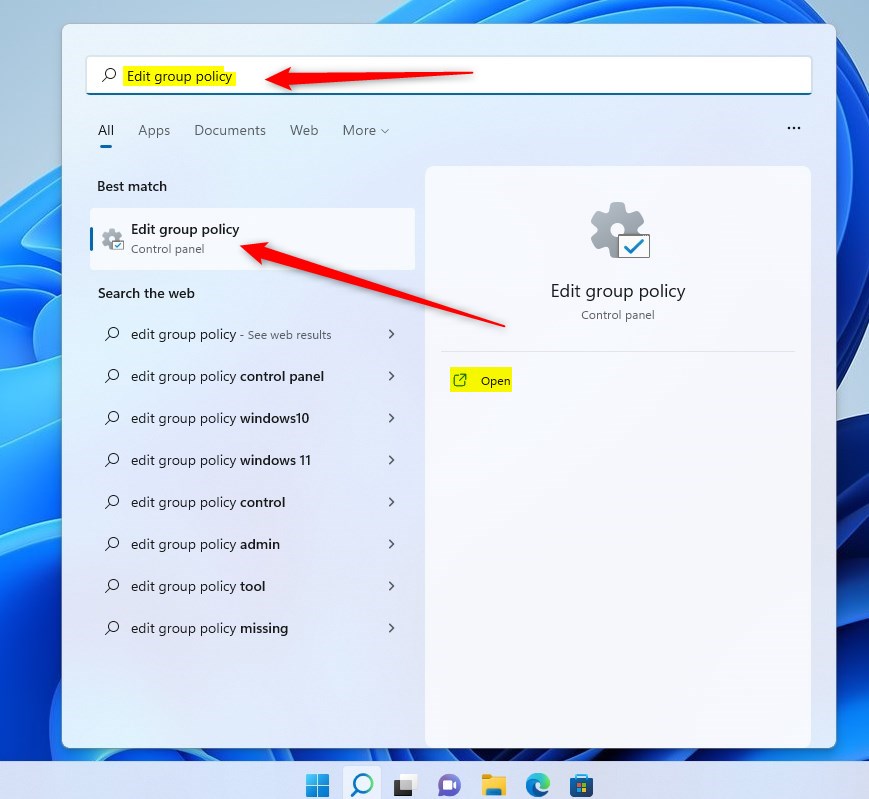
- Open Windows Terminal as Administrator. To do this, search for “Windows Terminal” in the Start menu, right-click it, and select Run as administrator.
- Type this command and press Enter to check if encryption is on or off:
fsutil behavior query encryptpagingfile
If you see EncryptPagingFile = 0, encryption is off. If it says EncryptPagingFile = 1, encryption is on.
- To turn on encryption, type this command and press Enter:
fsutil behavior set encryptpagingfile 1
- To turn off encryption, type this command and press Enter:
fsutil behavior set encryptpagingfile 0
Important: Restart your computer after running these commands to make the changes take effect.
2. Use Local Group Policy Editor
Use this method if you prefer a graphical tool and your Windows 11 edition supports it (usually Pro or Enterprise). Here’s what to do:
- Press Windows + R keys, type
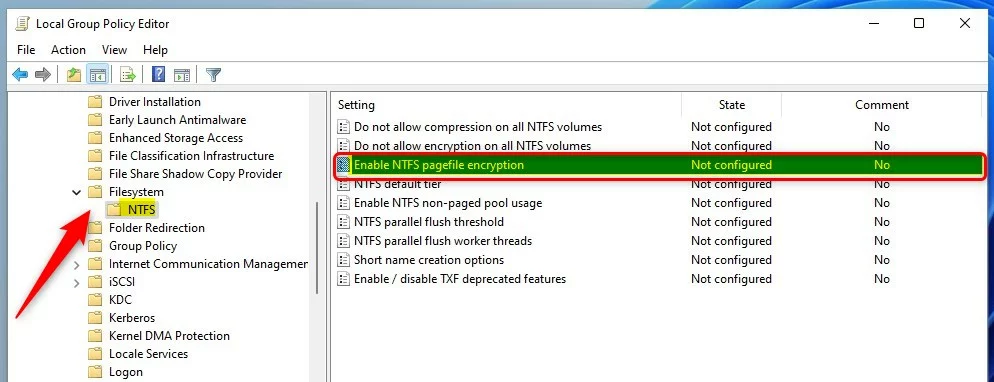
gpedit.msc, and press Enter to open the Local Group Policy Editor. - Navigate to this folder:
Computer Configuration > Administrative Templates > System > Filesystem > NTFS - On the right side, find and double-click Enable NTFS pagefile encryption.
- Choose one of these options:
- Not Configured – The default setting.
- Enabled – Turn on pagefile encryption.
- Disabled – Turn off pagefile encryption.
- Click OK and close the editor.
- Restart your computer to apply the changes.
3. Use Windows Registry Editor
If you don’t have access to the Group Policy Editor, you can use the Registry Editor instead. Be careful with this tool, and consider backing up your registry first.
- Press Windows + R, type
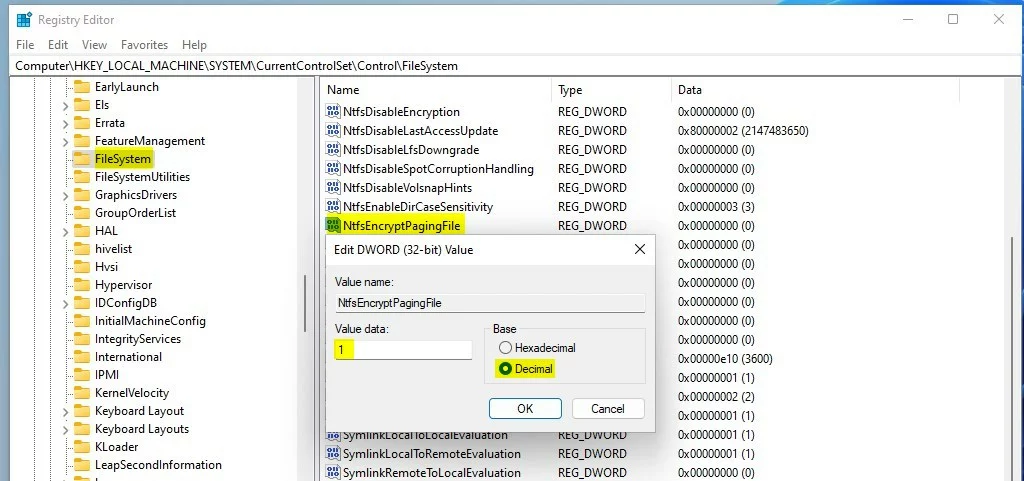
regedit, and press Enter to open the Registry Editor. - Go to this folder:
HKEY_LOCAL_MACHINE\SYSTEM\CurrentControlSet\ControlFileSystem - On the right side, find NtfsEncryptPagingFile and double-click it.
- Change the value to:
1to turn encryption on0to turn encryption off
- Click OK and close the Registry Editor.
- Restart your computer to apply the change.
Summary
- Encrypting your paging file keeps your data safer by stopping others from reading temporary files on your hard drive.
- Turning on encryption may cause your computer to work a little harder, which can slow it down slightly.
- You can use the Command Prompt, Local Group Policy Editor, or Registry Editor to change this setting.
- Always restart your computer after making changes for them to take effect.
For more details, you can check the official Microsoft page: Enable Pagefile Encryption – Microsoft

Leave a Reply