
This article explains how to enable or disable metered connection on Windows 11.
A metered network connection will try to control and reduce data usage on the Network. Metered data is automatically enabled by default for cellular connections.
You can manually set Wi-Fi and Ethernet network connections to metered if you want to reduce the amount of data used by apps and services on that Network.
However, if the meter is set on your networks, some updates for Windows won’t be installed automatically, which may introduce security risks and vulnerabilities.
If you have limited internet access with data caps, metered connections on your networks might help reduce data used by your apps and prevent you from exceeding your data usage limits.
How to turn on the metered connection on Windows 11
First, go to the Windows Settings app.
Windows 11 has a centralized location for the majority of its settings. Everything can be done, from system configurations to creating new users and updating Windows from its System Settings pane.
To get to System Settings, you can use the Windows key + I shortcut or click on Start ==> Settings, as shown in the image below:

Alternatively, you can use the search box on the taskbar and search for Settings. Then select to open it.
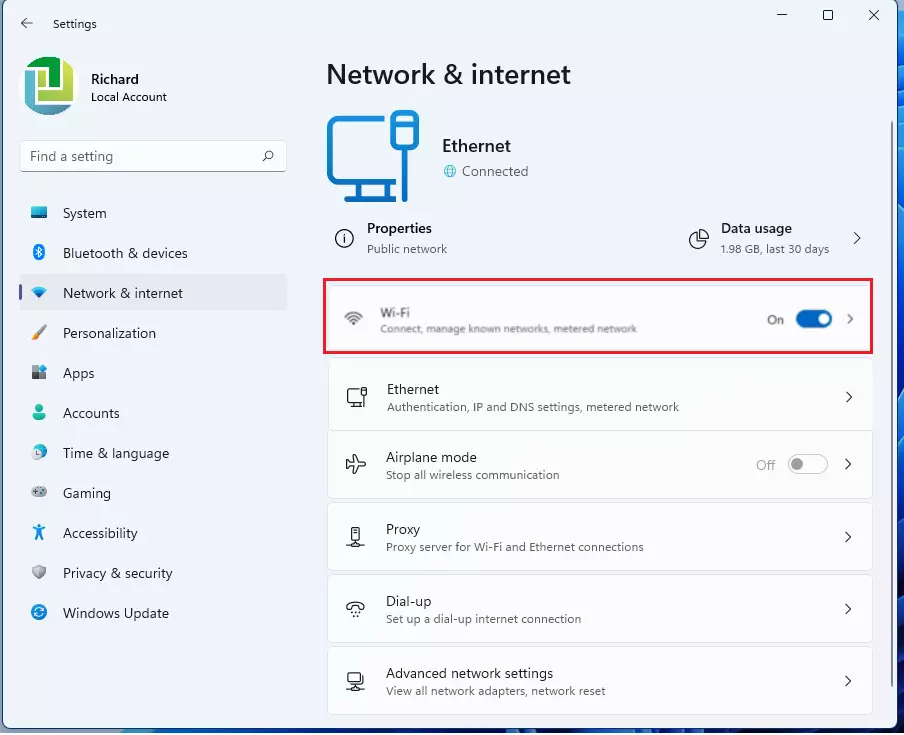
The Windows Settings pane should look similar to the image below. In Windows Settings, click Network & internet, then select Wi-Fi or Ethernet on the right pane of your screen, as shown in the image below.
- For Wi-Fi connection, select the Wi-Fi network you’re connected to, then turn on a Metered connection.
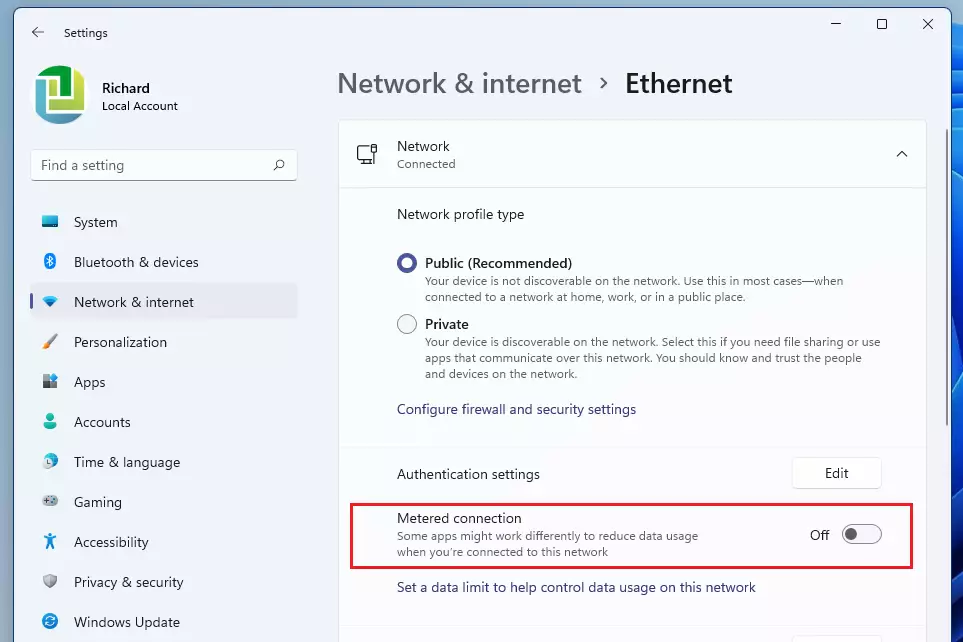
- For an Ethernet connection, select the Ethernet network you’re connected to, then turn on Metered connection.
- For Cellular connection, select Cellular, then turn on Metered connection.
On each network connection, toggle the button to the On position to enable a metered connection for that specific Network.

Once you turn it on, data on that Network should be reduced and limited. Some apps might work differently on a metered connection to help reduce your data usage.
How to turn off metered connection on Windows 11
If you change your mind about a metered connection, you can simply reverse the steps above to turn it off.
For each Network, go to Windows Settings ==> Network & internet ==> Wi-Fi, Ethernet, or Cellular and toggle the button to the Off position to disable.
That should do it!
Conclusion:
- A metered connection helps manage data usage on Windows 11 devices.
- Users can enable metered connections for Wi-Fi, Ethernet, and Cellular options to prevent excess data consumption.
- Some Windows updates may not install automatically while in metered mode, which could lead to security vulnerabilities.
- Disabling metered connections can allow full data usage, but might incur additional charges if data caps are exceeded.
- Consider your data plan and needs before setting connections to metered or unmetered.

Leave a Reply