How to Turn On or Off Metered Connection for Wi-Fi in Windows 11
You turn on or off metered connection for Wi-Fi in Windows 11 to manage your data usage and prevent apps from consuming excessive data in the background.
A metered connection tells Windows that you have a limited data plan, so it adjusts how it uses the internet. This is especially helpful for Wi-Fi networks where data caps can lead to extra charges.
For example, Windows 11 automatically limits background data usage for most applications, like Windows Updates and Microsoft Store downloads, when a connection is set to metered. You can easily toggle this setting on or off for your active Wi-Fi network.
Open Settings, navigate to Network & internet, select Wi-Fi, click Manage known networks, choose your network, and toggle “Metered connection” on or off. This helps manage data usage on limited Wi-Fi plans.
What is Wi-Fi?
Wi-Fi lets your computer connect to the Internet without wires. It uses radio waves to send data back and forth.
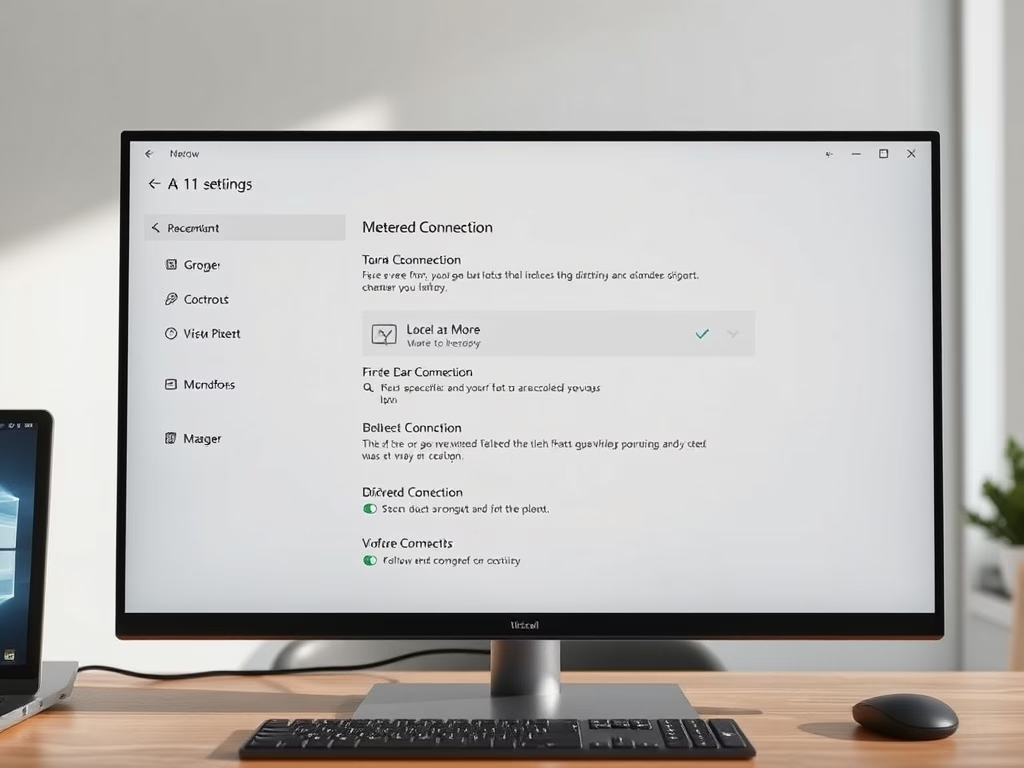
What is a Metered Connection?
A metered connection means your Internet has a data limit. For example, some plans only let you use a certain amount of data each month. Cellular (mobile) data is metered by default, but Wi-Fi usually isn’t.
When you set your Wi-Fi as metered, Windows and some apps will use less data. Also, Windows won’t automatically download big updates. This helps you save data.
Why does this matter? If you go over your data limit, you might pay extra fees. Or your Internet could slow down. Turning on metered connection can help you avoid surprises on your bill.
How to Turn On or Off Metered Connection for Wi-Fi in 🪟 Windows 11
Option 1Use Settings
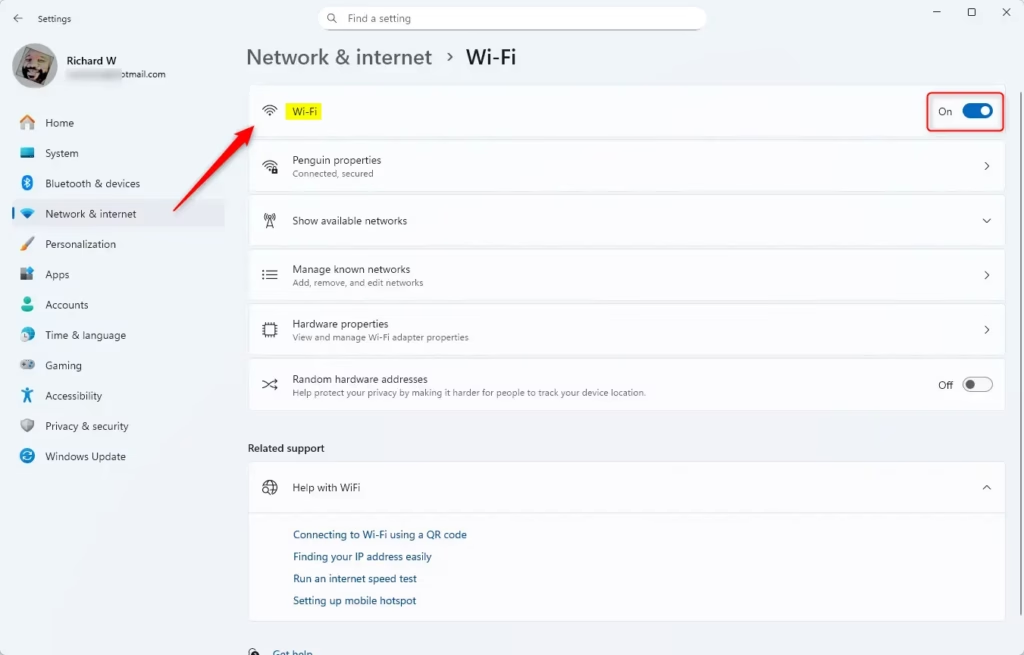
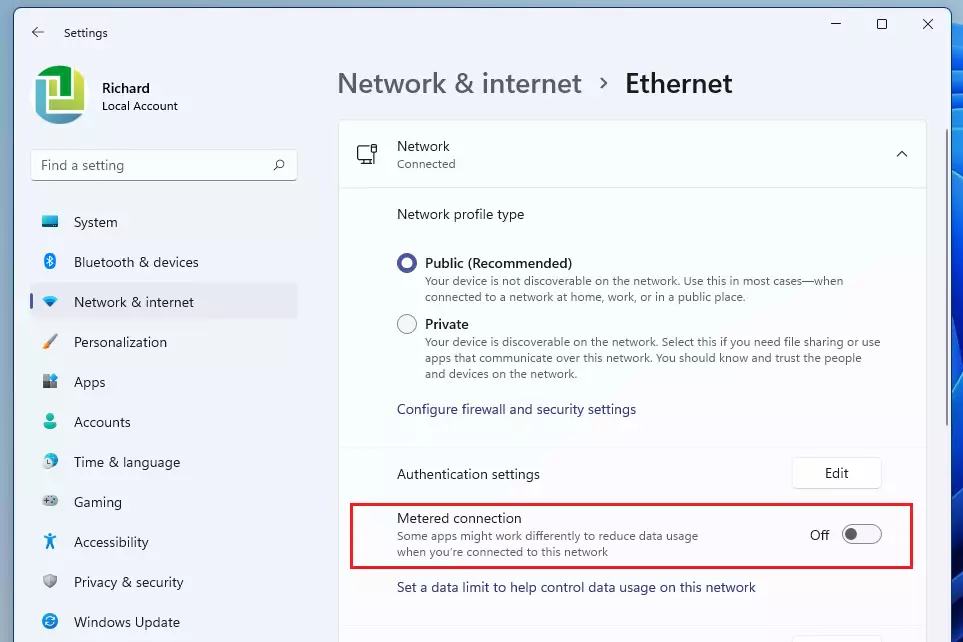
- Press ⊞ Win+I to open Settings.
- Click on Network & internet on the left side.
- Click Wi-Fi on the right side.
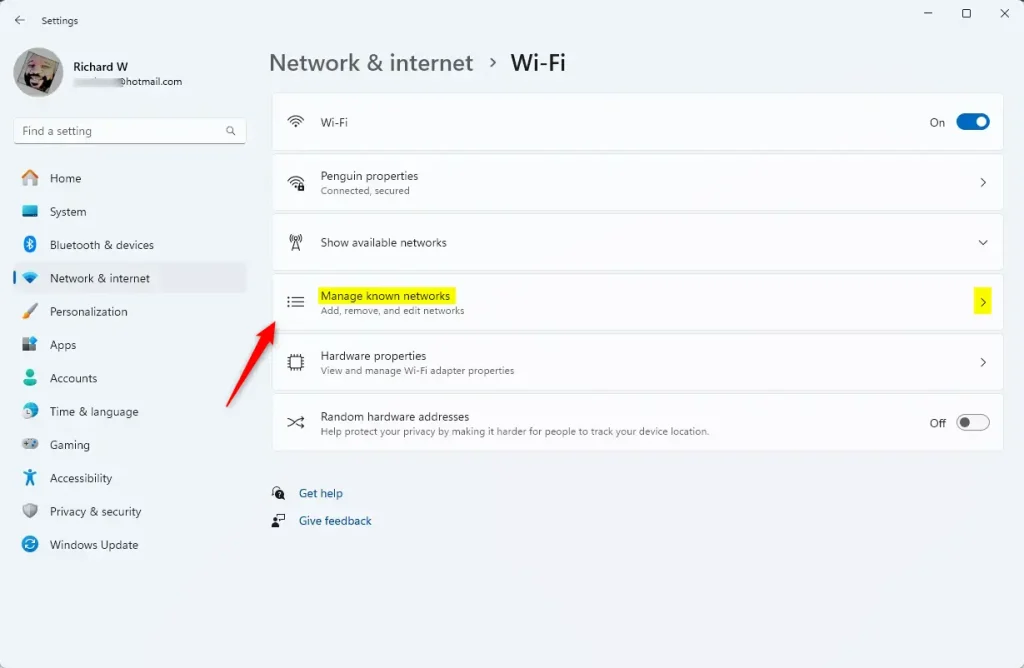
- Click Manage known networks.
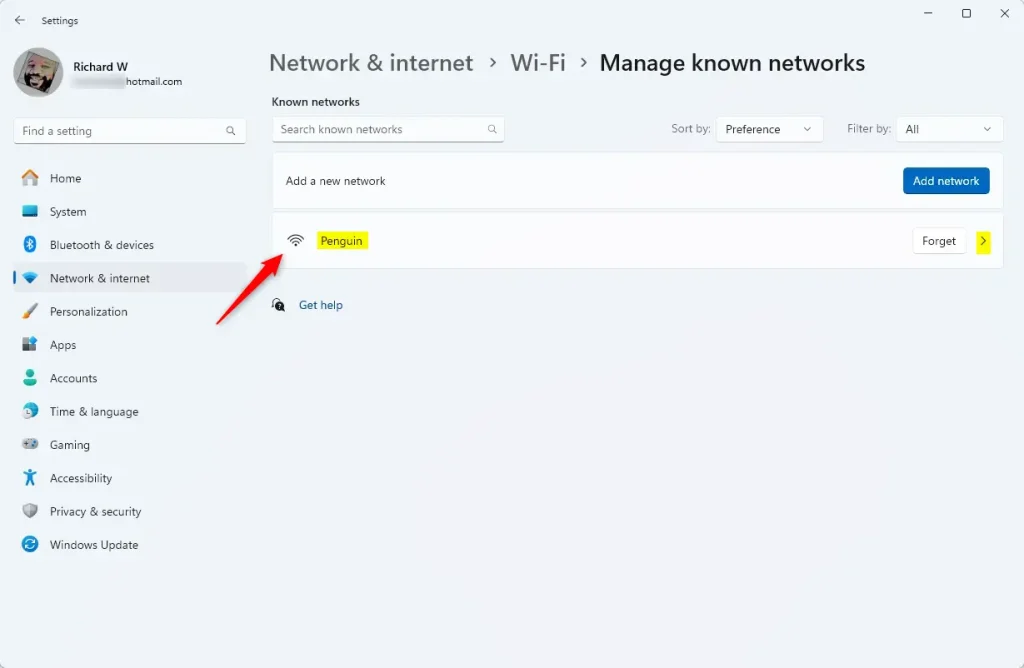
- Find the Wi-Fi network you want to change and click its name.
- Turn Metered connection On or Off as you wish.
- Close Settings when done.
Here are some pictures to help you:
Option 2Use Command Prompt (For Advanced Users)
⚠️ Note: You need admin privileges on your PC to do this.
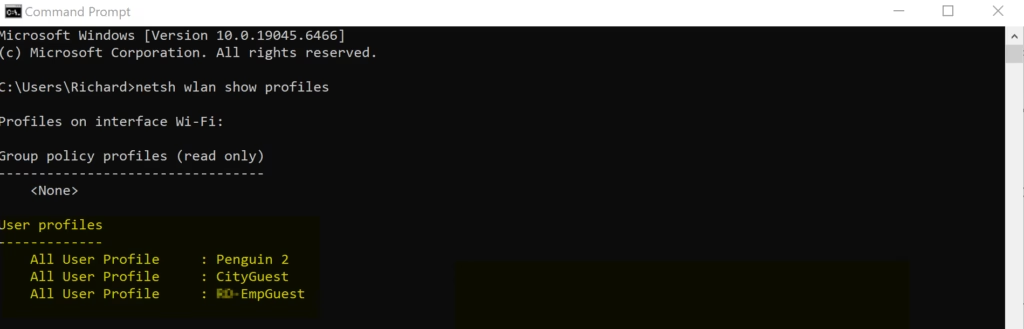
- Right-click the Start button and choose Windows Terminal (Admin).
- Type this command and press Enter to see all saved Wi-Fi networks:
netsh wlan show profiles - Find the Wi-Fi name you want to change.
- Check the current setting by typing:
netsh wlan show profile name="Your Wi-Fi Name"
Replace Your Wi-Fi Name with the exact name from step 2. - To turn off metered (make it non-metered), type:
netsh wlan set profileparameter name="Your Wi-Fi Name" cost=Unrestricted - To turn on metered (make it metered), type:
netsh wlan set profileparameter name="Your Wi-Fi Name" cost=Fixed - Close the terminal when finished.
Example:
netsh wlan set profileparameter name="Penguin" cost=Fixed
Summary
- Setting your Wi-Fi as a metered connection helps you save data and avoid extra charges.
- Windows and apps may limit downloads and updates on metered connections.
- You can easily change this in Settings or with Command Prompt if you are comfortable using it.
- Keep an eye on your data usage to stay within your limits.
- Change your settings anytime based on your internet plan.
- By following these simple steps, you can control your data use and avoid surprises on your Internet bill.
More Help from Microsoft
Learn more about metered connections on the official Microsoft support page:
Was this guide helpful?

About the Author
Richard
Tech Writer, IT Professional
Richard, a writer for Geek Rewind, is a tech enthusiast who loves breaking down complex IT topics into simple, easy-to-understand ideas. With years of hands-on experience in system administration and enterprise IT operations, he’s developed a knack for offering practical tips and solutions. Richard aims to make technology more accessible and actionable. He's deeply committed to the Geek Rewind community, always ready to answer questions and engage in discussions.


No comments yet — be the first to share your thoughts!