
Windows 11 can lock your computer automatically when you don’t use it for a while. Why does this matter? It keeps your files safe from others when you step away from your desk.
When your PC locks, you’ll see the lock screen. This is the screen that appears before you sign in. You can also lock your PC anytime by pressing Windows key + L.
How to Change When Your PC Locks Automatically
You can set how long your computer waits before locking itself when you’re not using it. Or you can turn off this automatic lock if you prefer.
For Windows 11 Pro, Enterprise, or Education Users:
Follow these steps to change the lock settings using the Local Security Policy tool:
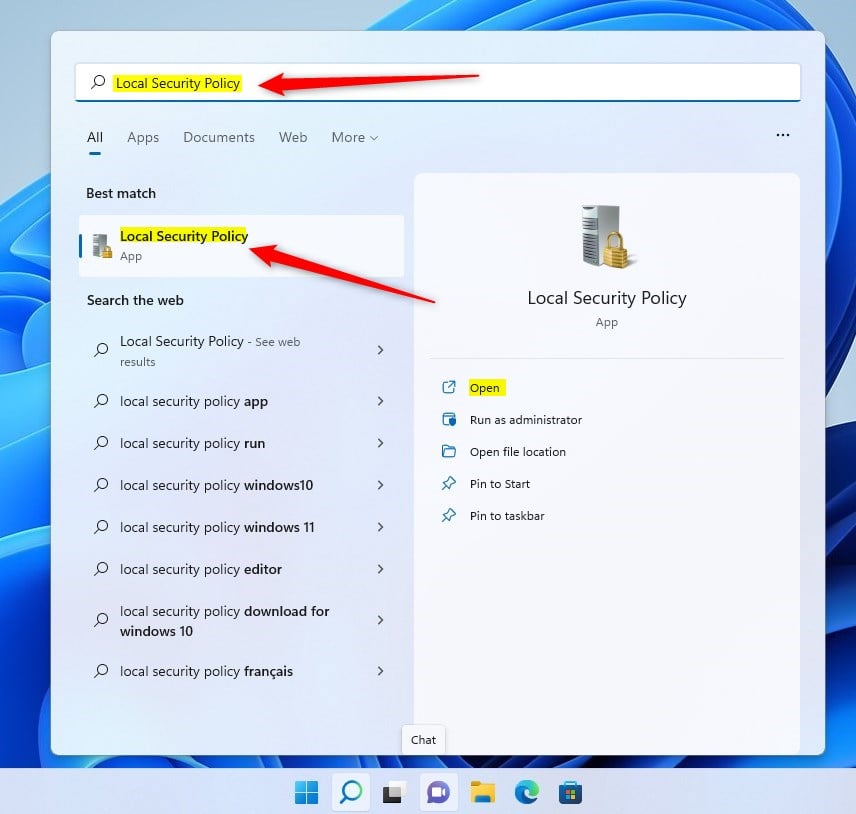
- Click the Start Menu (Windows icon at the bottom left).
- Type
Local Security Policyorsecpol.mscin the search box and click on it to open. ⚠️ Requires admin privileges
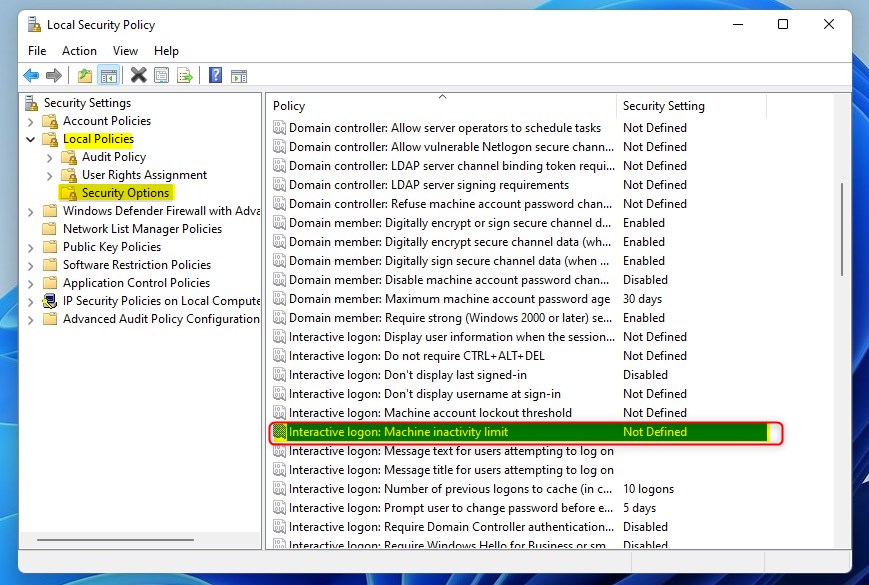
- In the window that opens, look at the left panel. Click the arrow next to Local Policies, then click Security Options.
- On the right side, find Interactive logon: Machine inactivity limit and double-click it.
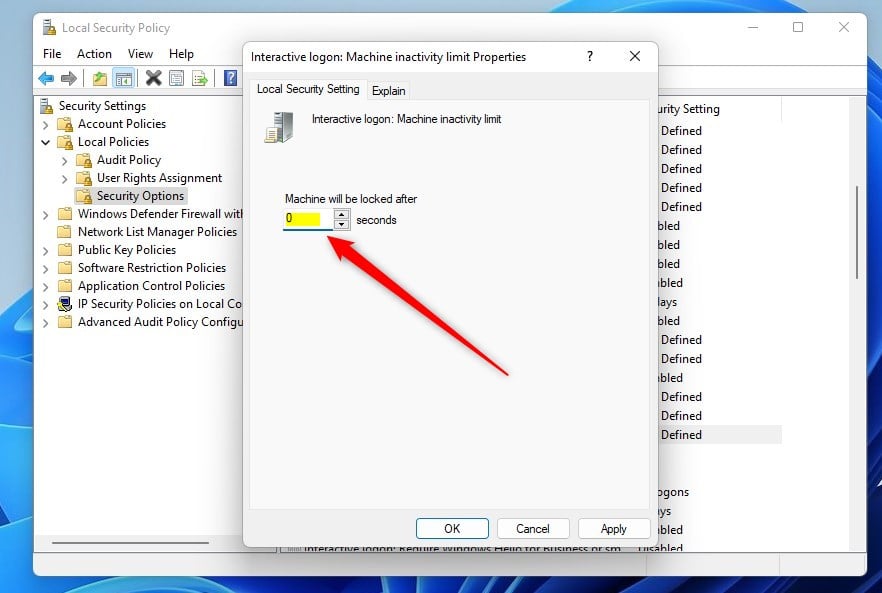
- In the box that appears, type the number of seconds you want your PC to wait before locking. For example,
600means 10 minutes. What happens? Your PC will lock after that time passes. - Type
0to turn off automatic locking. - Click OK to save your changes.
Note: The Local Security Policy tool is not available on Windows 11 Home edition.
For Windows 11 Home Users:
If you have Windows 11 Home, you won’t see the Local Security Policy tool. Instead, you can change the lock time by editing the Windows Registry. Be careful when editing the Registry — making wrong changes can cause problems.
- Press
Windows key + Rto open the Run box. - Type
regeditand pressEnterto open the Registry Editor. ⚠️ Requires admin privileges - In Registry Editor, go to this path:
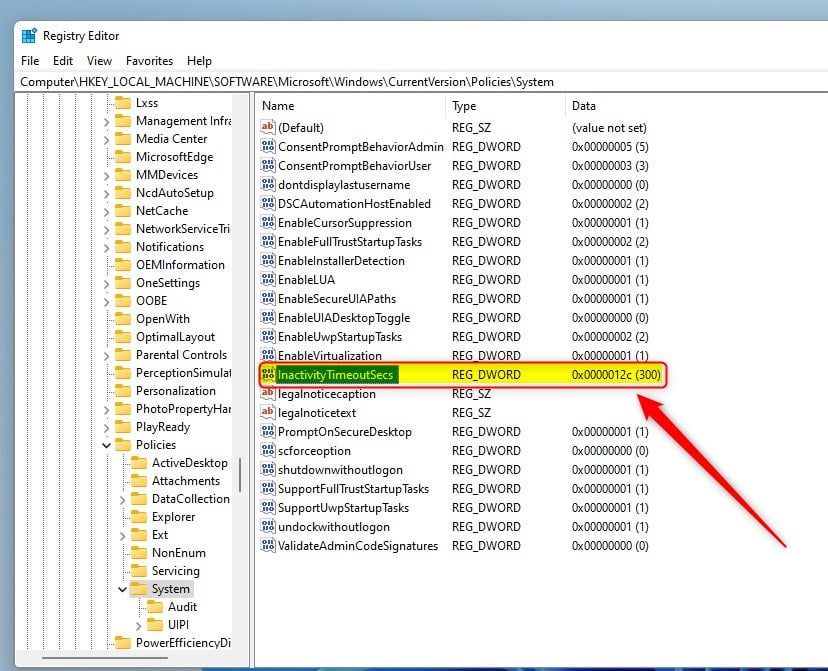
HKEY_LOCAL_MACHINE\SOFTWARE\Microsoft\Windows\CurrentVersion\Policies\System - On the right side, look for a setting named
InactivityTimeoutSecs. - If you don’t see it, right-click on an empty space, choose New > DWORD (32-bit) Value, and name it
InactivityTimeoutSecs. - Double-click
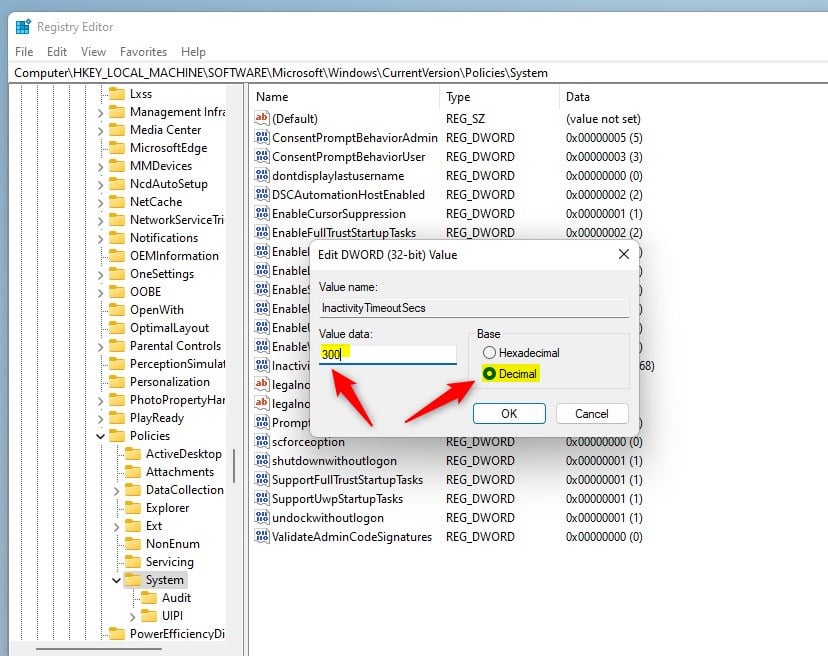
InactivityTimeoutSecsand select Decimal. - Enter the number of seconds you want your PC to wait before locking (for example,
600for 10 minutes). What happens? Your PC will lock after that time passes. - Enter
0to turn off automatic locking. - Click OK and close Registry Editor.
Summary
Windows 11 locks automatically after a set time of no use to keep your PC safe. If you want to change or stop this automatic lock, you can do it in Local Security Policy (for Pro and similar editions) or by editing the Registry (for Home edition). Set the time in seconds (like 600 seconds = 10 minutes) or use 0 to turn off automatic locking. Now you can control when your PC locks automatically and keep your computer just the way you want.


Leave a Reply