
This article explains how to enable or disable password-protected sharing in Windows 11.
Windows 11 comes with password-protected sharing by default. This allows for shared resources to be accessed by only those with accounts with usernames and passwords on the system.
With password-protected sharing, only account holders on your computer can access shared files and folders, printers, and public folders. This is a security feature. However, you can turn this off so anyone connected to the same network can access shared folders and resources.
Disable password-protected sharing in Windows 11
As mentioned above, password-protected sharing is enabled by default in Windows 11. With this enabled, only people with accounts on the computer can access shared files, printers, and other resources.
To give other people access to shared resources, you’ll need to turn off password-protected sharing, and the steps below show you how.
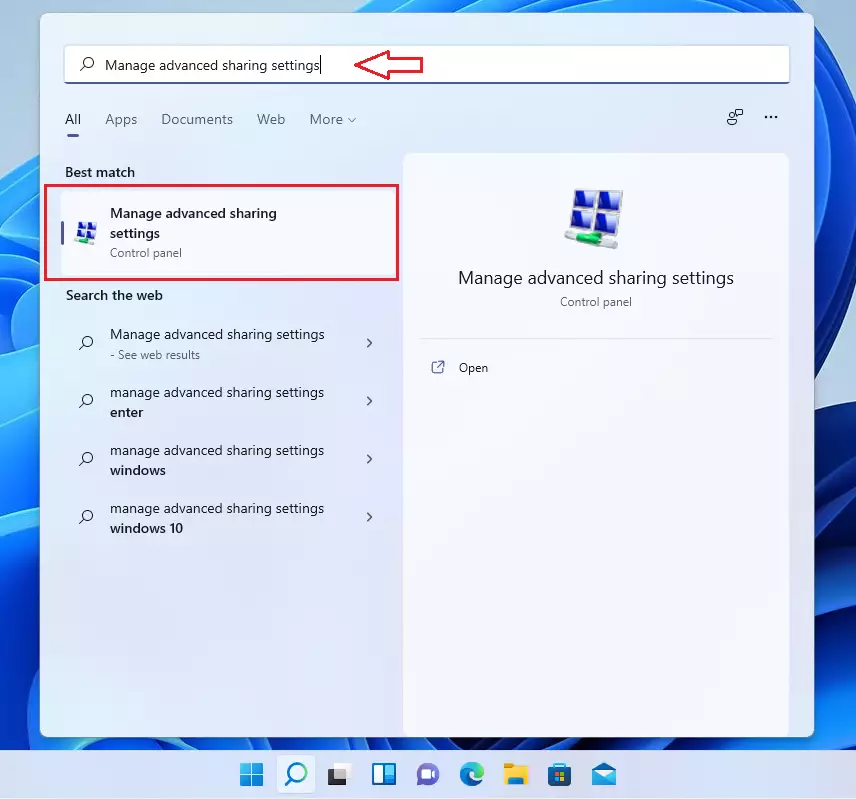
To enable this, click on the Start menu, search for “Manage advanced sharing settings,” and select the relevant result as highlighted.
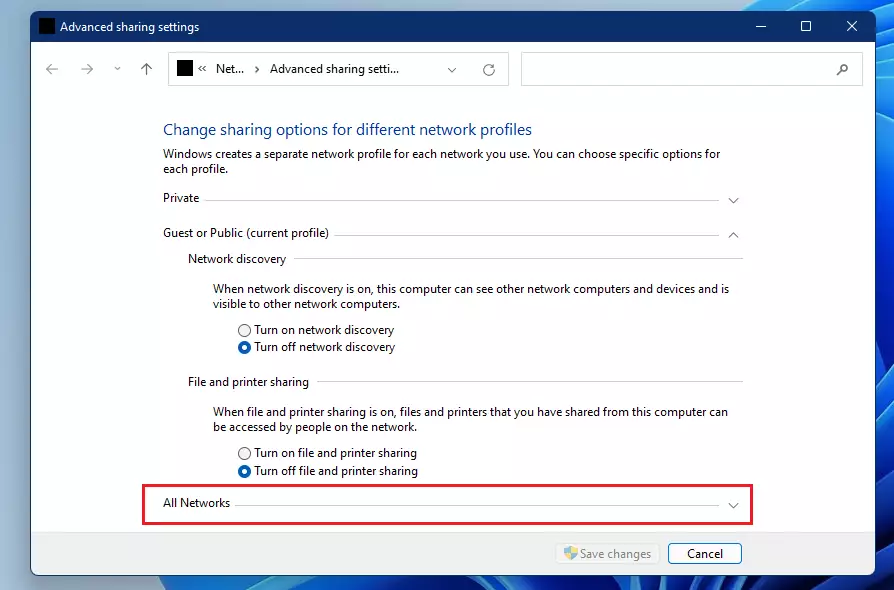
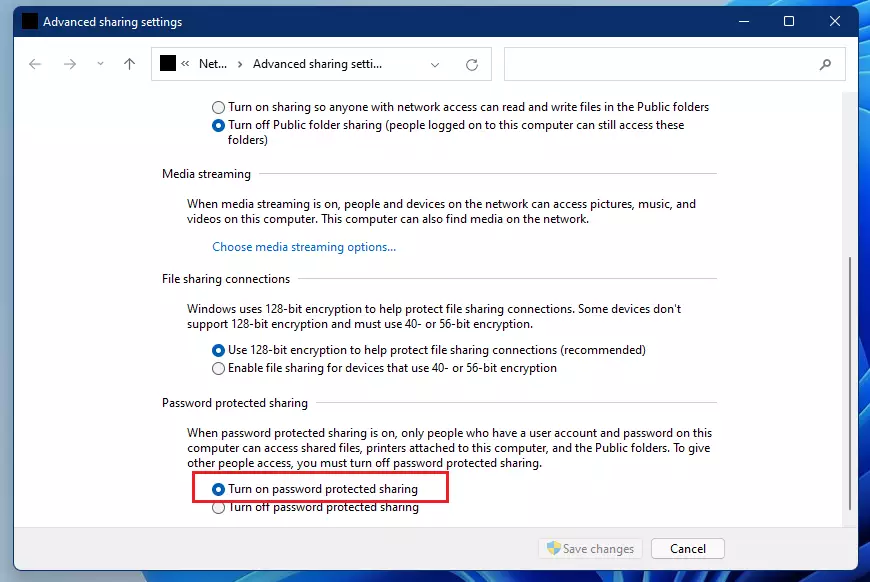
When the Advanced sharing settings pane opens, click the arrow to expand All networks.
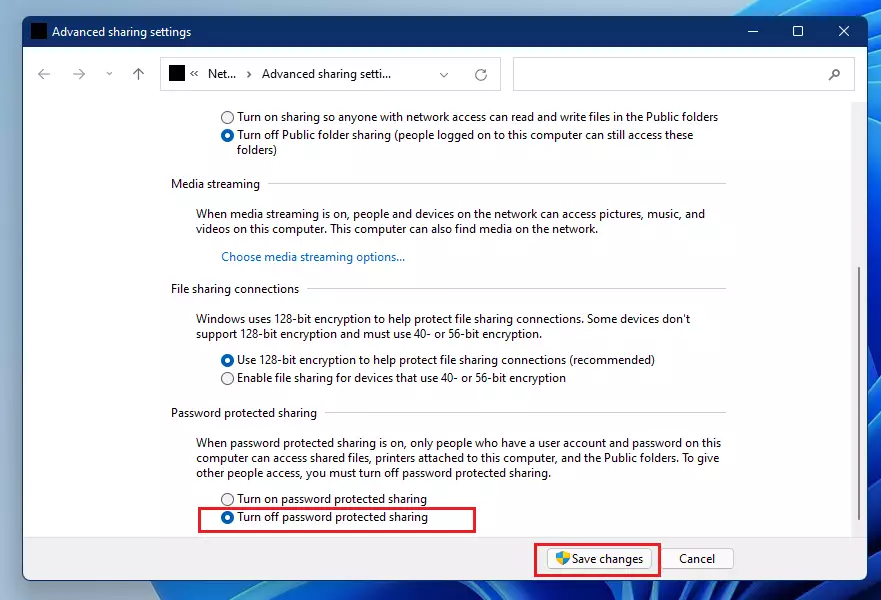
Select the option to “Turn off password-protected sharing” as highlighted below. Then click Save Changes.
That should do it!
Enable password-protected sharing in Windows 11
If you change your mind about enabling password-protected sharing above, simply reverse the steps above by selecting the Start menu ==> and searching for “Manage advanced sharing settings,” then expanding All networks, and selecting “Turn on password protected sharing.”
That should do it!
Now, when you enable file and printer sharing in Windows, other users with no accounts on the system should be able to see and access the shares as long as the resources are shared with everyone.
Conclusion:
- Password-protected sharing is a valuable feature in Windows 11 that enhances security by restricting access to shared resources.
- This feature is enabled by default, ensuring that only authenticated users can access files and printers.
- Users can easily toggle password-protected sharing on or off through the “Manage advanced sharing settings.”
- Disabling password protection allows anyone on the same network to access the shared resources, which may benefit specific scenarios.
- Always consider the security implications before changing the password-protected sharing settings to ensure your data remains safe.


Leave a Reply