
This post shows students and new users steps to enable or disable a device’s advertising ID in Windows 11 to prevent apps from tracking and providing you with more personalized advertisements online or within apps.
Advertising ID in Windows is a unique identifier assigned to a Windows device that allows apps to track and provide personalized advertising to users. This feature is enabled by default in Windows 11 and can be used by apps and websites to track user’s activities and display targeted ads.
However, users can disable this feature in Windows 11 to prevent apps from tracking and providing them with personalized advertisements online or within apps.
Users may want to enable or disable advertising ID in Windows 11 for privacy reasons. Advertising ID allows apps and websites to track user’s activities and display targeted ads when enabled.
Some users may find this invasive and prefer not to have their online activities tracked. Disabling the advertising ID feature can help prevent apps from tracking and providing personalized advertisements online or within apps.
Activate or deactivate personalized advertising ID in Windows 11
As mentioned above, Windows lets you enable or disable personalized advertising ID.
Here’s how to do it.
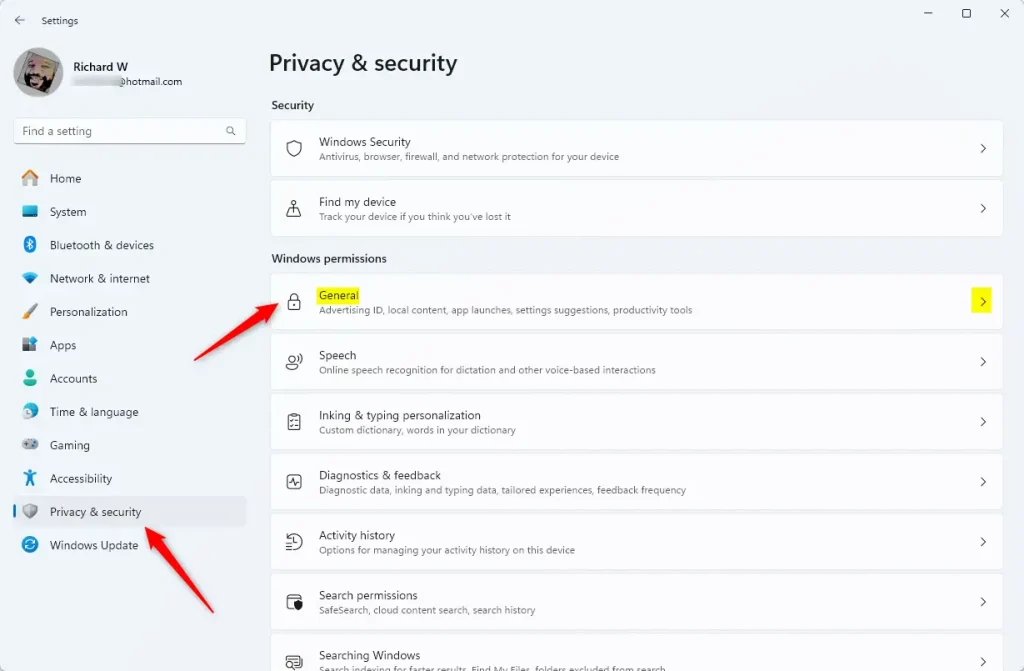
First, open the Windows Settings app.
Then, select Privacy & security on the left and General tile on the right to expand it.
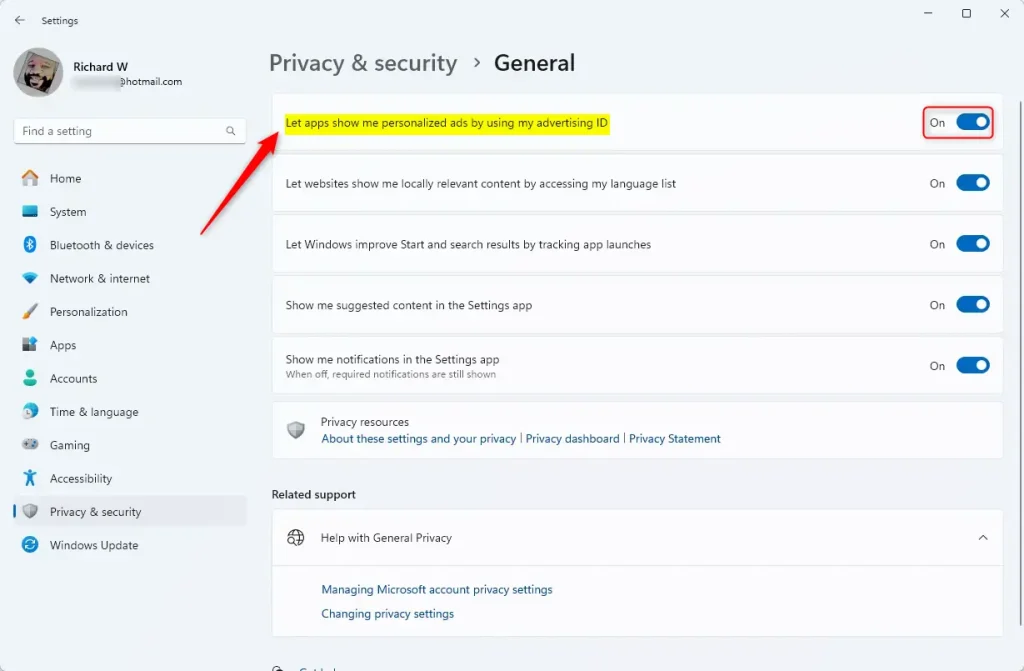
Next, select the “Let apps show me personalized ads by using my advertising ID” tile. Then, toggle the switch button to the On position to enable it.
To disable it, toggle the button to the Off position.
Exit the Settings app when you’re done.
Enable or disable personalized advertising ID using group policy
Another way to disable or enable personalized advertising ID is to use the Local Group Policy Editor.
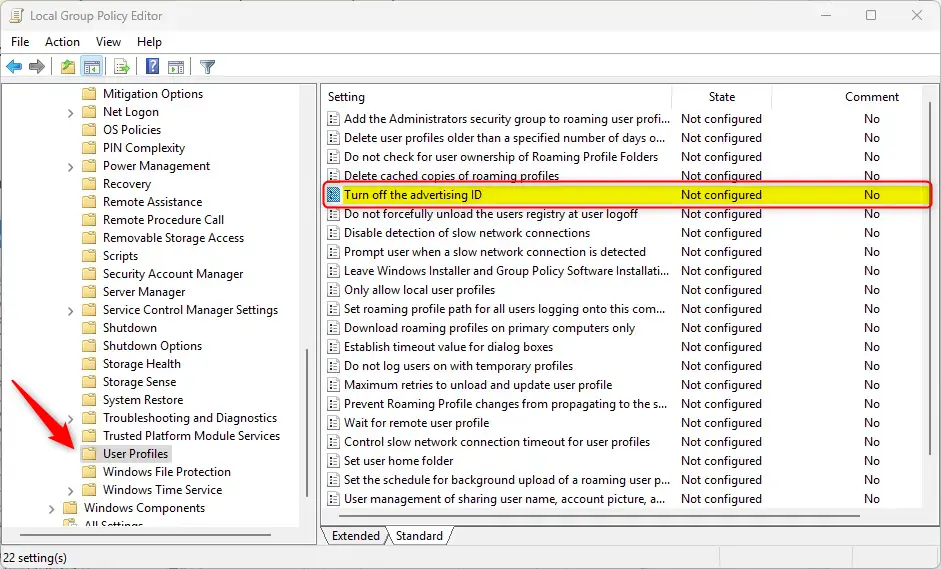
First, open the Local Group Policy Editor (gpedit.msc). (Search for “Edit group policy”) on the Start menu.
Then, navigate the folders below:
Computer Configuration > Administrative Templates > System > User Profile
In the Group Policy details pane on the right, locate and double-click the “Turn off the advertising ID” settings.
On the “Turn off the advertising ID” window, set the option to Not Configure, Enabled, or Disabled.
- Not Configured (default) – Same as Disabled.
- Enabled – Apps can’t use the ID for experiences across apps.
- Disabled – Users can control whether apps can use the advertising ID for experiences across apps.
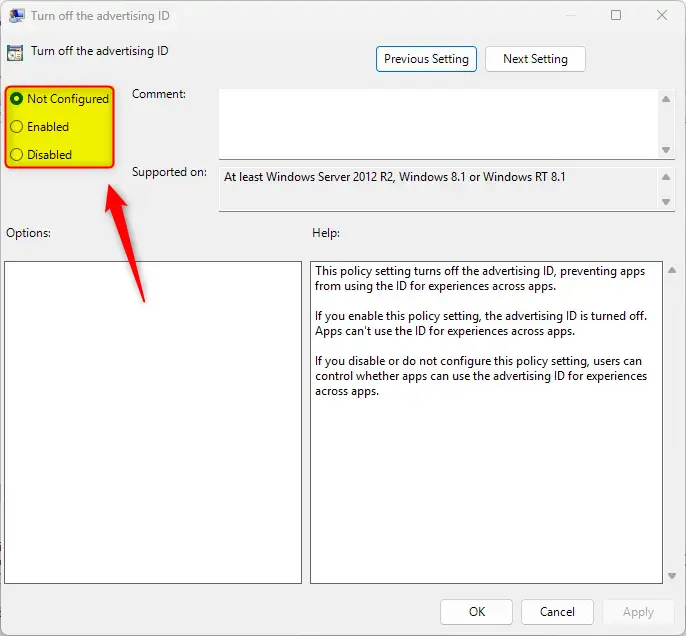
Click OK to save your changes. You may have to reboot your device for the settings to apply.
Turn on or off personalized advertising ID using the Windows Registry Editor
Yet another way to disable personalized advertising ID is to use the Windows Registry editor.
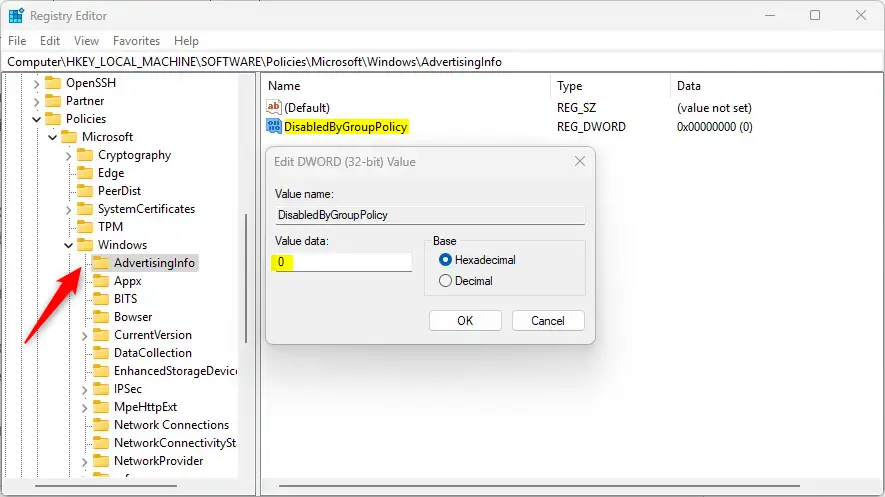
First, open the Windows Registry and navigate to the folder key path below.
Disable or enable for current user:
ComputerHKEY_LOCAL_MACHINESOFTWAREPoliciesMicrosoftWindowsAdvertisingInfo
Next, double-click the DisabledByGroupPolicy (REG_DWORD) name on the AdvertisingInfo key’s right pane to open it.
Then, enter a value 1 to disable the personalized advertising ID in Windows.
If you do not see the “DisabledByGroupPolicy” item, right-click a blank area and create a new DWORD (32-bit) registry item.
Then, enter the name “DisabledByGroupPolicy” and enter a value 0
To restore the default behavior and allow personalized advertising ID, delete the “DisabledByGroupPolicy” name created above.
Save your changes and restart your computer.
That should do it!
Conclusion:
- In Windows 11, users have the option to manage their advertising ID settings for enhanced privacy.
- Disabling the advertising ID can help prevent personalized advertisements and tracking by apps and websites.
- Users can activate or deactivate their advertising ID through the Windows Settings app, Local Group Policy Editor, or Windows Registry Editor.
- Each method provides a level of control, allowing users to customize their advertising experience according to their preferences.
- Regularly reviewing and adjusting these settings can help maintain privacy while using Windows 11.
Leave a Reply