
This article explains how to turn AutoPlay on or off in Windows 11.
The AutoPlay settings allow users to choose different actions when devices are inserted or attached to a Windows computer.
By default, Windows displays a notification to select what actions to take when you insert media or attach a new device. These settings apply to media such as photos, music, and video stored on drives, CDs, DVDs, cameras, and phones.
Windows allows you to reset your AutoPlay settings, change previously selected actions, and entirely disable or enable AutoPlay.
Windows also allows users to bypass the AutoPlay settings by holding down the SHIFT key while inserting external media into their computer to display a notification on what action to take.
Turn on or off AutoPlay in Windows 11
As mentioned above, users can enable or disable AutoPlay in Windows so that no notifications are displayed. Windows can’t act when media is inserted or attached to their computer.
Here’s how to do that.
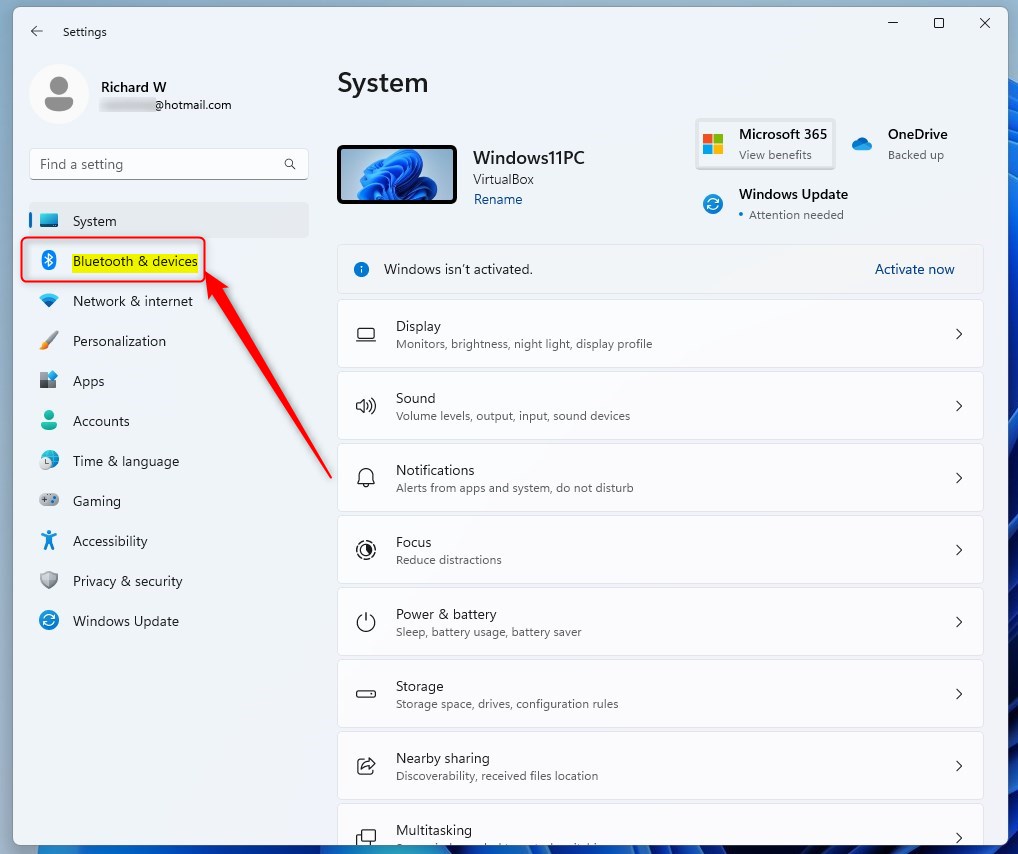
First, open the Windows Settings app.
You can do that by clicking on the Start menu and selecting Settings. Or press the keyboard shortcut (Windows key + I) to launch the Settings app.
When the Setting app opens, click Bluetooth & devices button on the left.
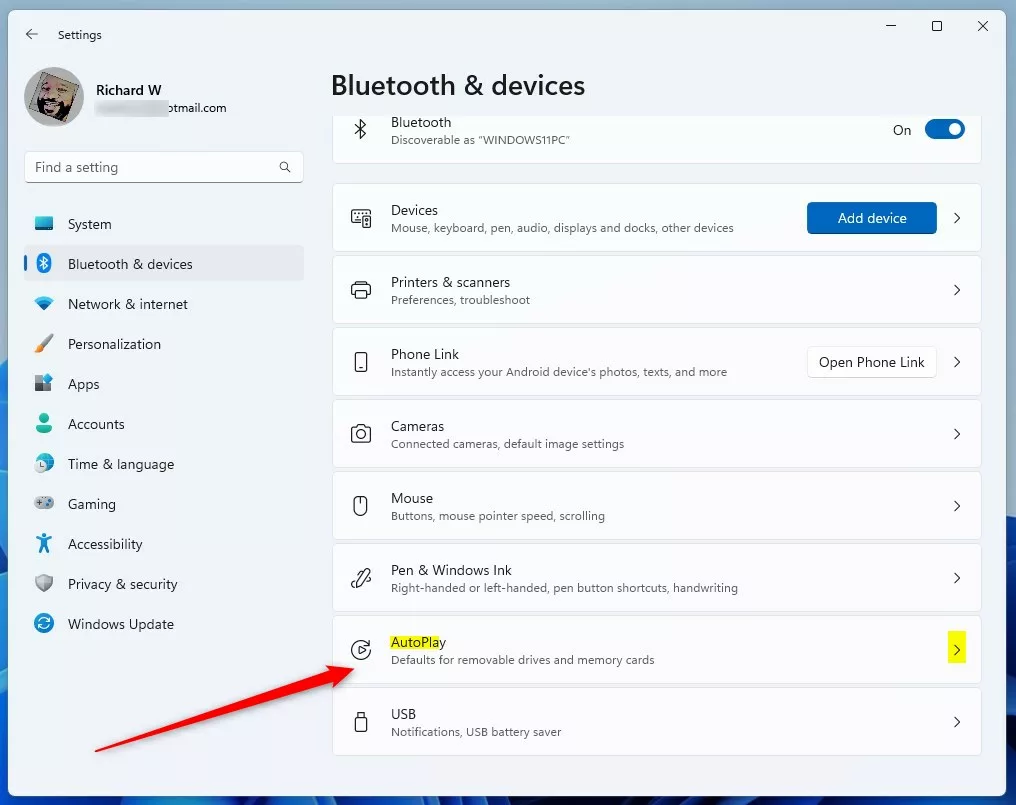
On the right, select the AutoPlay tile to expand.
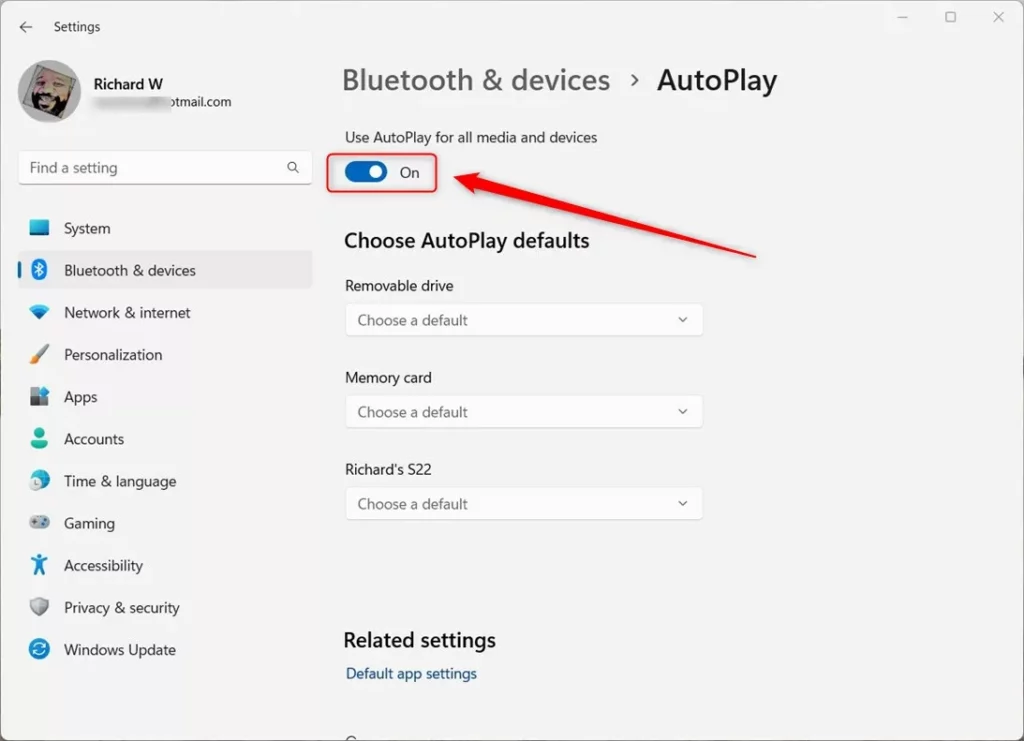
On the Bluetooth & devices -> AutoPlay settings pane, toggle the AutoPlay button to the On or Off position to enable or disable AutoPlay in Windows.
Exit the Settings app when you are done.
Enable or disable AutoPlay using the Control Panel app
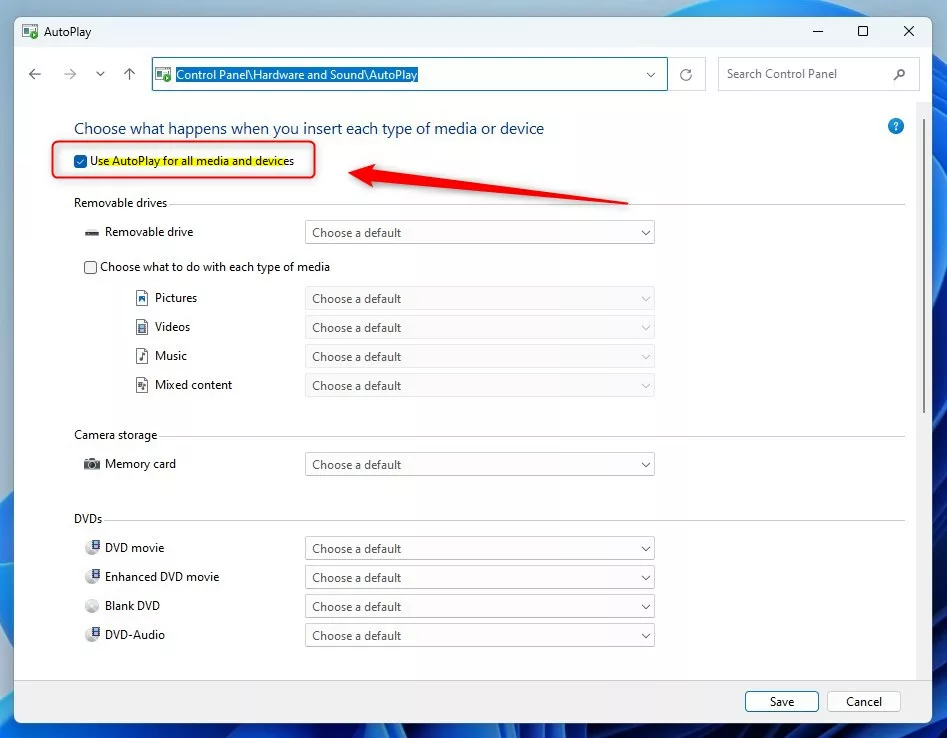
Another way to enable or disable AutoPlay play in Windows is from the Control Panel app. To do that, first, open the Control Panel app.
Then go to Control Panel -> Hardware and Sound -> AutoPlay panel.
Control Panel -> Hardware and Sound -> AutoPlay
On the AutoPlay settings page, check or uncheck the box next to “Use AutoPlay for all media and devices” to enable or disable AutoPlay in Windows.
Enable or disable AutoPlay via Windows Registry
Yet another way to turn on or off the AutoPlay feature in Windows is to use the Windows Registry Editor.
First, open the Windows Registry, and navigate to the folder key path below.
HKEY_CURRENT_USER\Software\Microsoft\Windows\CurrentVersion\Explorer\AutoplayHandlers
If you don’t see the AutoplayHandlers folder key, right-click on the Explorer key, then create the subkey (AutoplayHandlers) folders.
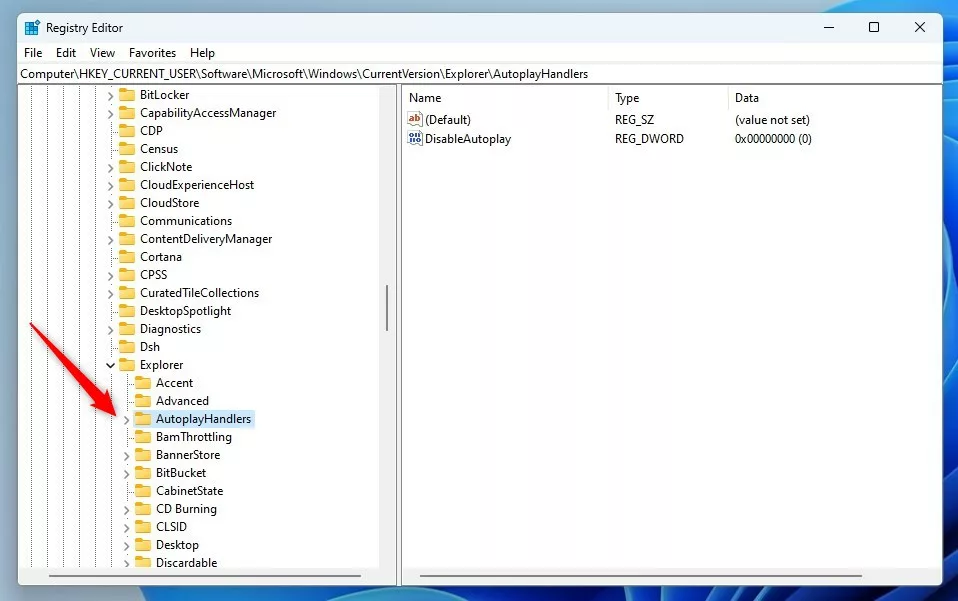
Right-click the AutoplayHandlers folder key’s right pane and select New -> DWORD (32-bit) Value. Next, type a new key named DisableAutoplay.
Double-click the new key item name (DisableAutoplay) and make sure the Base option is Decimal, and then update the Value data, making sure you keep your existing value:
- To turn this feature on. Type 0.
- To turn this feature off. Type 1.
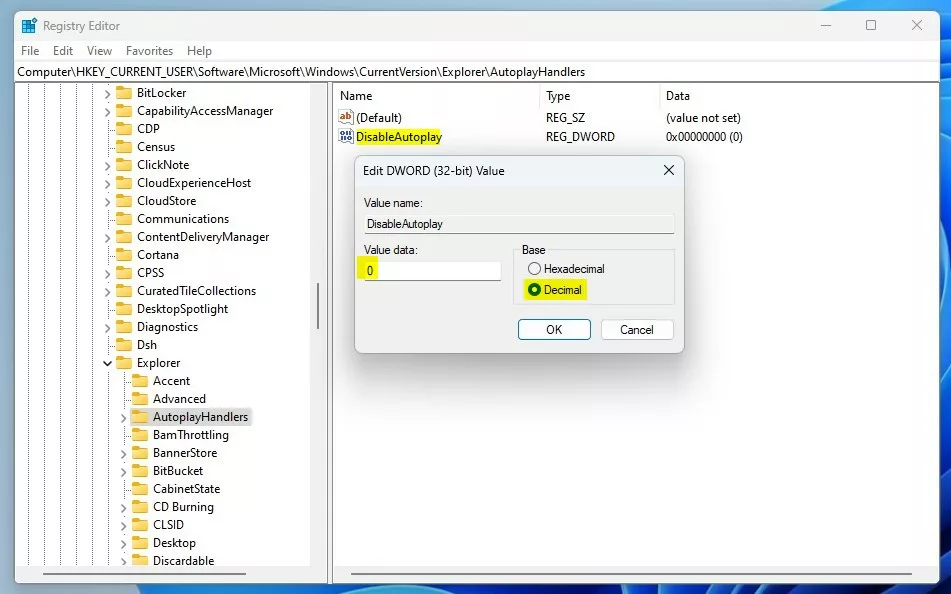
Save your changes and restart your computer.
That should do it!
Conclusion:
- Following these steps, you can easily customize the AutoPlay feature in Windows 11 to suit your preferences.
- Whether through the Windows Settings app, Control Panel, or Windows Registry Editor, you can enable or disable AutoPlay based on your needs.
- Remember to save your changes after adjusting the AutoPlay settings and restart your computer.
- Understanding and controlling the AutoPlay feature can enhance your Windows 11 experience and streamline your workflow.


Leave a Reply