How to Set Up a Kiosk on Windows 11
You set up a kiosk on Windows 11 to lock a PC to a single app or specific applications for public use.
Windows kiosk mode transforms a standard computer into a dedicated, special-purpose device. This significantly enhances security by preventing access to the desktop, system settings, or other unauthorized programs.
Windows 11 provides multiple methods for setting up a kiosk, including Assigned Access, which is the simplest option for locking a device to one Microsoft Store app. The Shell Launcher offers more advanced customization for Win32 applications.
Once you configure it, the PC automatically launches your chosen application after login, keeping the user within that defined experience until an administrator exits the session.
To set up a kiosk on Windows 11, go to Settings > Accounts > Family & other users. Click “Get Started” under “Set up a kiosk,” create a “KioskUser” account, select a standard user account, and choose the single application to run.
Prerequisites for Kiosk Mode
Setting up a kiosk on Windows 11 requires specific Windows editions like Pro, Enterprise, or Education; the Home edition won’t work for this kiosk setup.
- Edition: Windows 11 Pro, Enterprise, or Education. (Home edition does not support Assigned Access).
- Account Type: You must create a standard local user account. Do not use an administrator account for kiosk mode.
- Hardware: Ensure your hardware supports the intended application load.
How to set up Kiosk mode (Single-App)
You can easily set up a single-app kiosk on Windows 11 using the Assigned Access tool found in Settings, which guides you through the process.
In the Settings window, click ‘Accounts’ and then choose ‘Family & other users’.

Find the ‘Set up a kiosk’ section and click ‘Get Started’.

Give it a generic name, like “KioskUser,” and then click ‘Next’.
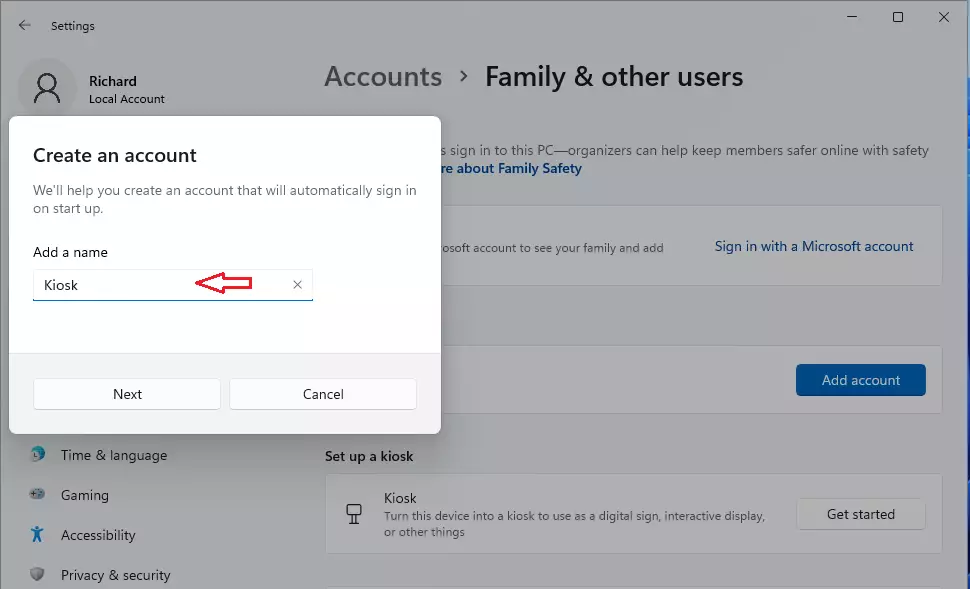
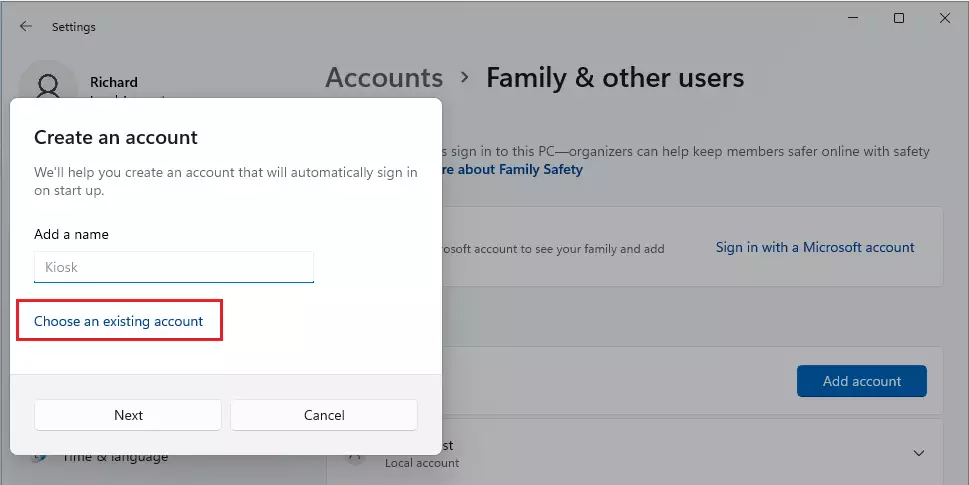
Choose an existing standard account or create a new one.
Choose the application you want to run. This will be the only app the user sees.
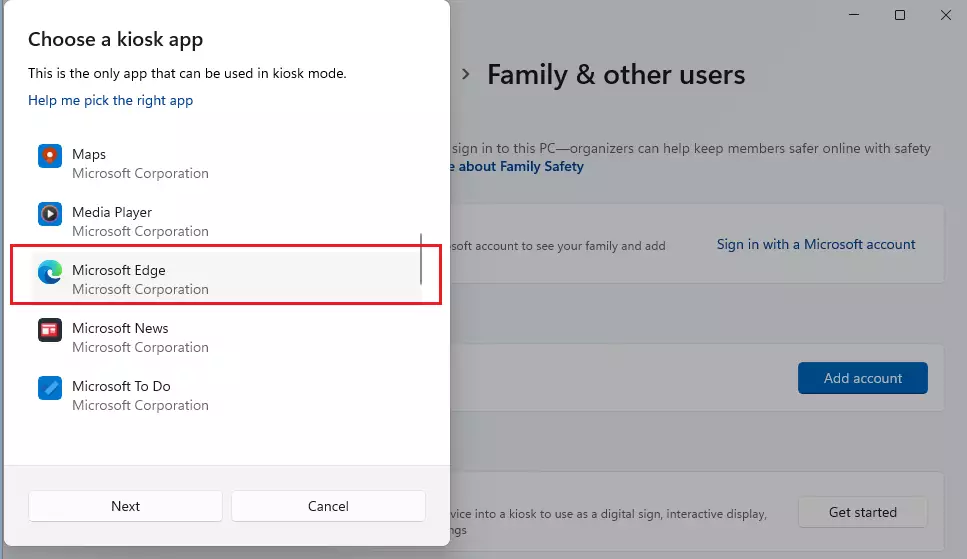
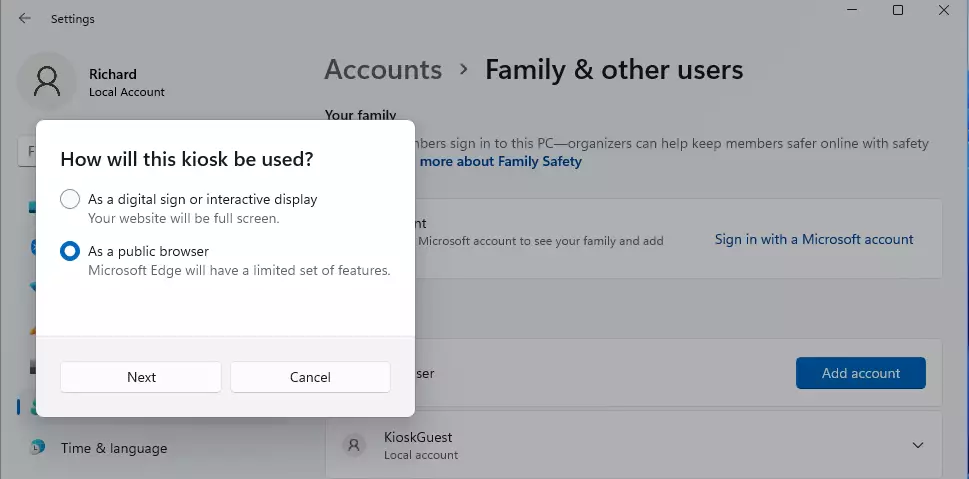
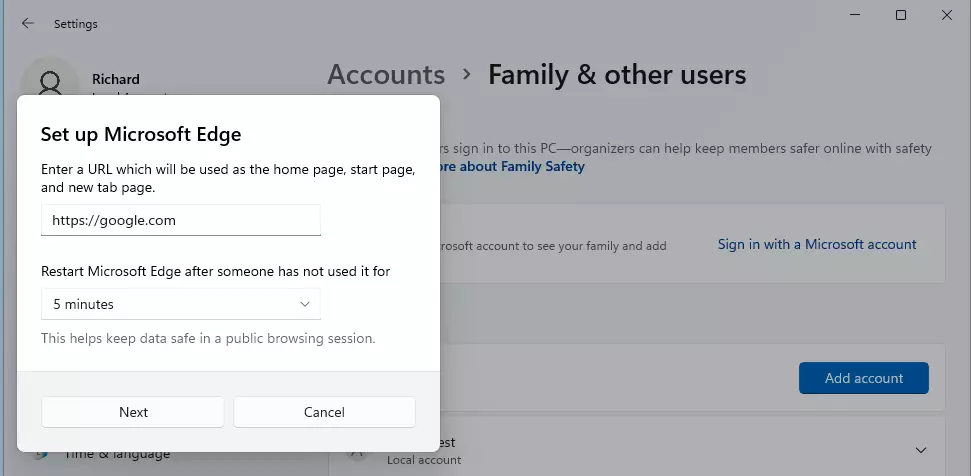
If you choose Microsoft Edge, you have two modes:
- Digital sign or interactive display: Displays a specific website in full-screen mode.
- Public browser: Provides a limited web browser for public use.
Enter the URL and set the refresh interval to clear cache and cookies for security.
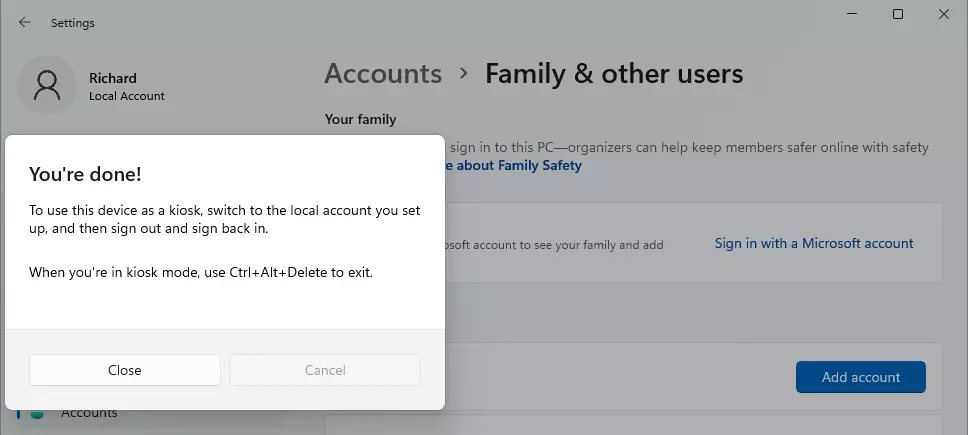
Click ‘Next’ to finalize the setup.
Advanced Configuration: Multi-App Kiosk
A multi-app kiosk setup on Windows 11 lets you give users access to several approved apps, which is useful for more complex needs.
Managing Kiosk Devices at Scale
For businesses managing many devices, manual setup is inefficient. Use solutions like Microsoft Intune (a type of UEM, or Unified Endpoint Management) to set up kiosk profiles across all your devices. This keeps security policies consistent and simplifies updates for all your public-facing devices.
Troubleshooting Common Issues
- App not launching: Verify the user account is a standard user and not an administrator.
- Registry errors: Check paths like 🗝️HKEY_LOCAL_MACHINE\SOFTWARE\Microsoft\Windows\AssignedAccessConfiguration to ensure settings are applied.
- Hardware integration: Ensure drivers for touchscreens or scanners are installed for the ‘All Users’ profile.
Common issues with Windows 11 kiosk setup include apps not launching, which can often be fixed by checking that the user account is standard, not an administrator.
Summary
Setting up a kiosk on Windows 11 is a great way to lock down public computers, using the Assigned Access feature to keep users focused on specific apps. Whether you choose a simple single-app mode or a more complex multi-app setup, Windows 11 offers the tools to secure your devices effectively.
How do I exit 🪟 Windows 11 kiosk mode?
To exit kiosk mode, press Ctrl+Alt+Del on your keyboard. This will bring up the security screen, allowing you to sign out of the current session. You can then log back in using your administrator credentials to modify settings or disable the kiosk feature entirely.
Can I run Win32 applications in kiosk mode?
Yes, you can run regular desktop apps, called Win32 apps, in Windows 11 kiosk mode, even though the basic settings mainly show Store apps.
Was this guide helpful?

About the Author
Richard
Tech Writer, IT Professional
Richard, a writer for Geek Rewind, is a tech enthusiast who loves breaking down complex IT topics into simple, easy-to-understand ideas. With years of hands-on experience in system administration and enterprise IT operations, he’s developed a knack for offering practical tips and solutions. Richard aims to make technology more accessible and actionable. He's deeply committed to the Geek Rewind community, always ready to answer questions and engage in discussions.


No comments yet — be the first to share your thoughts!