

Do you have photos on your Windows 11 computer that are turned sideways or upside down? You’re not alone! Fortunately, rotating them back to the correct position is easy. This guide shows you how to use simple tools that already come with your PC.
What is File Explorer?
File Explorer is a program on your computer that helps you find and organize your files and pictures. Why use it? Because it’s already built into Windows and does the job quickly. You can open it by clicking the Start menu and selecting File Explorer, or by pressing the Windows key + E on your keyboard.
Learn more about File Explorer here: How to Open and Use File Explorer on Windows 11
How to Rotate Images in File Explorer
The easiest way to rotate pictures is right inside File Explorer. You don’t need to open any other programs. Here’s what happens when you do it:
- Find the picture file you want to rotate.
- Click once on the picture to select it.
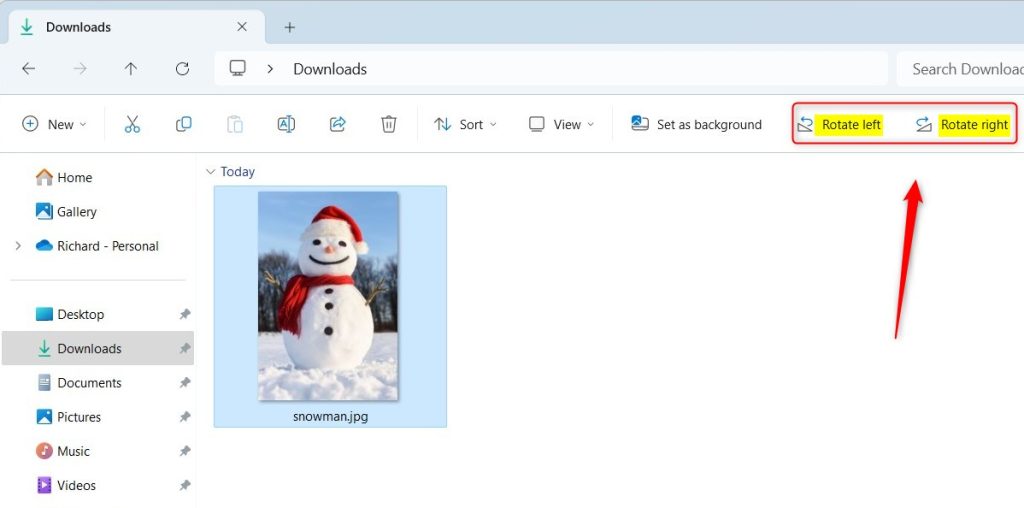
- At the top of the File Explorer window, look for buttons called Rotate right and Rotate left.
- Click Rotate right to turn the picture 90 degrees clockwise.
- Click Rotate left to turn the picture 90 degrees counterclockwise.
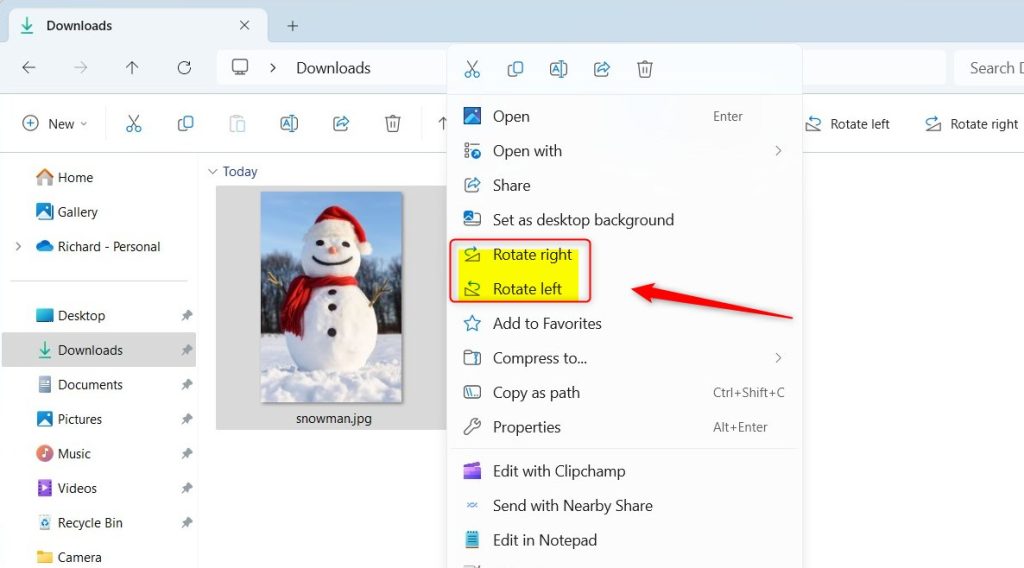
Another Quick Way
- Right-click on the picture file.
- From the menu that appears, choose Rotate right or Rotate left.
Rotate Images Using the Photos App
Why use the Photos app? It’s the default picture viewer in Windows 11 and gives you more editing options. Here’s what to do:
- Double-click your image to open it in the Photos app.
- Click the Rotate button at the top (it looks like a curved arrow), or press
CTRL + Ron your keyboard. - Each click or shortcut press turns the image 90 degrees clockwise.
- When finished, click the three dots (More options) in the top right corner, and select Save as to save your rotated image.
- Choose where you want to save the image and click Save.

Rotate Images Using the Paint App
You can also use the Paint app if you prefer another option:
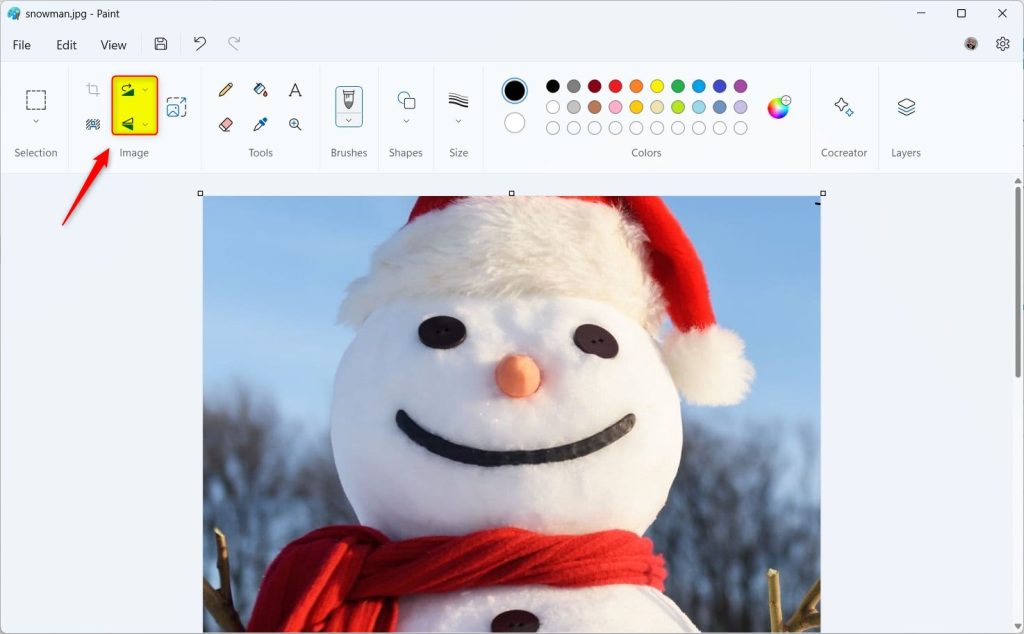
- Right-click the image file, choose Open with → Paint.
- In Paint, find the Rotate buttons on the top toolbar.
- Click Rotate right or Rotate left to turn the image 90 degrees.
- When done, click File → Save or Save as to keep your changes.
Summary
You can quickly rotate images in Windows 11 using File Explorer without extra software. Why? It’s fast and built right in. What happens when you rotate? Your image turns 90 degrees in the direction you choose.
The Photos app and Paint app also let you rotate and save your pictures easily. Choose the method you like best to fix your pictures’ orientation in just a few clicks!
Give it a try next time you need to turn a picture the right way!
Leave a Reply