
This article explains how to restore the default location of their folders in their home directories in Windows 11.
In previous posts, we showed you how to change the default locations of the Downloads folder and other default folders in your home directory in Windows.
If you want to restore the default locations, the steps below will show you how to do that with just a few clicks. When you change the default location or redirect a folder in your home directory, the folder and its content will be redirected to the new Location. However, access will remain as if the folder wasn’t redirected or changed.
Changing or redirecting a home folder is helpful in cases where you’re running out of storage space on a partition and want to use a larger partition to store new content.
If you followed our previous posts and changed your folder’s default locations, you can restore them using the steps below.
How to restore the default location of a personal folder in Windows 11
As mentioned above, one can change or redirect the default location of a personal folder in your home directory. When redirecting and restoring the previous Location, use the steps below.
First, open File Explorer from the Taskbar. When File Explorer opens, type copy and paste shell: UsersFilesFolder into the address bar, and press.
shell:UsersFilesFolder
You should see content in a similar folder to the one below.
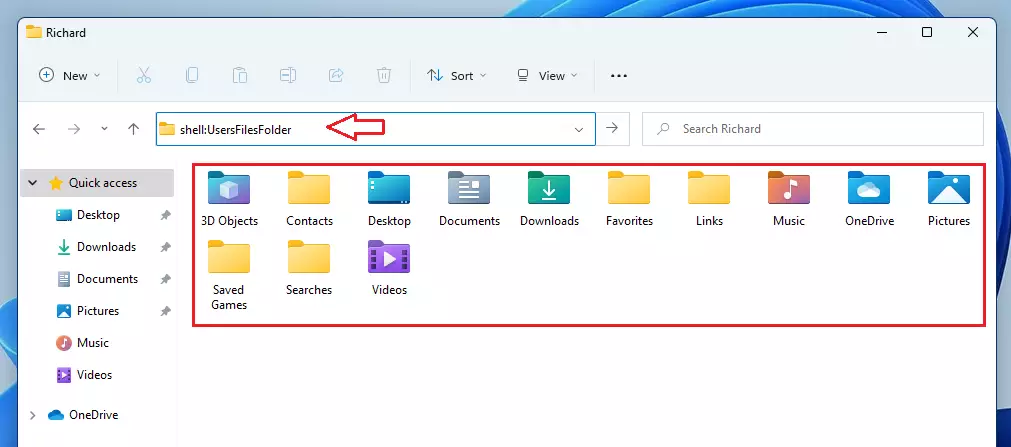
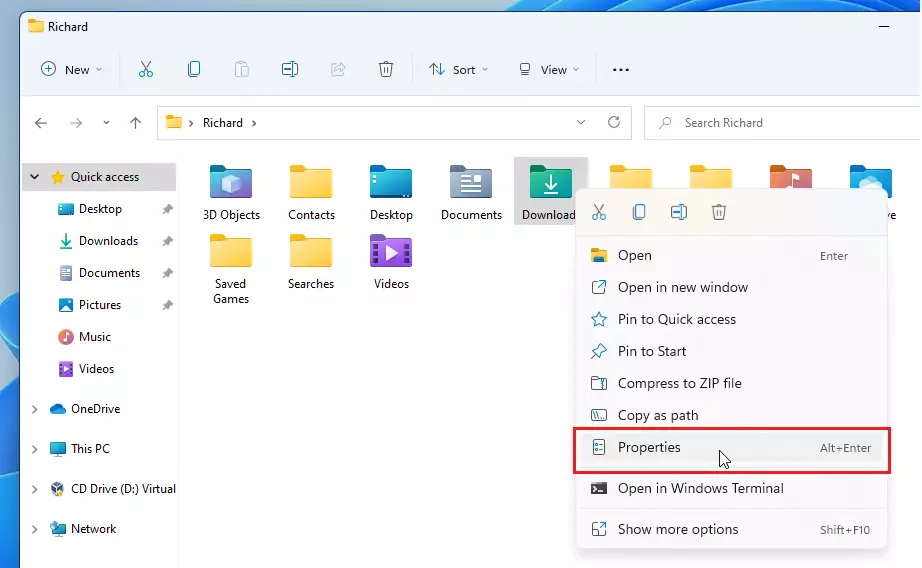
This will show all your folders. For example, if you previously changed or redirected a folder’s default location, right-click that particular folder, then select Properties.
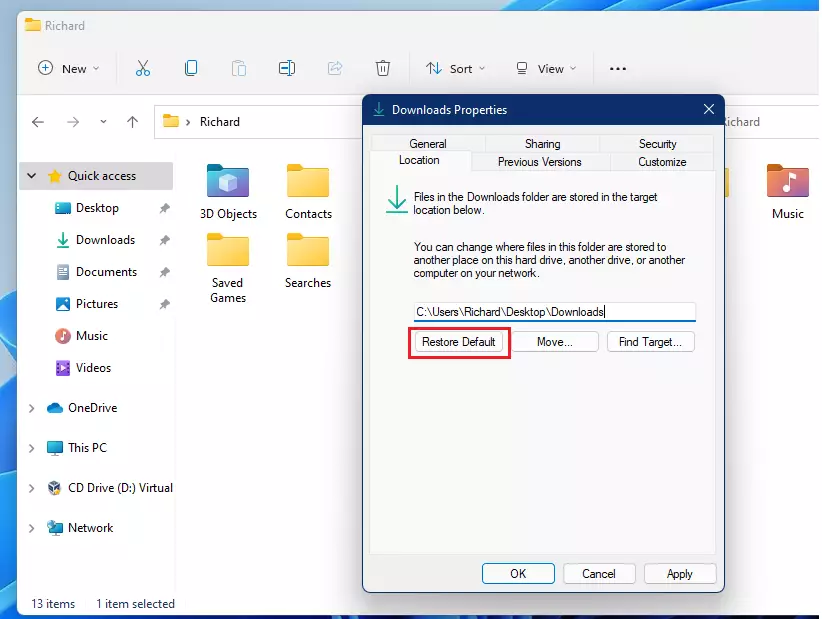
On the folder Properties windows, under Location, click the Restore Default as highlighted below.
When you do that, Windows 11 prompts you to confirm that you want to change the Location; click Yes.
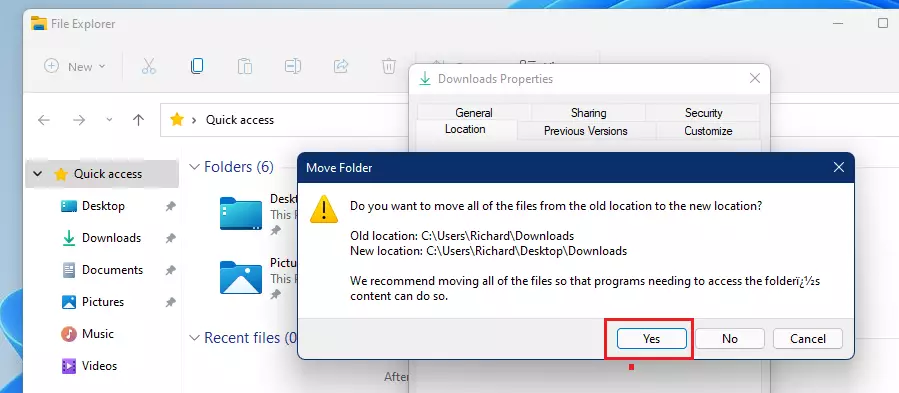
After a few moments, the folder should be restored to its default location.
That should do it!
Conclusion:
- Restoring the default location of folders in Windows 11 is a straightforward process.
- The first step is accessing File Explorer and navigating to the user files folder.
- Right-clicking the folder of interest and selecting Properties allows restoring its original location.
- Confirming the action ensures the folder returns to its default state without losing content.
- Following these steps can help maintain organization and effectively manage disk space on your computer.


Leave a Reply