How to Reset Audio Settings in Windows 11
Resetting your audio settings in Windows 11 can solve common sound problems by putting your sound setup back to its default.
This is helpful if you have no sound, crackly audio, or if your devices aren’t recognized.
Windows 11 comes with a handy audio troubleshooter that can often fix sound problems by itself. While it’s great for many issues, a manual reset might be needed for persistent glitches. You’ll usually find these settings in the Settings app, under System > Troubleshoot > Other troubleshooters.
Reset audio settings in Windows 11 by opening Settings, navigating to System > Sound, and using the Volume mixer to click Reset. For more advanced options, go to More sound settings, select your audio device, and click Restore Defaults in its Properties.
Why Reset Audio Settings?
Resetting audio settings in Windows 11 can fix many common sound problems, like no sound, distorted audio, or issues with microphones.
But if these settings get changed or don’t work right, it can cause problems. So, what happens when you reset? Your audio reverts to the default Windows 11 setup, which often resolves many issues.
How to Reset Audio Settings in 🪟 Windows 11
Step 1Open the Settings App
Click the Start menu and select Settings. Or press ⊞ Win+I on your keyboard.
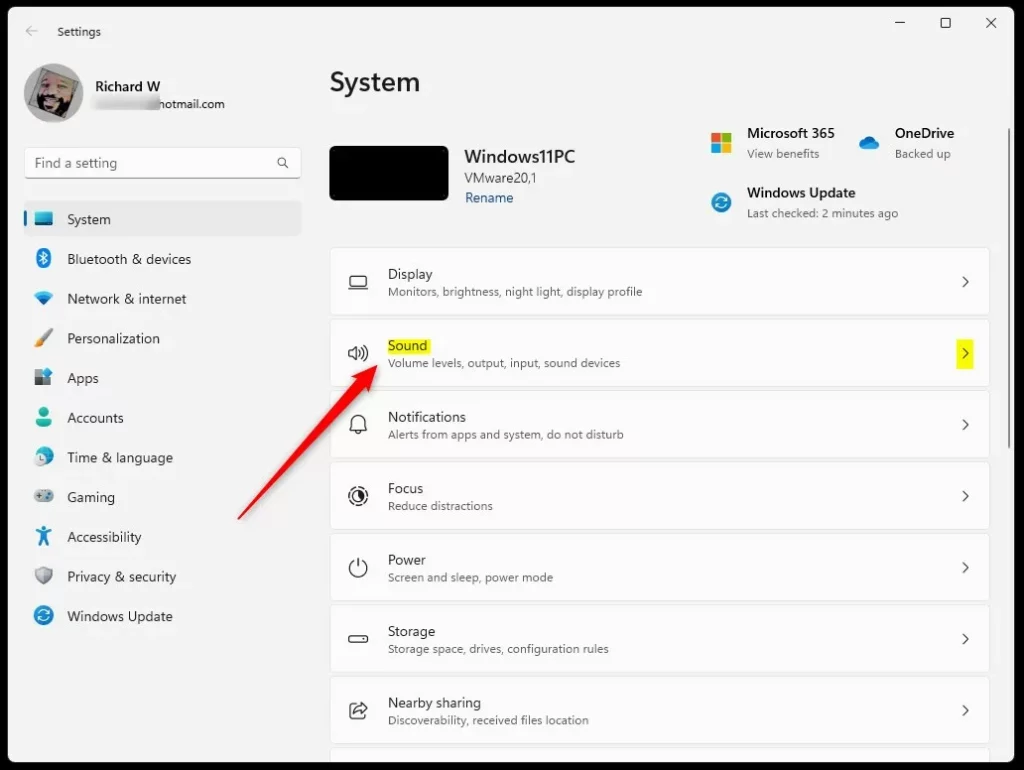
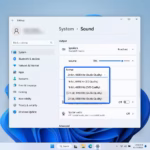
Step 2Go to Sound Settings
In the left menu, click System. Then on the right side, click Sound.
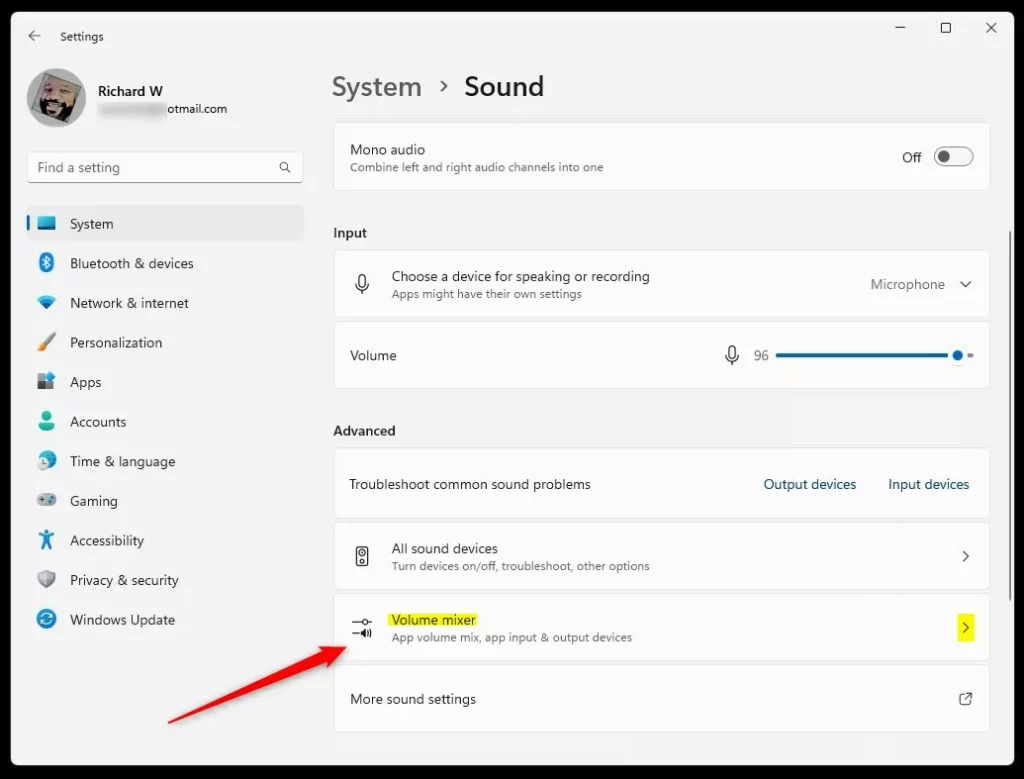
Step 3Open Volume Mixer
Scroll down to the Advanced section and click Volume mixer.
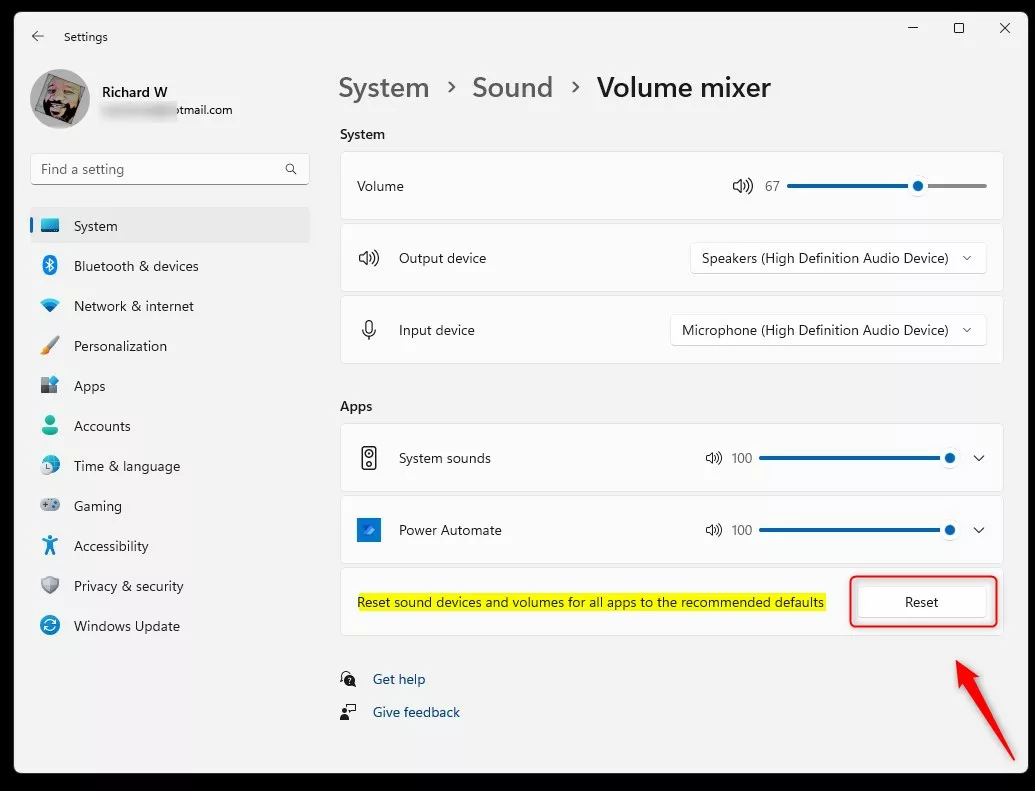
Step 4Reset Volume Mixer
Click the Reset button. This will set all app sound levels back to the recommended defaults.
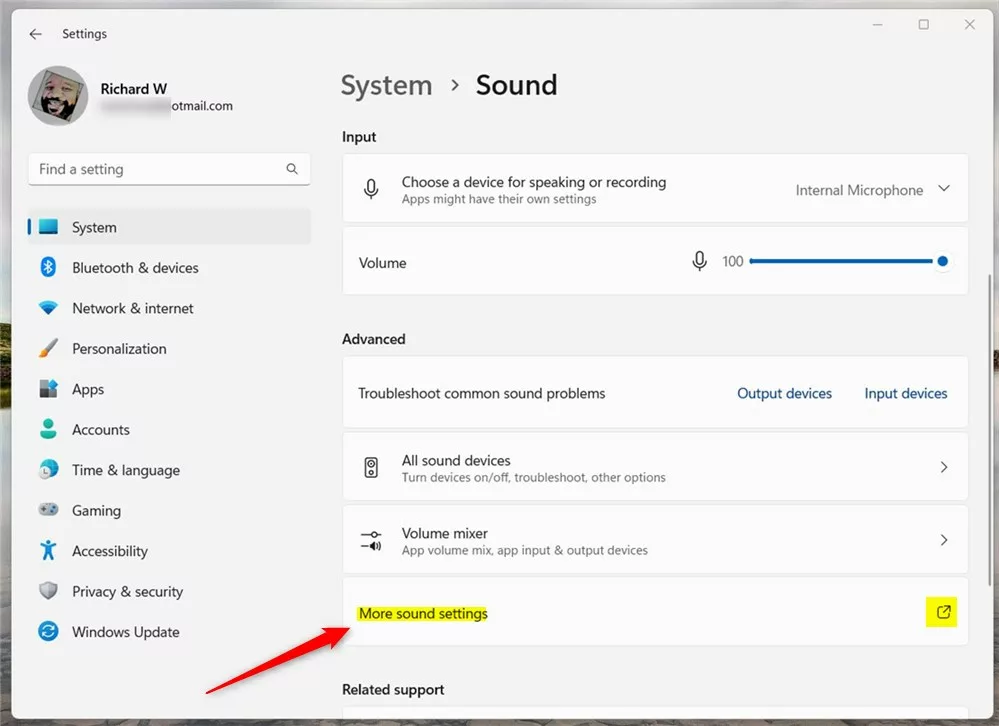
Step 5Reset Advanced Audio Settings
Go back to System > Sound. Find the link that says More sound settings under the Advanced section. Click it.
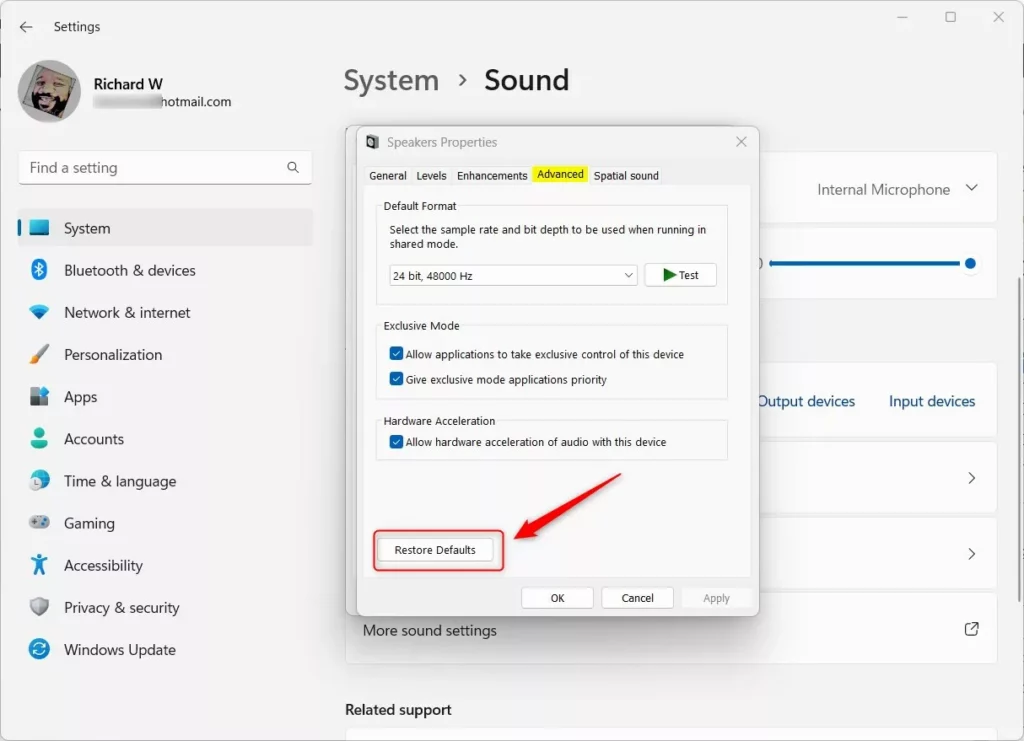
Step 6Open Speakers Properties
In the new window, click Speakers on the left. Then click the Properties button.

Step 7Restore Defaults
In the Speakers Properties window, click the Advanced tab. Then click the Restore Defaults button to reset your audio device settings.
Step 8Update Sound Drivers (Optional)
If your sound is still acting up, try updating your audio drivers – that’s the software that lets Windows communicate with your sound hardware. Updating them can fix problems by essentially reinstalling this crucial software. Learn how to update device drivers in Windows 11
Summary
Resetting your audio settings in Windows 11 is a great way to solve sound issues, bringing your audio back to its default state.- Resetting your audio settings can fix many sound problems on your Windows 11 PC.
- You can reset volume levels, sound device settings, and more using the Settings app.
- Updating or reinstalling your audio drivers can help if resetting settings doesn’t fix the problem.
- If you have questions or tips, feel free to leave a comment below!
- Good luck, and enjoy your sound working properly again!
Was this guide helpful?
100% of readers found this helpful (1 votes)

About the Author
Richard
Tech Writer, IT Professional
Richard, a writer for Geek Rewind, is a tech enthusiast who loves breaking down complex IT topics into simple, easy-to-understand ideas. With years of hands-on experience in system administration and enterprise IT operations, he’s developed a knack for offering practical tips and solutions. Richard aims to make technology more accessible and actionable. He's deeply committed to the Geek Rewind community, always ready to answer questions and engage in discussions.


No comments yet — be the first to share your thoughts!