
This article explains how to change or rename a printer on Windows 11.
When you install a new printer in Windows, it automatically assigns a name based on the printer’s manufacturer, series, and model number, depending on the brand.
This feature can help users who want to use descriptive information to identify the correct printers when printing. However, if a printer’s name is too long, you can rename it to something shorter and more unique for easy identification, rather than sticking with the automatically assigned name.
The steps below walk you through renaming a printer on Windows 11.
Change Windows 11 Printer Name
Users can change their printer name to a more descriptive one in Windows 11.
Here’s how to do it.
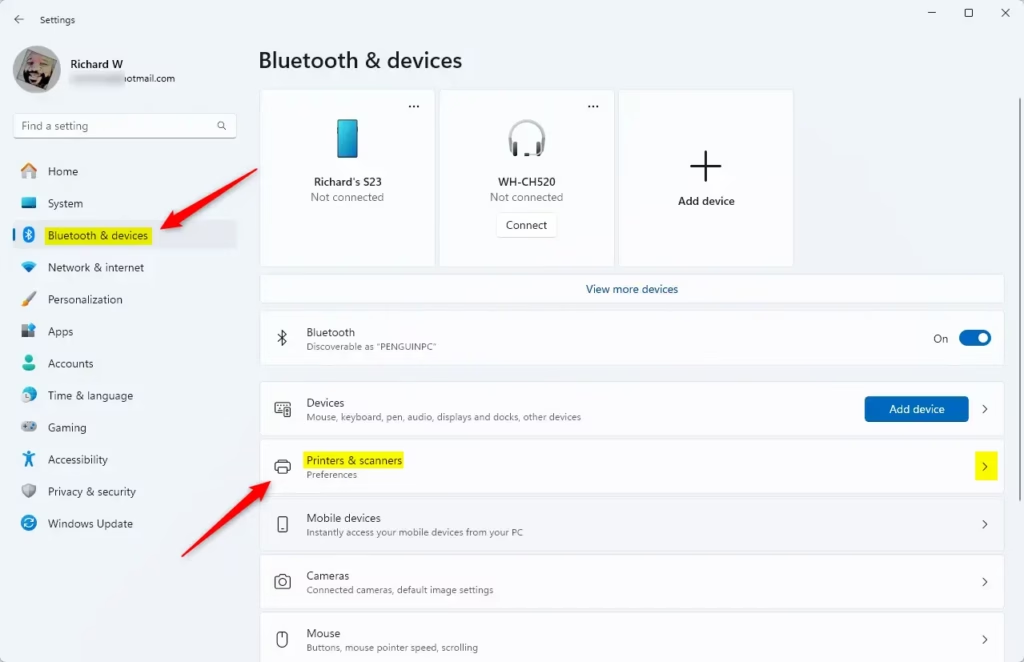
First, open the Windows Settings app.
You can do that by clicking on the Start menu and selecting Settings. Or press the keyboard shortcut (Windows key + I) to launch the Settings app.
When the Settings app opens, click the Bluetooth & devices button on the left. Then, select the Printers & scanners tile on the right to expand it.
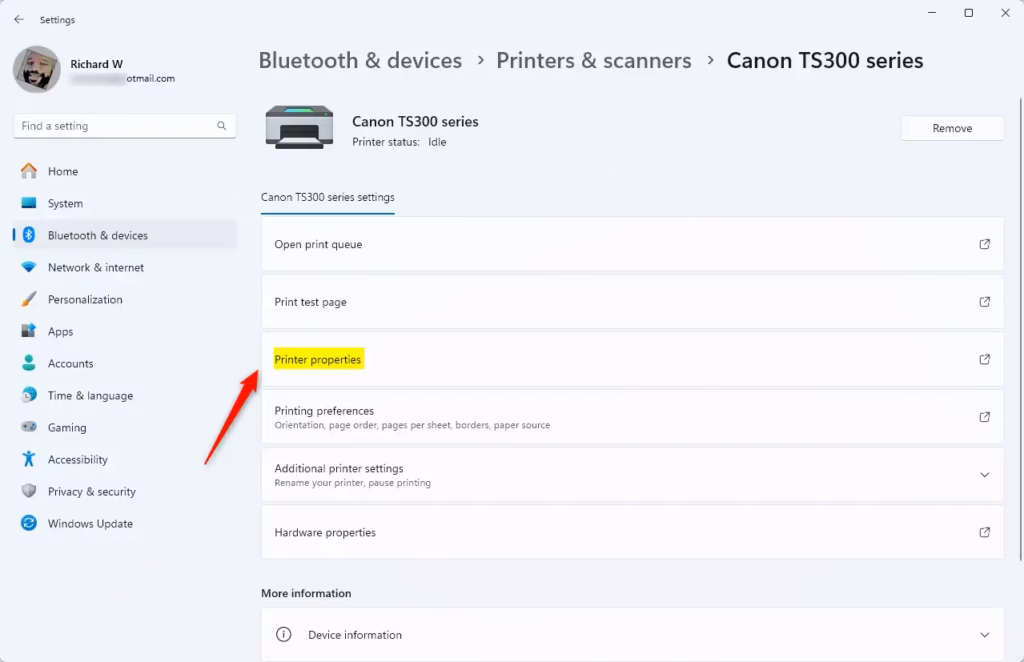
On the Bluetooth & device > Printers & scanners settings page, click on the printer you want to rename to expand its tile.

On the printer details pane, select Printer properties as highlighted in the image below.
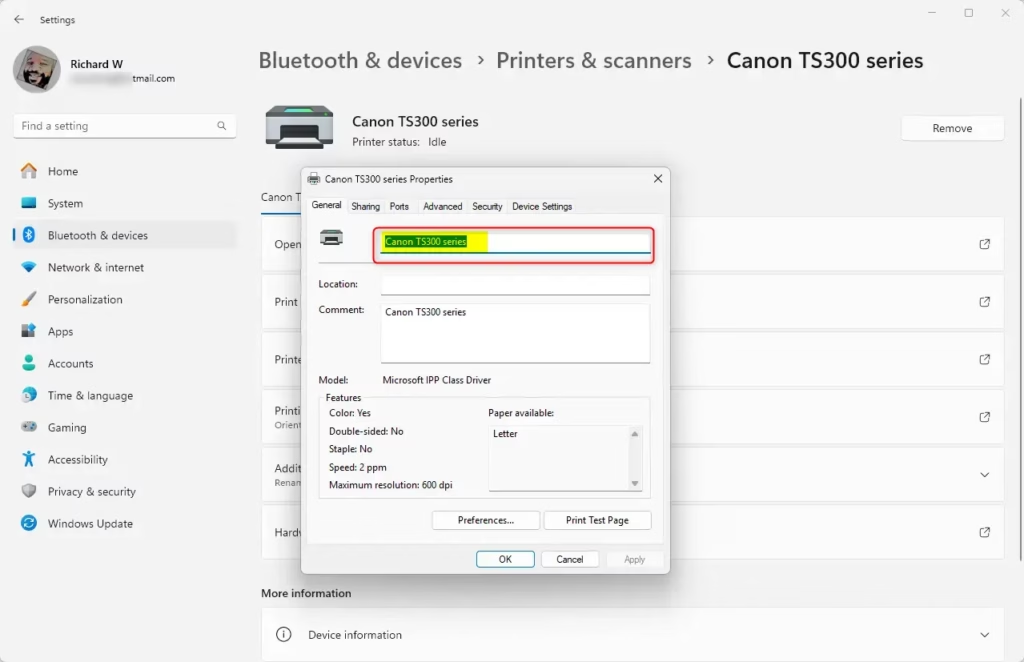
When printer properties open, enter the General tab and type a new name.
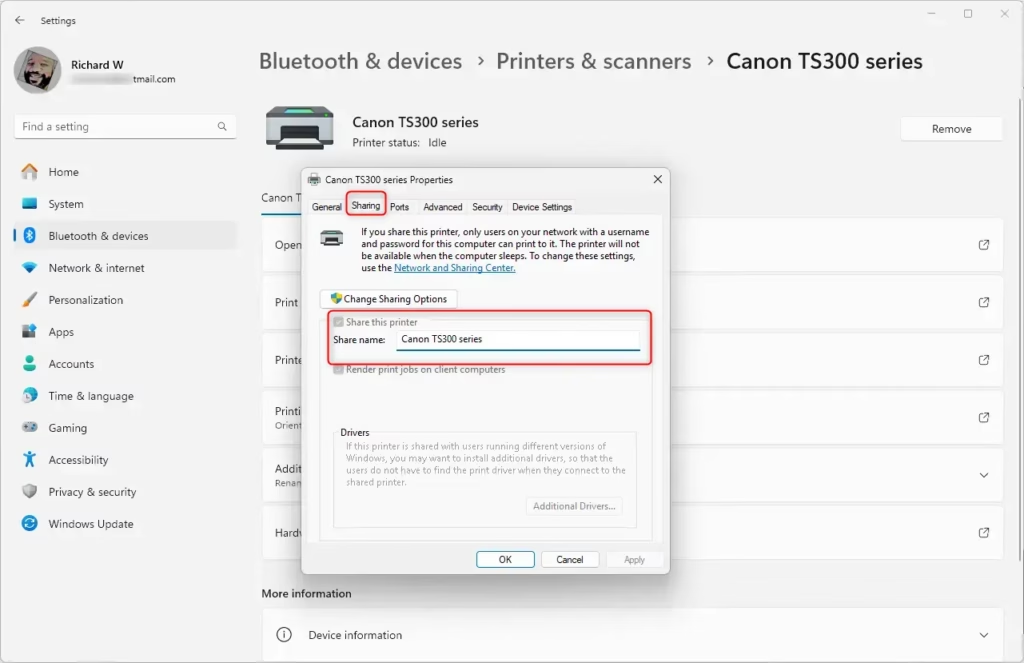
If the printer is shared, you might also want to replace the name on the Sharing tab.
When you’re done, click OK to save your changes and exit.
The new name should now appear.
That’s all!
Conclusion:
- Renaming a printer in Windows 11 enhances organization and ease of identification.
- The process is straightforward, allowing users to personalize printer names.
- Accessing printer properties through the Settings app ensures proper modifications.
- Remember to update the shared name if the printer is accessible to others.
- A clearly named printer can improve efficiency in multi-printer environments.

Leave a Reply