How to Remove Image Background in Windows 11 Photos App
This article explains how to remove an image background using the Photos app in Windows 11.
Open your image in the Photos app, click Edit image, then select the Background tab. Click Remove to let the app automatically remove the background, or use the Background brush tool for manual adjustments. Click Apply and then Save a copy.
What Is the Photos App?
The Microsoft Photos app is a built-in tool that comes with Windows 11. It lets you view, edit, and organize your photos and images. You can include and display your photos stored on OneDrive within the app.
Why Remove a Background?
The updated Photos app can remove an image background without needing any other software. This feature is built-in and available to all users.
Removing a background is useful for all sorts of projects. You can create more polished images for presentations or social media posts. Focusing on the main subject makes your image look cleaner and more professional.
The Photos app in Windows 11 makes this process quite accessible. You don’t need extra software or special technical knowledge.
How to Remove an Image Background Using the Photos App
Here’s how to do it step by step.
- Select the photo you want to edit. Open it using the Photos app.
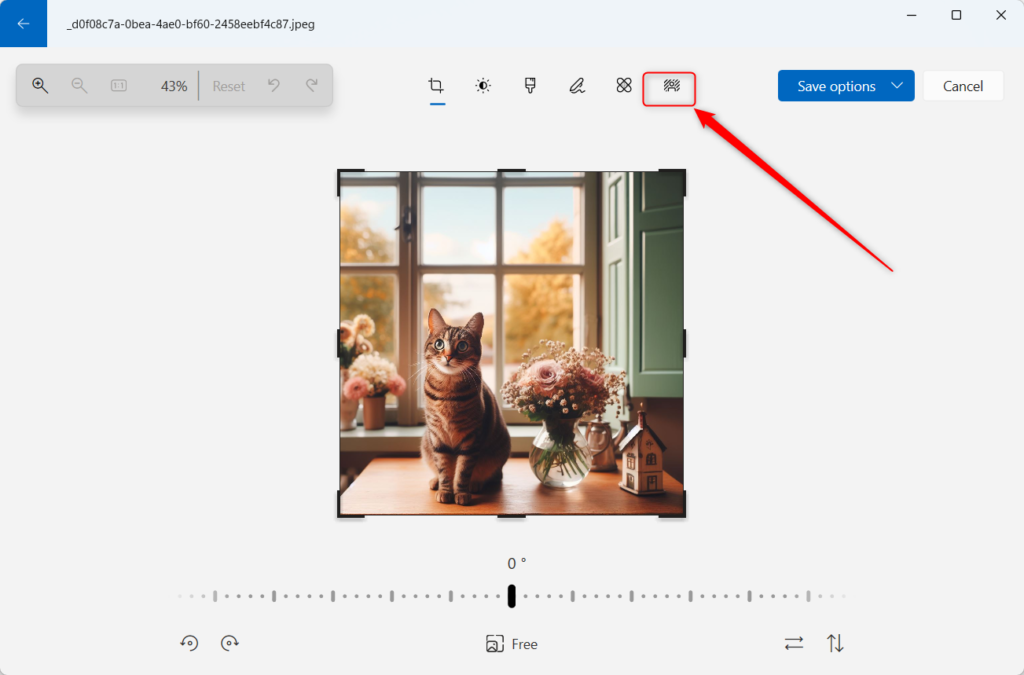
- When the app opens, click the Edit image button on the toolbar. Or press Ctrl+E on your keyboard.
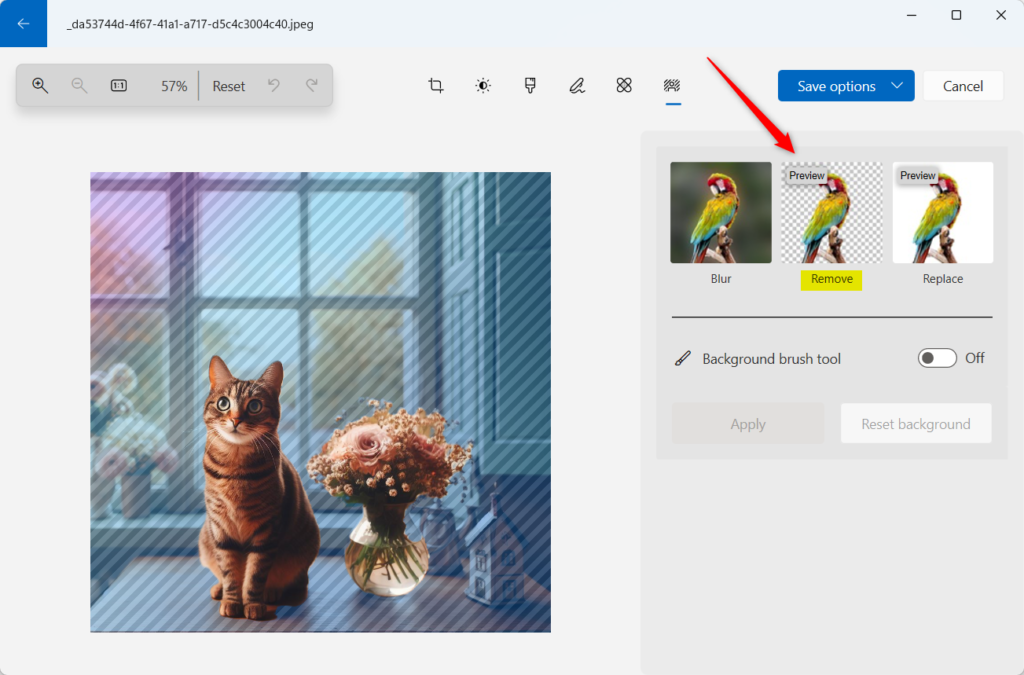
- Look at the toolbar. Click on the Background tab.
- The Photos app will automatically start finding the background of your image. When the image is in focus, click OK. Then select Remove to remove the background.
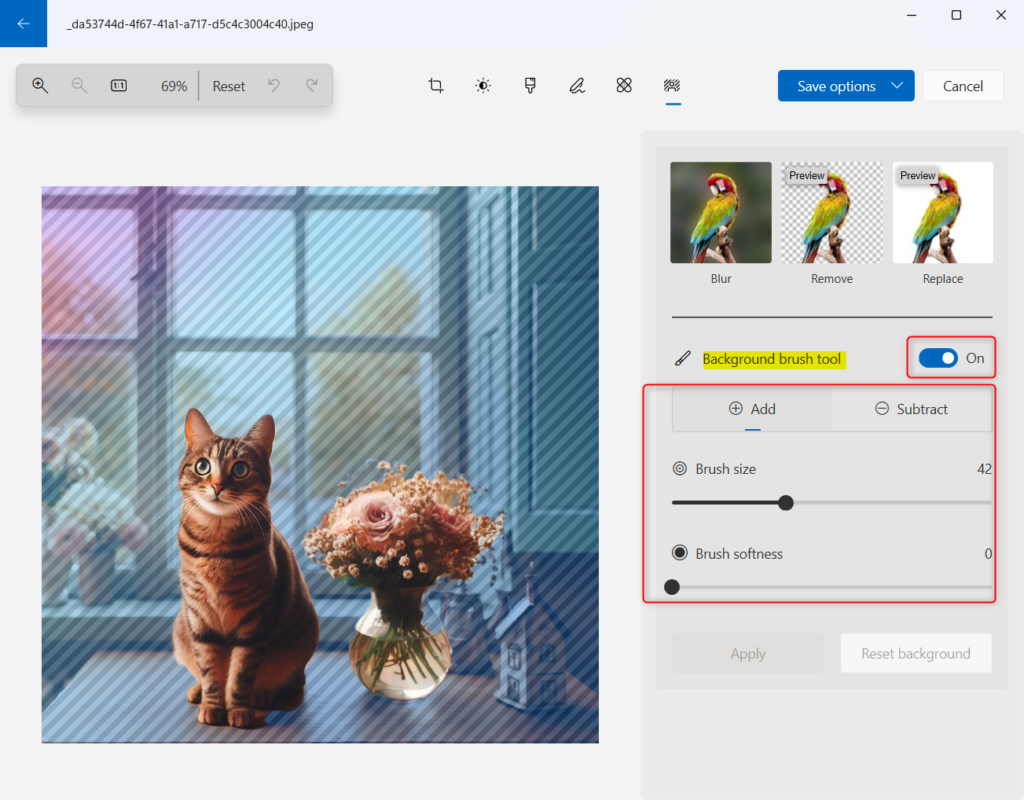
- If you want to adjust the background area more, turn on the Background brush tool. Use this tool to add or subtract background areas. You can also adjust the brush size and softness level.
- When you’re done making changes, click the Apply button. This saves your edits.
- Finally, click Save a copy to save your final image.
That’s all there is to it!
Summary
The Microsoft Photos app in Windows 11 has a built-in feature to remove image backgrounds. You don’t need any other software to do this.
This feature helps you create professional-looking images for presentations, social media, and other projects. Following the steps is quite simple. You’ll open your photo, click the ‘Background’ tab, remove the background, and then save your work. If you need to adjust the background more, use the Background brush tool to add or remove parts. With just a few clicks, you can make your photo’s subject stand out and give it a professional look.
Frequently Asked Questions
Was this guide helpful?

About the Author
Richard
Tech Writer, IT Professional
Richard, a writer for Geek Rewind, is a tech enthusiast who loves breaking down complex IT topics into simple, easy-to-understand ideas. With years of hands-on experience in system administration and enterprise IT operations, he’s developed a knack for offering practical tips and solutions. Richard aims to make technology more accessible and actionable. He's deeply committed to the Geek Rewind community, always ready to answer questions and engage in discussions.

[…] can use the Photos app to replace an image background, remove an image background, import photos and videos, show iCloud in the app, change mouse wheel behavior, and […]
[…] can use the Photos app to replace an image background, remove an image background, import photos and videos, show iCloud in the app, change mouse wheel behavior, use filmstrip, […]