How to Blur Image Background in Windows 11 Photo App
You can blur an image background directly within Windows 11’s Photos app using its AI-powered background blur feature.
This built-in tool isolates your subject, creating a professional bokeh effect similar to what you’d achieve with a DSLR camera, all with a single click.
To use it, open your desired image in the Photos app (version 2023.2303.10002.0 or newer). You’ll then find the “Background blur” option within the “Edit” menu.
Open your image in the Photos app, click “Edit image,” then select “Background blur.” Use the intensity slider or brush tool to adjust the blur and click “Apply” to save.
Prerequisites
- Windows 11 operating system (Version 22H2 or higher).
- Microsoft Photos App version 2023.11090.13001.0 or newer.
- Ensure your app is updated via the Microsoft Store.
- An image file (JPG, PNG, or TIFF).
Why blur your background?
Blurring the background of your photos in Windows 11 makes your main subject pop and look more professional, especially if the background is messy.
What happens when done?
Once you’re done, your photo will have a soft, blurry background while the main subject stays sharp and clear. This creates a high-quality look that draws the viewer’s eye directly to the person or object you want to highlight.
How to blur your background in the Photos App
- Open the Photos app on your computer.
- Select the image you want to edit from your library or OneDrive folder.
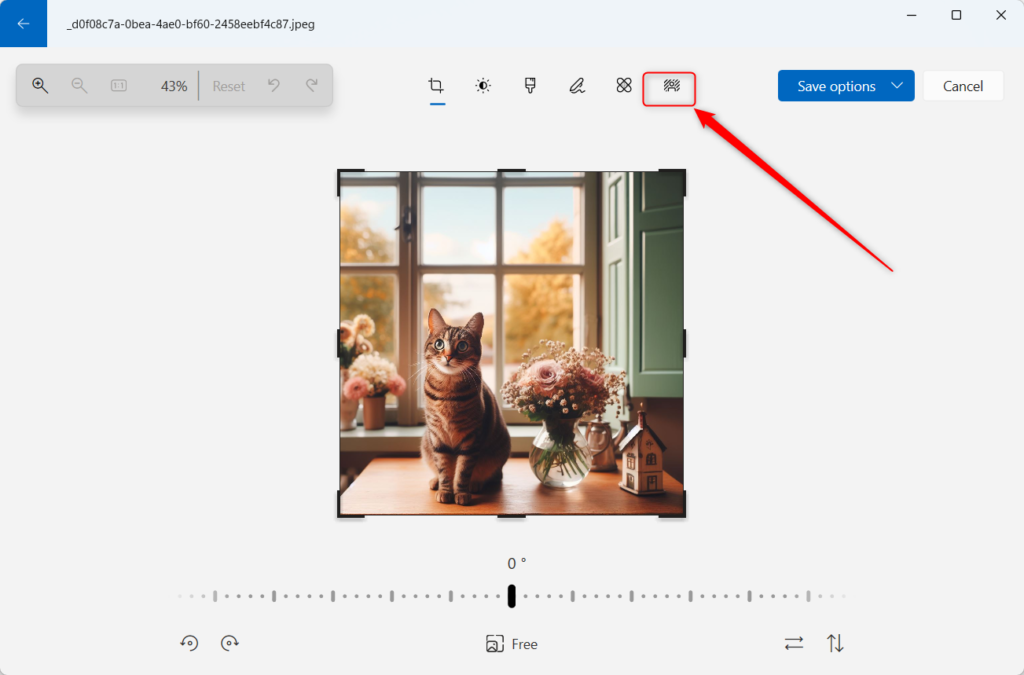
- Click the Edit image button at the top or press Ctrl+E on your keyboard.
- Click the Background blur button in the toolbar. The app uses AI-powered tools to automatically detect the background for you.
- Use the Blur Intensity slider to change how blurry the background looks. You can also use the Brush Tool to manually fix specific areas if the automatic detection missed a spot.
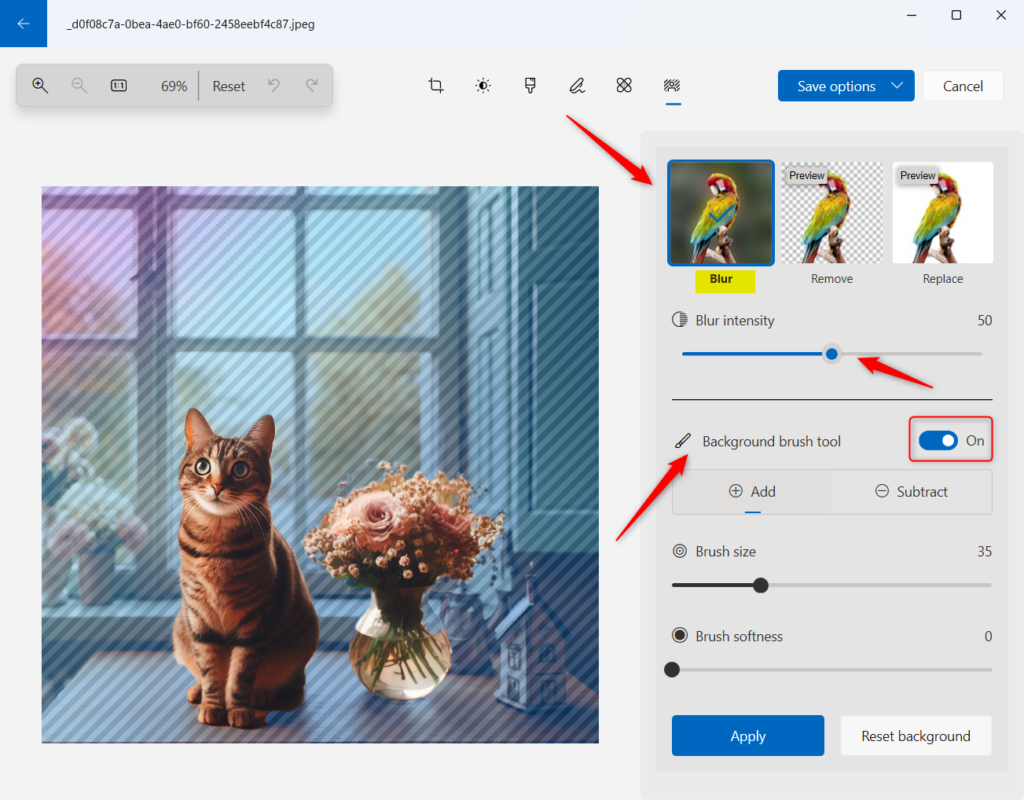
- Once you are happy with the look, click the Apply button to save your changes.
You can easily blur an image background in the Windows 11 Photos app using its built-in tools.
How to blur your webcam background during video calls
Blurring your webcam background in Windows 11 during video calls is simple and keeps your personal space private during meetings.
- Open your video conferencing app (e.g., Microsoft Teams).
- Before joining a meeting, look for the Background effects or Video settings menu.
- Select Blur from the available options.
- This uses your computer’s processing power to mask your background in real-time.
Troubleshooting and Requirements
If the background blur option isn’t showing up in your Windows 11 Photos app, you might need to check for app updates, ensure your Windows version is current, or confirm your PC meets the hardware requirements for this feature.
- Update the App: Open the Microsoft Store and check for updates for the Photos app.
- Check Windows Version: Ensure you are on the latest Windows 11 build.
- Hardware Limits: The AI feature requires a modern processor. If your PC is older, the feature may not appear.
You can turn a simple photo into a professional-looking image using the Background blur feature in the Windows 11 Photos app. By adjusting the intensity and using the brush tool, you can remove distractions and make your subject the star of the show. For more tips on managing your files, see our guide on organizing your C:\Users\Public folders effectively.
Summary
Why is the background blur option missing in my Photos app?
The background blur feature is only available in newer versions of the Microsoft Photos app. If you do not see it, open the Microsoft Store, go to your Library, and click ‘Get updates’ to ensure you are running version 2023.11090.13001.0 or later on your Windows 11 device.
Does 🪟 Windows 11 have a native background blur for webcams?
Windows 11 does not have a single global switch for webcam blur. Instead, this feature is built into communication apps like Microsoft Teams or Zoom. These apps use Windows 11 AI-powered background blur settings to hide your surroundings during live video calls without needing extra software.
Was this guide helpful?

About the Author
Richard
Tech Writer, IT Professional
Richard, a writer for Geek Rewind, is a tech enthusiast who loves breaking down complex IT topics into simple, easy-to-understand ideas. With years of hands-on experience in system administration and enterprise IT operations, he’s developed a knack for offering practical tips and solutions. Richard aims to make technology more accessible and actionable. He's deeply committed to the Geek Rewind community, always ready to answer questions and engage in discussions.

No comments yet — be the first to share your thoughts!