

This article explains how to list all available System restore points in Windows 11.
When a drive is added to System protection, Windows creates restore points so one can revert unneeded changes and go back to a previous good state.
A restore point is the state of your computer that Windows captures and saves on a system partition that can be used to restore the computer in the event of a disaster.
Windows will automatically create a restore point if none weren’t created within 24 hours. Although you can change that so Windows doesn’t skip creating restore points, making a restore point every 24 hours is the default.
A typical computer will have several restore points. Here’s how to list them all in Windows 11.
List all available restore points.
As described above, a typical Windows machine will have multiple restore points available to restore your computer to a time when the restore point was created.
Here’s how to do that.
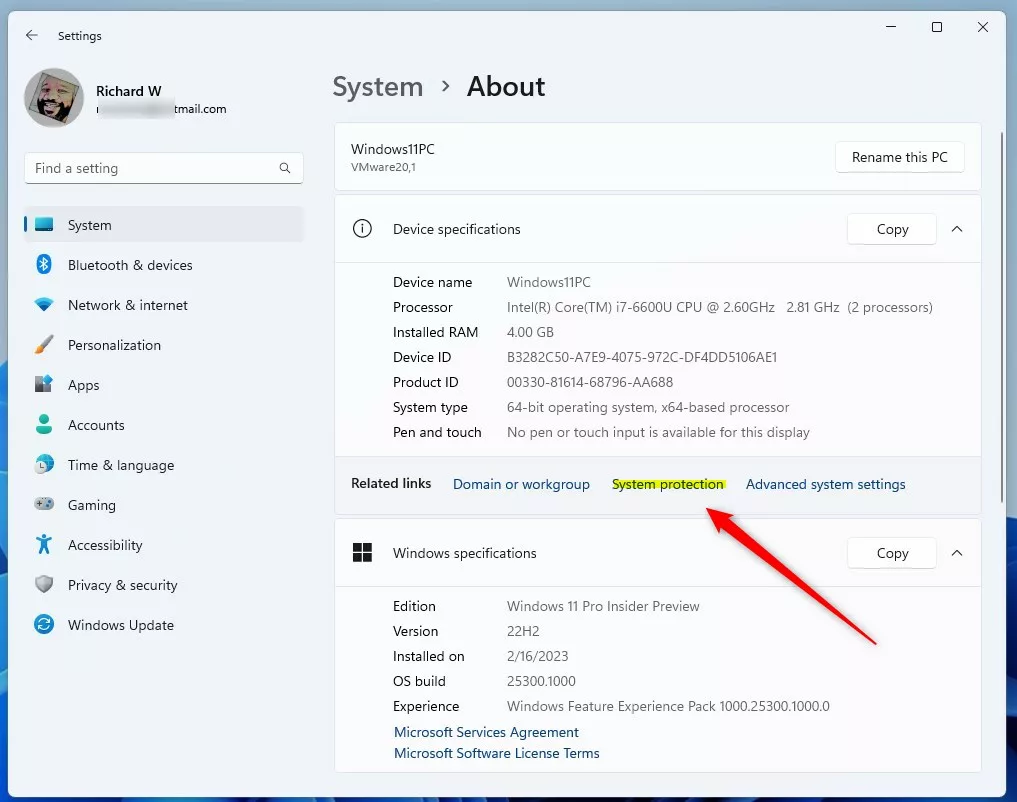
To do that, first, open the Windows Settings app.
You can do that by clicking on the Start menu and selecting the Settings app. Or press the keyboard shortcuts (Windows + I) to launch the Settings app.
When the Settings app opens, navigate to System -> About -> System protection link on the About page.
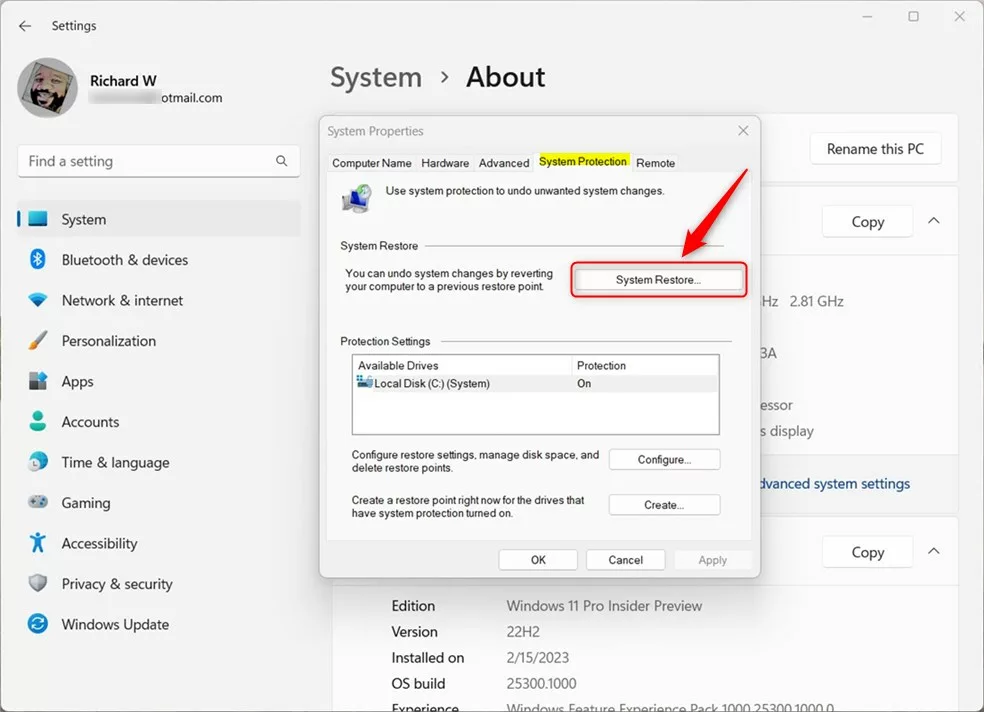
On the System Protection window, click the System Restore button.
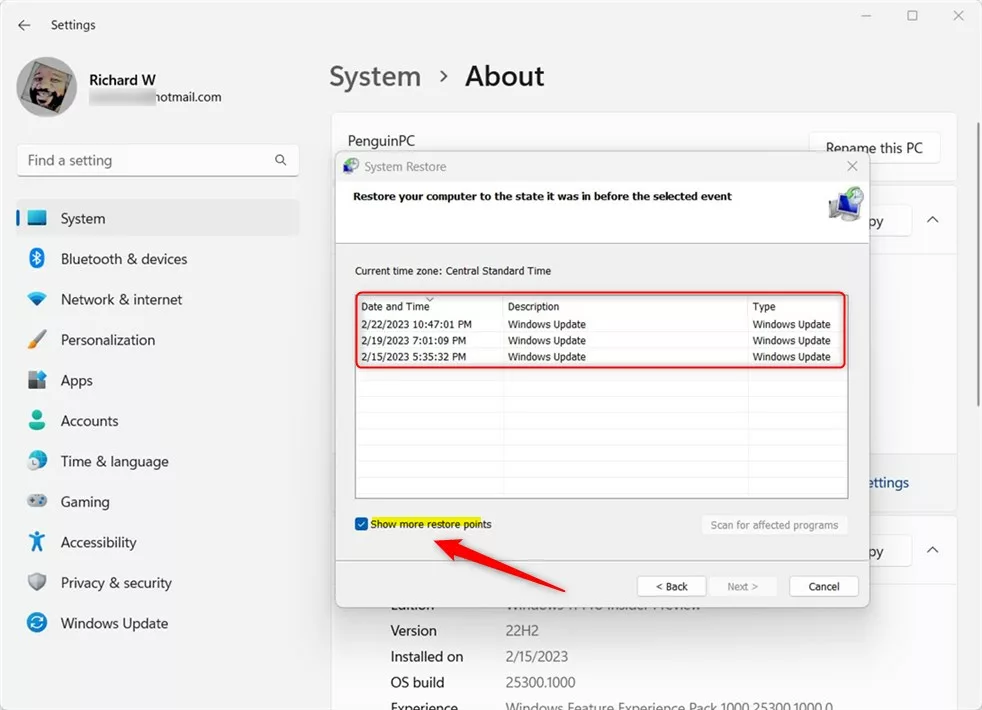
Check the box highlighted below to “Show more restore points” on the window. You should then see a list of available restore points to which you can revert your computer.
List available restore points using Windows commands
Alternatively, you can list all available restore points using the Windows PowerShell or Command Prompt app.
To do that, first, open the Windows Terminal app as administrator.
In the Windows Terminal PowerShell tab, type the commands below.
Get-ComputerRestorePoint | Format-Table -AutoSize
The Command above should output similar lines as below:
CreationTime          Description    SequenceNumber EventType           RestorePointType
------------          -----------    -------------- ---------           ----------------
2/15/2023 5:35:32 PM  Windows Update 1              BEGIN_SYSTEM_CHANGE 17
2/19/2023 7:01:09 PM  Windows Update 2              BEGIN_SYSTEM_CHANGE 17
2/22/2023 10:47:01 PM Windows Update 3              BEGIN_SYSTEM_CHANGE 17
Or use the Windows Terminal with the Command Prompt tab and run the commands below.
PowerShell Get-ComputerRestorePoint^|Format-Table -AutoSize
That should do it!
Conclusion:
- Listing all available restore points in Windows 11 can be done through the Windows Settings app or via Windows PowerShell or Command Prompt.
- Restoring your computer to a previous state can be crucial in case of unexpected issues, making the knowledge of available restore points valuable.
- Creating, viewing, and using restore points can be a lifesaver in recovering from system failures or unintended changes.
Frequently Asked Questions
How can I check my Windows 11 system restore points?
What is a system restore point in Windows 11?
Can I create a restore point manually in Windows 11?
How do I list restore points using PowerShell in Windows 11?
What should I do if I don't see any restore points in Windows 11?


Leave a Reply Cancel reply