This article explains how to install Moodle with Apache on Ubuntu 24.04.
Moodle, a popular open-source learning management system (LMS), can be efficiently hosted by Apache, a widely used web server, on Ubuntu, a stable and well-supported Linux distribution. This installation process allows you to create a reliable and robust environment for hosting and managing your e-learning content.
Apache’s role as a web server is crucial in serving web pages and applications, making it an excellent choice for hosting Moodle. You can create a secure and scalable e-learning environment by installing Moodle with Apache on Ubuntu.
The steps below walk you through installing Moodle with Apache support on Ubuntu 24.04.
Install Apache HTTP server on Ubuntu Linux
Moodle requires a web server. For this post, we will install and use the Apache web server to run Moodle.
To do that, open the Ubuntu terminal and run the commands below to install the Apache web server.
sudo apt update
sudo apt install apache2
Once Apache is installed, the commands below can start, stop, and enable the Apache web server to start automatically when your server boots up.
sudo systemctl stop apache2
sudo systemctl start apache2
sudo systemctl enable apache2
You test that the Apache web server is running by opening your web browser and browsing to the server’s localhost or IP address.
http://localhost
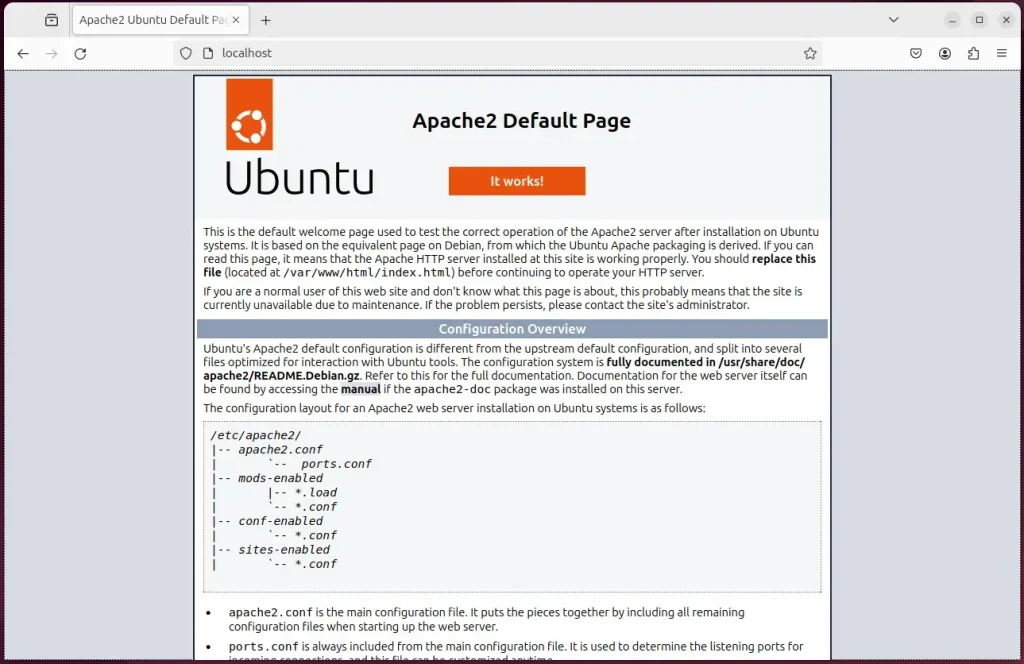
When you see the Apache2 Default Page, it means the Apache HTTP server is successfully installed.
Additional help on installing Apache on Ubuntu is in the link below.
How to install Apache on Ubuntu
Install MariaDB database server on Ubuntu Linux
The next component that is required to run Moodle is a database server. This post will install and use the MariaDB database server to run Moodle.
To install and use the MariaDB database server, use the instructions below.
Open the Ubuntu terminal and run the commands below to install the MariaDB database server.
sudo apt update
sudo apt install mariadb-server
Once the MariaDB database server is installed, use the commands below to stop, start, and enable the MariaDB server to start automatically when the server boots.
sudo systemctl stop mariadb
sudo systemctl start mariadb
sudo systemctl enable mariadb
Run the following commands to validate and test if the MariaDB database server is installed successfully.
sudo mariadb
Once you run the commands above, it will log you onto the MariaDB console and display a message similar to the one below.
Welcome to the MariaDB monitor.  Commands end with ; or \g.
Your MariaDB connection id is 32
Server version: 10.11.2-MariaDB-1 Ubuntu 23.04

Copyright (c) 2000, 2018, Oracle, MariaDB Corporation Ab and others.

Type 'help;' or '\h' for help. Type '\c' to clear the current input statement.

MariaDB [(none)]>
The message tells you that the server is installed successfully.
Additional help on installing MariaDB.
Create a Moodle database
Upon successfully installing the MariaDB database server, create a blank database specifically for the Moodle application on the server.
As part of the setup, we will create a database named ‘moodledb ‘and a corresponding user account named ‘moodledbuser ‘.
Finally, we’ll grant the moodledbuser full access to the moodledb database.
All the database steps above can be done using the commands below:
But first, log on to the MariaDB database server:
sudo mariadb
Then run the commands below to complete the steps:
CREATE DATABASE moodledb CHARACTER SET utf8mb4 COLLATE utf8mb4_general_ci;
CREATE USER moodledbuser@localhost IDENTIFIED BY 'type_your_password_here';
GRANT ALL ON moodledb.* TO moodledbuser@localhost WITH GRANT OPTION;
FLUSH PRIVILEGES;
exit
Ensure to replace ‘type_your_password_here‘ with your password.
Install PHP on Ubuntu Linux
The last component you will need to run Moodle is PHP. The Moodle application is a PHP-based application. It supports the latest versions of PHP.
Run the commands below to install PHP.
sudo apt install php libapache2-mod-php php-intl php-mysql php-curl php-cli php-zip php-xml php-gd php-common php-mbstring php-xmlrpc php-json php-sqlite3 php-soap php-zip
Additional help on installing PHP
How to install PHP on Ubuntu Linux
Download Moodle files
Let’s begin straightforwardly downloading and configuring the Moodle files on Ubuntu Linux. Run the commands below to download and extract the Moodle files to the Apache web server root directory.
The command block below will download and create a new Moodle folder in the Apache root directory.
First, create a Moodle folder in the Apache root directory.
Next, navigate to the /tmp directory and download Moodle files. After unzipping the file, move the content into the Moodle folder you created in the Apache root directory.
Rest assured, the final step is to change the permissions. This will allow the Apache web server to safely interact with the files, ensuring a secure environment for your Moodle installation.
Stay up-to-date with Moodle’s latest version. Get it from the official download page and replace the link with the new version to ensure you benefit from the latest features and security updates.
cd /tmp/
wget https://download.moodle.org/download.php/direct/stable404/moodle-4.4.zip
sudo unzip -d /var/www moodle-*.zip
sudo mkdir -p /var/www/moodledata
sudo chown -R www-data:www-data /var/www/moodledata/
sudo chown -R www-data:www-data /var/www/moodle/
Once you have completed all the above steps, continue below to configure the Apache web server to serve the Moodle content.
Run the commands below to create an Apache virtual host file for Moodle.
sudo nano /etc/apache2/sites-available/moodle.conf
Then, copy and paste the content block below into the Apache server block.
<VirtualHost *:80>
  ServerName moodle.example.com
  ServerAlias www.moodle.example.com
  ServerAdmin [email protected]
  DocumentRoot /var/www/moodle

  <Directory /var/www/moodle/>
       Options FollowSymlinks
       AllowOverride All
       Require all granted
  </Directory>

       ErrorLog ${APACHE_LOG_DIR}/error.log
       CustomLog ${APACHE_LOG_DIR}/access.log combined

</VirtualHost>
Save the file.
Then, run the commands below to enable the server block and restart the Apache server.
sudo a2ensite moodle.conf
sudo systemctl restart apache2
Setup Let’s Encrypt SSL/TLS for Moodle
You may want to install an SSL/TLS certificate to secure your Moodle site. Secure your Moodle installation with HTTPS from Let’s Encrypt.
Please read the post below for additional resources on installing and creating Let’s Encrypt SSL certificates for Apache.
How to set up Let’s Encrypt SSL certificate for Apache on Ubuntu Linux
Once you have restarted the Apache web server, open your browser and browse to the server hostname or IP address defined in the Apache server block.
http://moodle.example.com
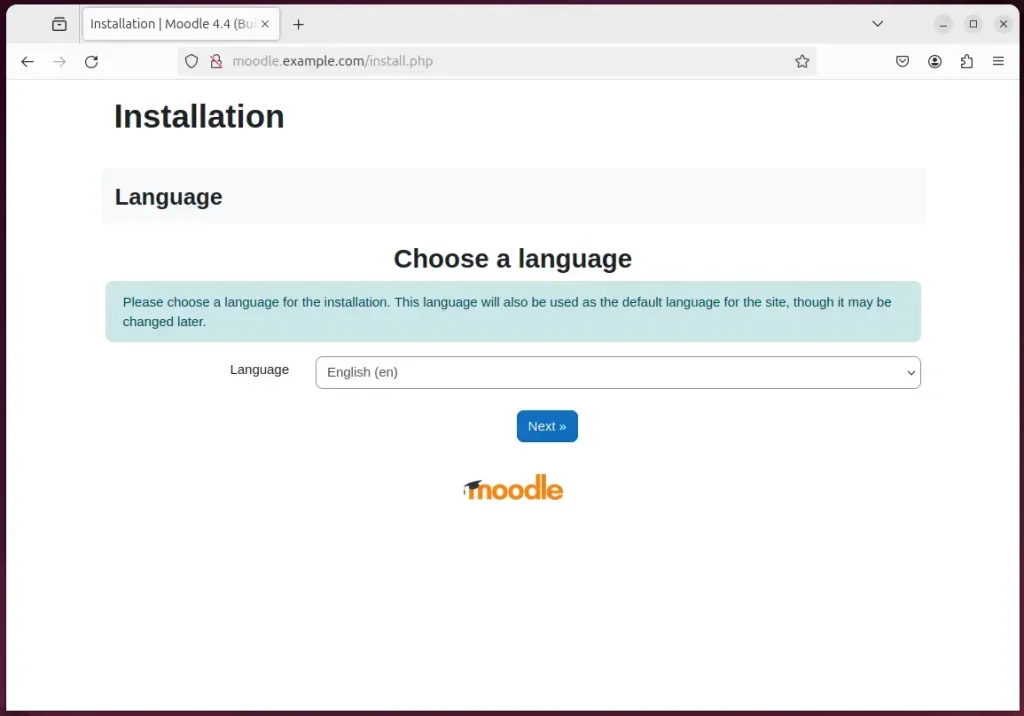
A Moodle installation wizard page should appear. Select the installation language and continue to the next page.
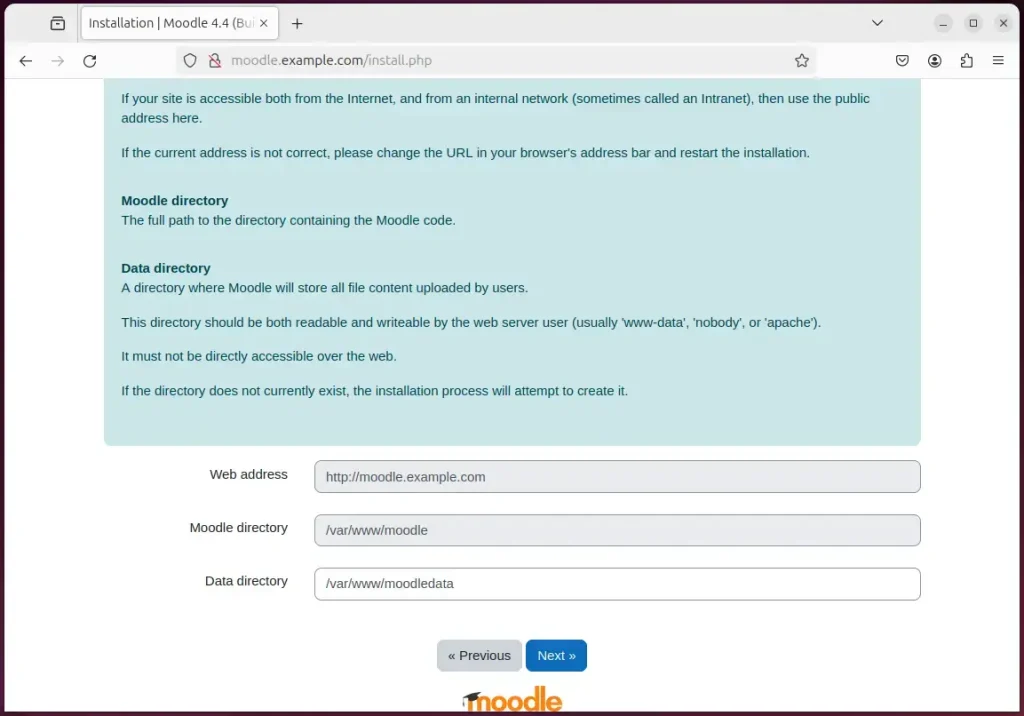
Confirm the installation paths and continue.
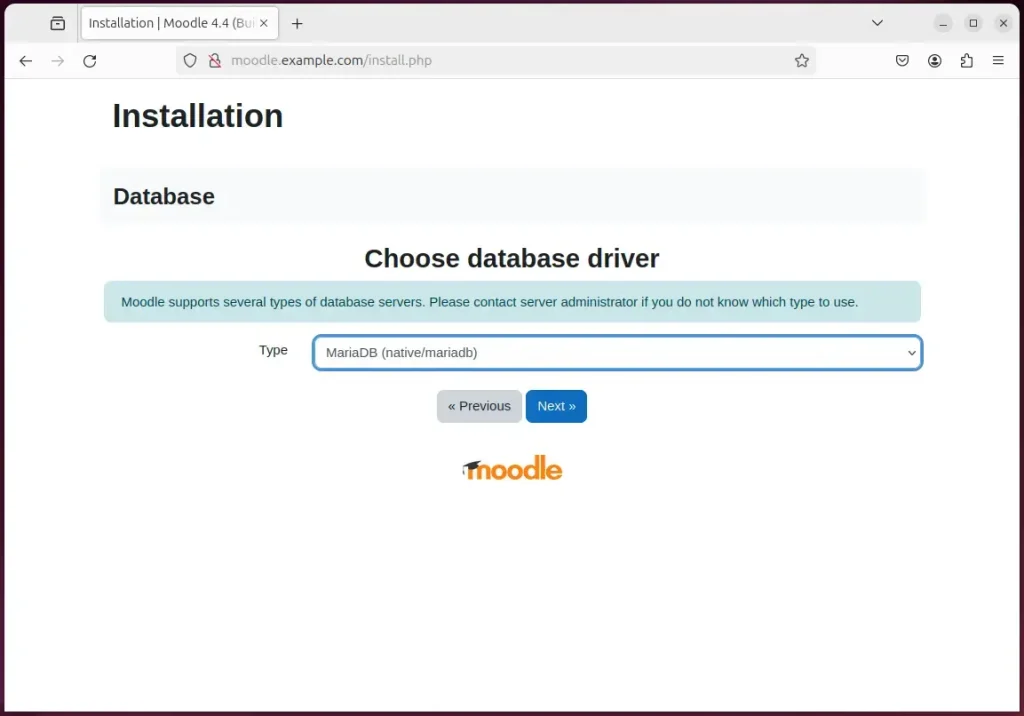
Next, choose a database driver (MariaDB) and continue.
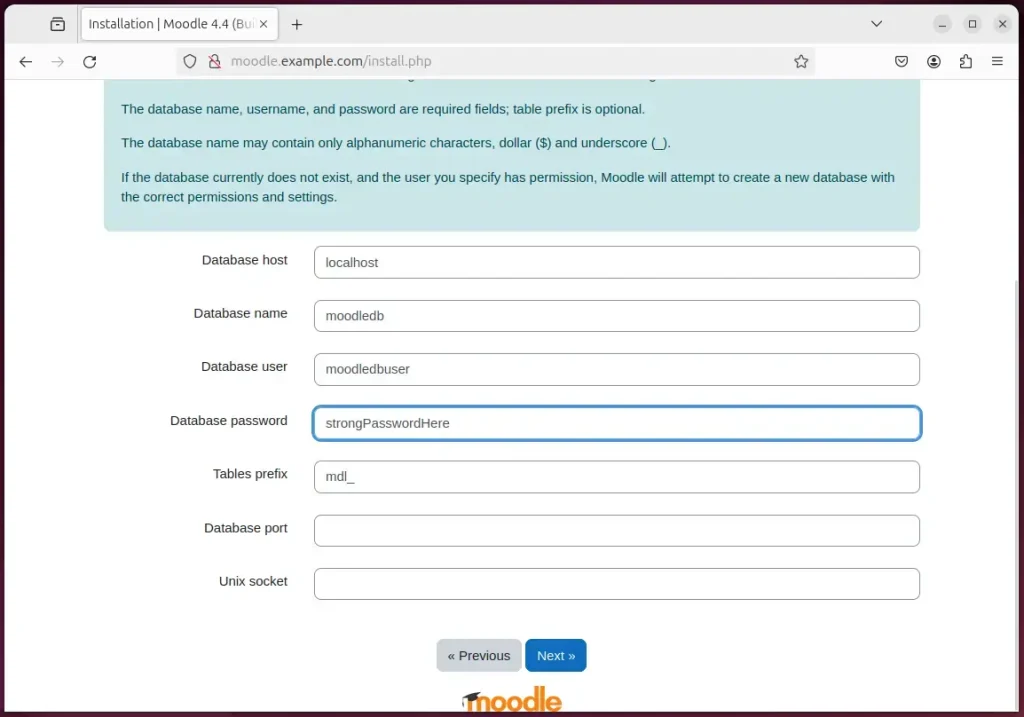
On the next page, type in the database name, username, and password created above and continue.
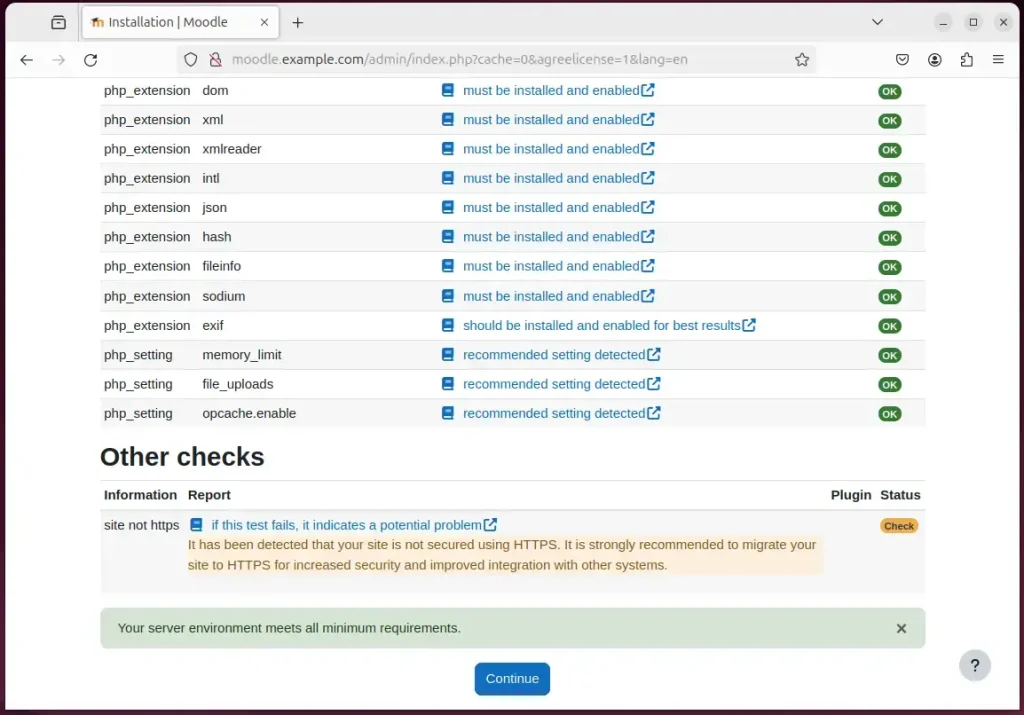
Confirm all requirements are met and continue.
If you get an error message that “max_input_vars” must be at least 5000, run the command below to fix it. Ensure that it is applied to the correct PHP version installed.
sudo sed -i "s/;max_input_vars = .*/max_input_vars = 5000/" /etc/php/8.3/apache2/php.ini
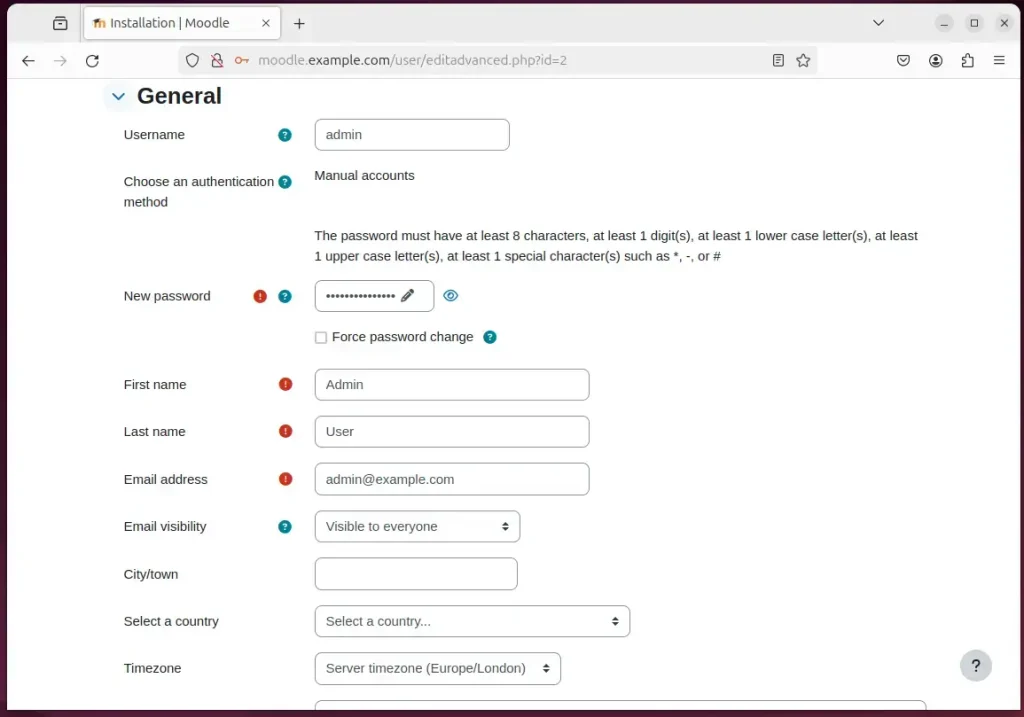
Next, set up your admin account and continue.
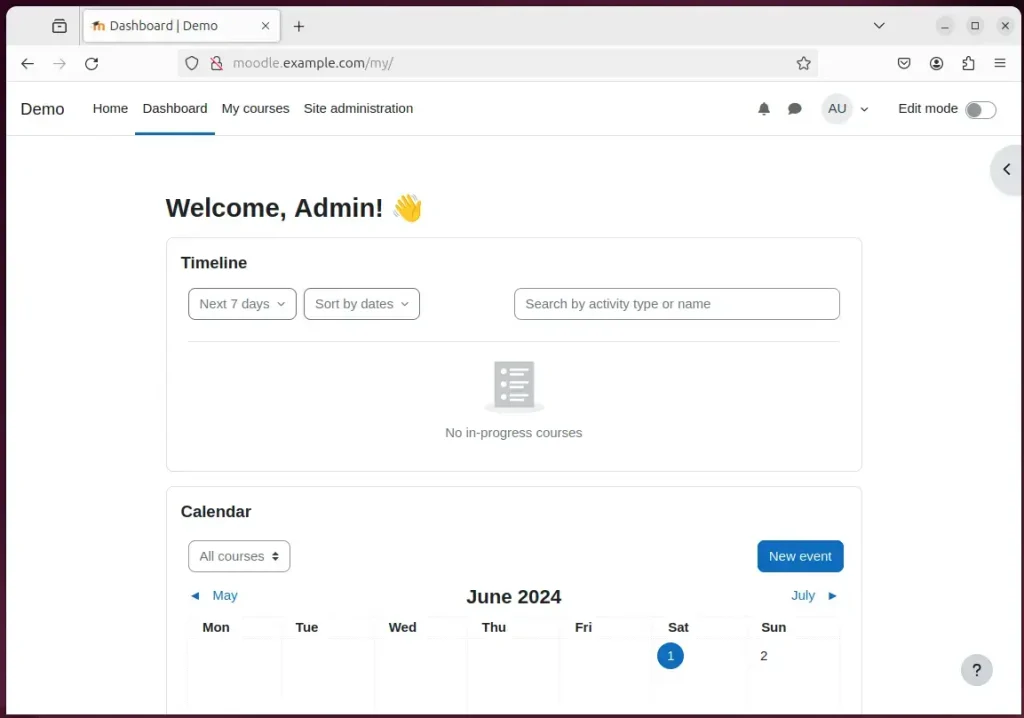
Your Moodle site should be set up and ready to use.
That should do it!
Conclusion:
- This guide provides a comprehensive overview of installing Moodle with Apache support on Ubuntu 24.04. It incorporates essential components like the Apache web server, MariaDB database server, PHP, and Let’s Encrypt SSL/TLS for enhanced security.
- The step-by-step tutorials for each component ensure a thorough understanding of the installation process, enabling users to create a reliable and robust environment for hosting their e-learning content.
- By following these instructions, users can seamlessly set up a Moodle site on Ubuntu, leveraging the capabilities of Apache as the web server, MariaDB as the database server, and PHP for a smooth and versatile web application experience.
- Including additional resources and links for each component further enriches the guide, empowering users to seek further assistance or explore specific aspects of the installation as needed.
- Should readers encounter errors or wish to contribute additional insights, the comments section provides a platform for engaging in meaningful discussions and sharing valuable feedback.


Leave a Reply