How to Install a Language Pack in Windows 11
If you want to use Windows 11 in a different language, you can install a language pack. Installing this changes many parts of Windows, like menus and settings, to that language.
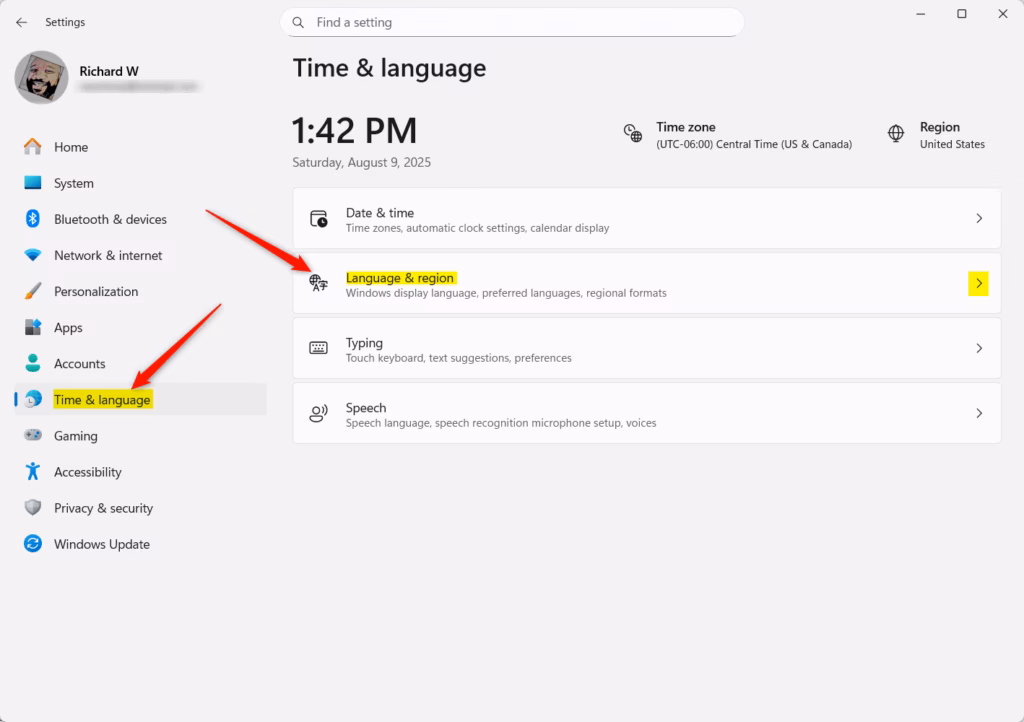
Install a language pack in Windows 11 by going to Settings > Time & language > Language & region. Click “Add a language,” select your desired language, and ensure “Language pack” is checked. Alternatively, click the three dots next to an added language and select “Language options” to download the pack.
What is a Language Pack?
What exactly is a language pack? Think of it as a collection of files that allows Windows to display text in the language you select. Once it’s installed, you can switch core Windows features, like Settings and File Explorer, to that new language.
Important Note
Heads up: If you have the Single Language Edition of Windows 11, you’re limited to just one language. To add more, you’ll need to upgrade to Windows 11 Home or Pro.
How to Install a Language Pack
Option 1Install When You Add a New Language
Installing a language pack in Windows 11 is simple when you’re adding a new language for the first time.- Open Settings by pressing Win + I.
- Go to Time & language > Language & region.
- Click Add a language.
- Search for the language you want and select it.
- When the Install language features window appears, check the box for Language pack if it’s available.
- Click Install.
Option 2Install a Language Pack After Adding a Language
If you’ve already added a language to Windows 11 but didn’t install its language pack, you can easily add it later through the Settings app.
- Open Settings (Win + I).
- Click Time & language on the left, then choose Language & region on the right.
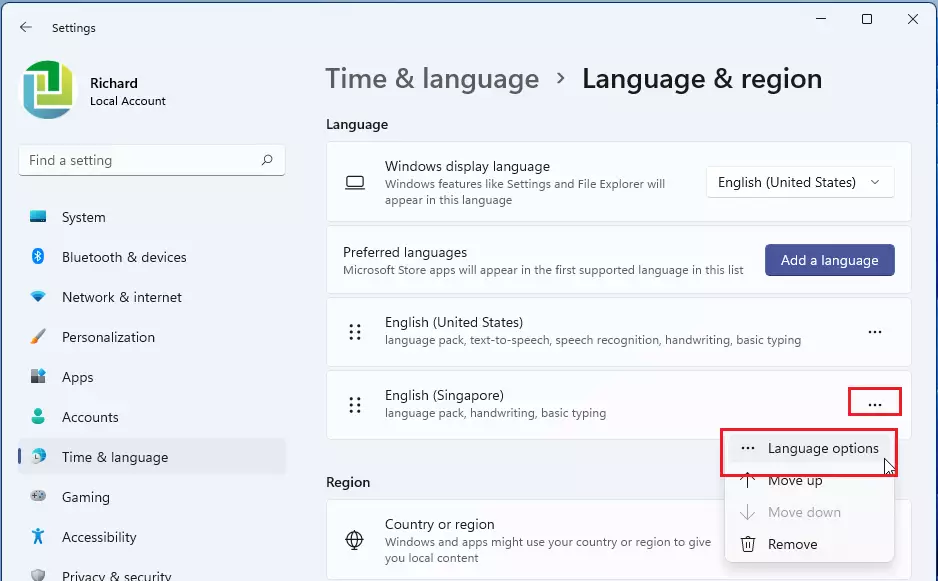
- Under Preferred languages, find the language you want.
- Click the three dots ⋮ next to that language, then pick Language options.
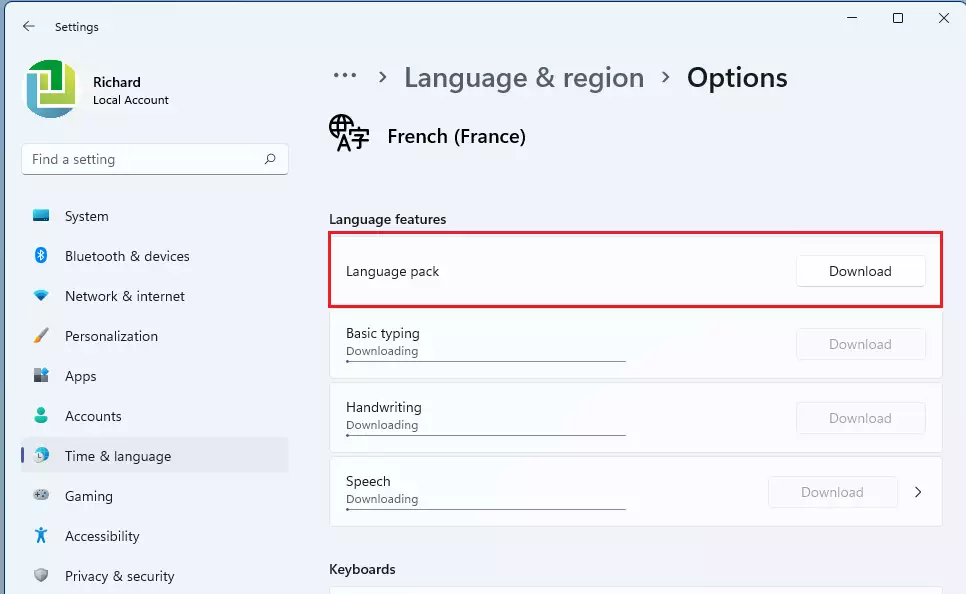
- Look for Language pack in the list. If it’s not installed, you’ll see a Download button next to it.
- Click Download to install the language pack.
Once finished, you can close the Settings window.
Summary
- A language pack lets you use Windows 11 in a language you like.
- It changes text in Windows apps like Settings and File Explorer.
- If you have a Single Language Edition, you can’t add new languages without upgrading.
- You can install language packs while adding a language or later through Settings.
- Always look for the “Language pack” option when installing a new language.
A language pack lets you use Windows 11 in a language you prefer, changing text in apps like Settings and File Explorer.
Helpful Links
- Language Packs for Windows – Microsoft Support
- Manage Language & Keyboard Settings – Microsoft Support
- Download Languages & Voices for Read Aloud – Microsoft Support
How do I install language packs on 🪟 Windows 11?
You can install another language for Windows 11 using the ‘Add a language’ feature. This lets you view menus, dialog boxes, and compatible apps and websites in that new language. Here’s how: Select Start > Settings > Time & language > Language & region.
How to manually install a language pack?
Here’s how to do this. First, right-click on the Start button, usually found at the bottom of your screen on the taskbar. From the list of options that appear, click on ‘Settings’.
Why is my language bar missing?
Method 1: Add or remove Language Bar via Settings app. Press ⊞ Win+I to open Settings. Go to Time & language > Typing > Advanced keyboard settings. Under ‘Switching input methods’: To show the Language Bar, select the checkbox for ‘Use the desktop Language Bar when it’s available’.
Was this guide helpful?

About the Author
Richard
Tech Writer, IT Professional
Richard, a writer for Geek Rewind, is a tech enthusiast who loves breaking down complex IT topics into simple, easy-to-understand ideas. With years of hands-on experience in system administration and enterprise IT operations, he’s developed a knack for offering practical tips and solutions. Richard aims to make technology more accessible and actionable. He's deeply committed to the Geek Rewind community, always ready to answer questions and engage in discussions.

No comments yet — be the first to share your thoughts!