
This article explains how to enable or disable the “Energy saver” feature that lowers the screen brightness when in energy-saving mode in Windows 11.
Energy Saver is a power management feature in Windows that allows you to save power by reducing the amount of power your computer uses when it’s not in use or used at reduced energy usage. This feature is designed to help you conserve energy and extend your laptop’s battery life.
You can turn Energy saver on or off laptops and desktops anytime. This feature can be toggled via Quick Settings in the system tray, even for PCs plugged in to conserve energy.
Users can also turn on the energy-saving feature automatically when the device’s battery reaches a certain level, so they don’t have to trigger it each time manually.
When “Energy saver” is enabled or turned on, it automatically lowers the screen brightness to save power. However, there may be times when you want to use your laptop or desktop at full brightness, even when the energy-saving feature is on. In such cases, you can disable the option to lower the screen brightness with an Energy saver.
Similarly, you may want to enable this option to save more power when your device’s battery is running low.
Lower screen brightness when using energy saver
As mentioned above, your device’s screen brightness will be lowered when an energy saver is enabled.
Here’s how to turn it on or off.
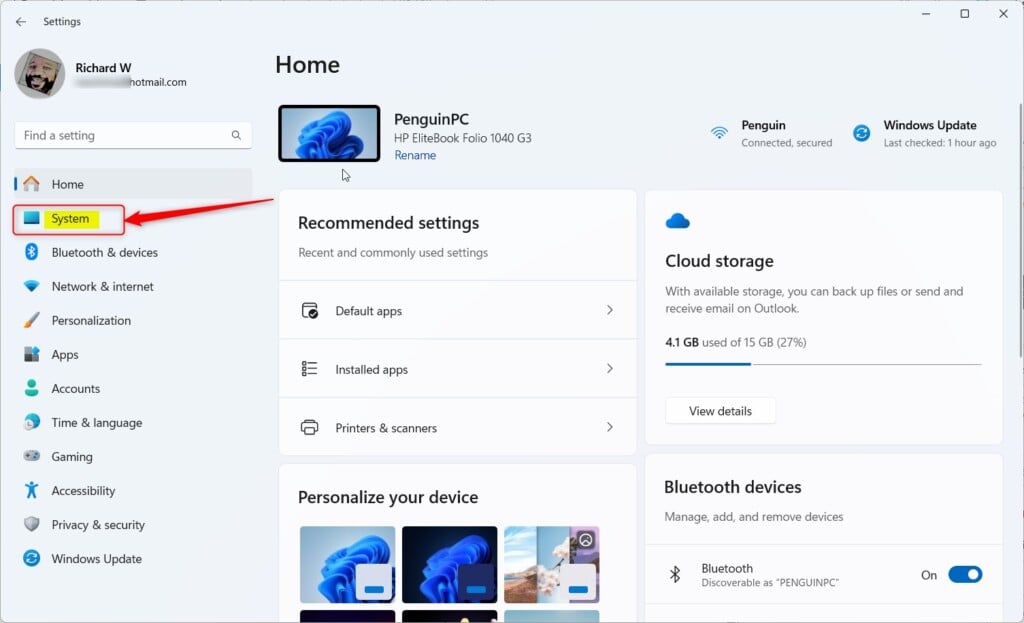
First, open the Windows Settings app.
You can do that by clicking on the Start menu and selecting Settings. Or press the keyboard shortcut (Windows key + I) to launch the Settings app.
When the Setting app opens, click the System button on the left.
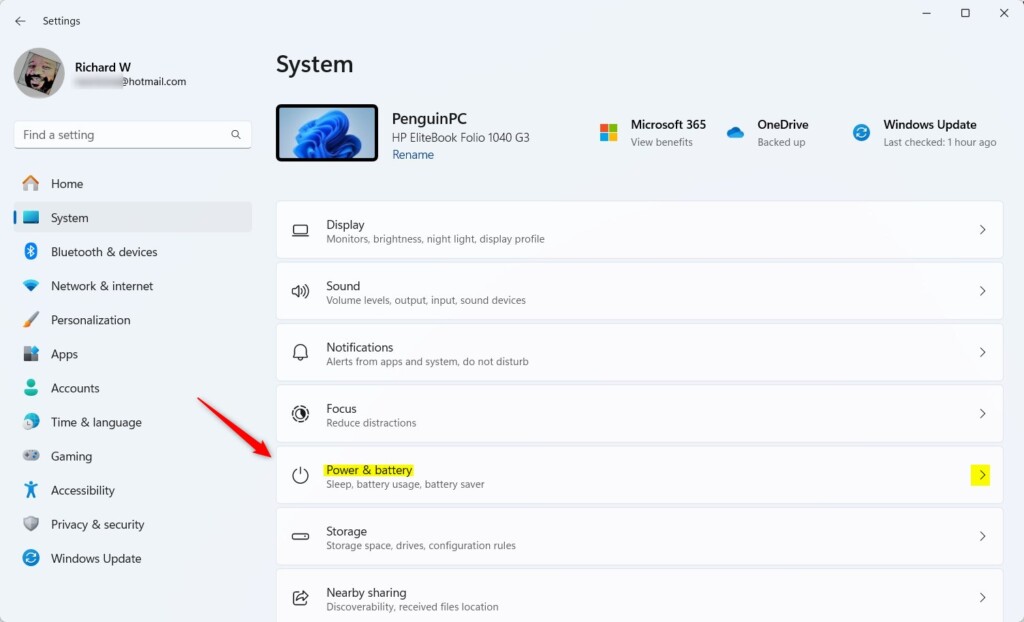
Select the Power & battery or Power tile on the right to expand it.
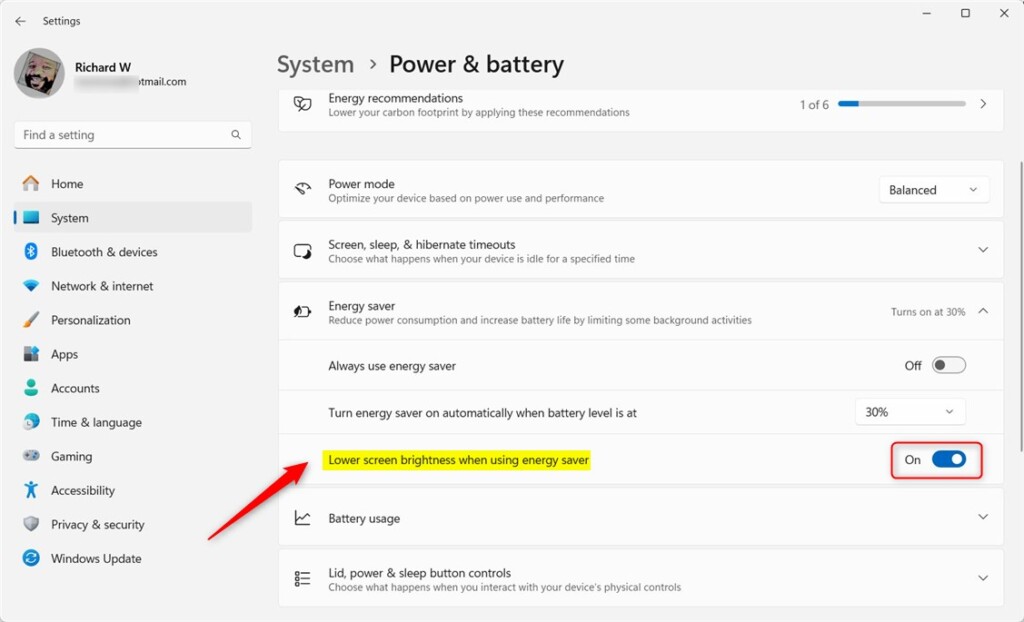
On the Power & battery or Power settings page, expand the Energy saver tile. Then, select the ‘Lower screen brightness when using energy saver‘ tile and toggle the switch button to the On position to enable it.
To disable it, toggle the switch button to the Off position.
When you’re done, exit the Settings app.
That should do it!
Conclusion:
- Enabling or disabling the “Lower screen brightness when using energy saver” feature in Windows 11 can help you customize power-saving settings based on your preferences.
- You can efficiently manage your device’s power consumption and battery life by following the abovementioned steps.
- Feel free to utilize the comments section below the article for any feedback, corrections, or additional information.


Leave a Reply