This article explains how to enable or disable File History in Windows 11.
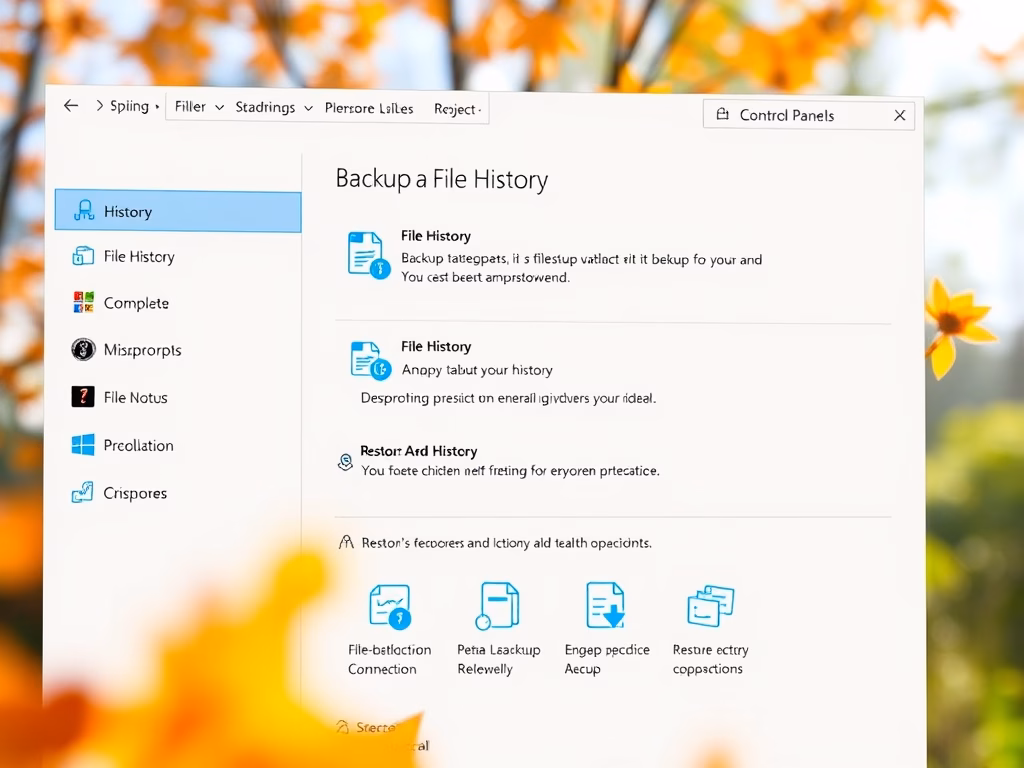
File History is a built-in Windows backup tool to back up all folders in a user’s home directory and files, including documents, music, pictures, videos, and desktops.
In cases where the original files are lost or damaged, users can then use the backup versions created by File History to restore them. File History also allows you to browse a backup timeline, select the version you want, and fix it.
By default, File History backs up all the files and folders in a user’s home directory (C:\Users\Username). You can also include additional folders and locations to backup.
File History is automatically not enabled when there are no suitable backup locations. You can only back up to an externally connected drive, such as a USB drive, or save to a network drive. File History will not be used if none of these locations are available.
Read our previous post on how to Backup Windows 11.
How to turn off File History on Windows 11
If you want to turn off File History on Windows 11, use the steps below.
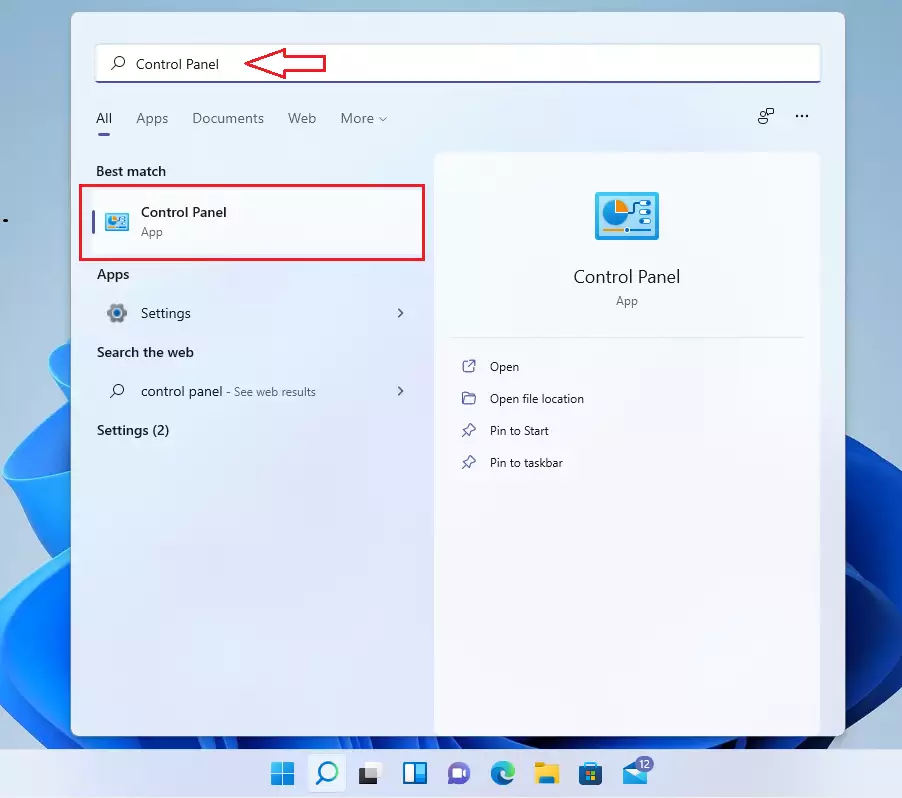
Go to the Start menu, search for the Control Panel app, and open it.
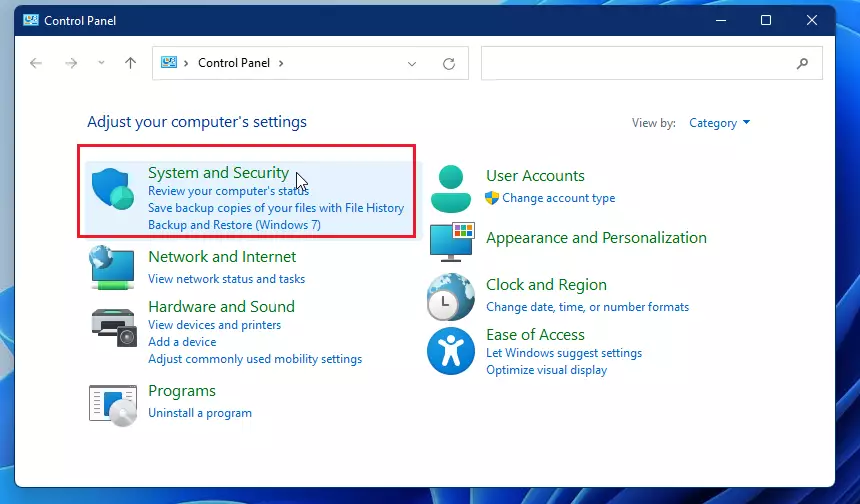
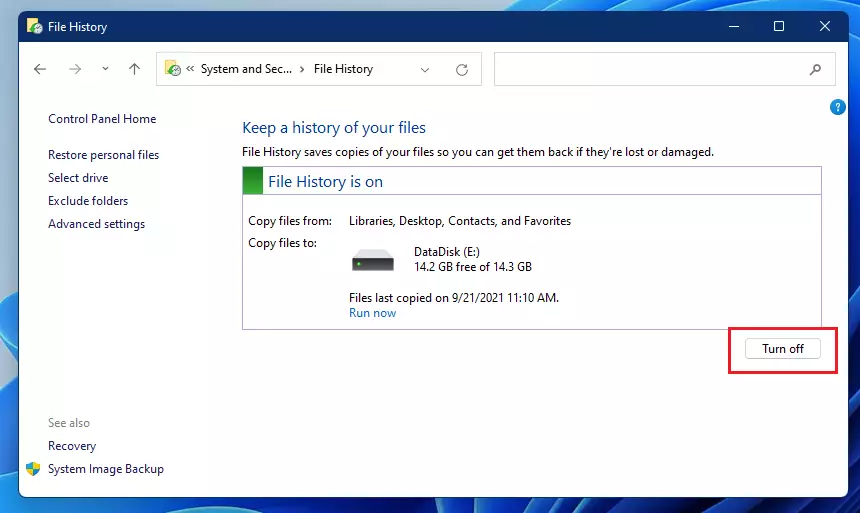
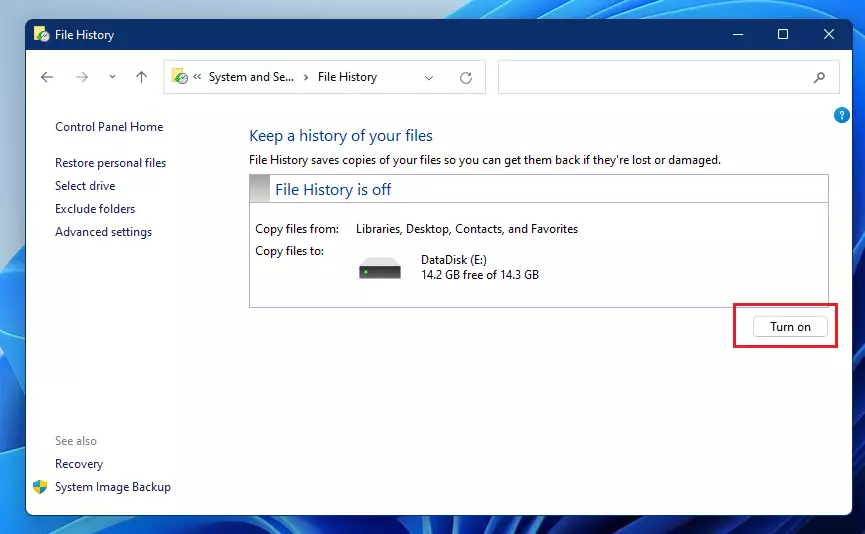
When the Control Panel opens, go to the System and Security category group.
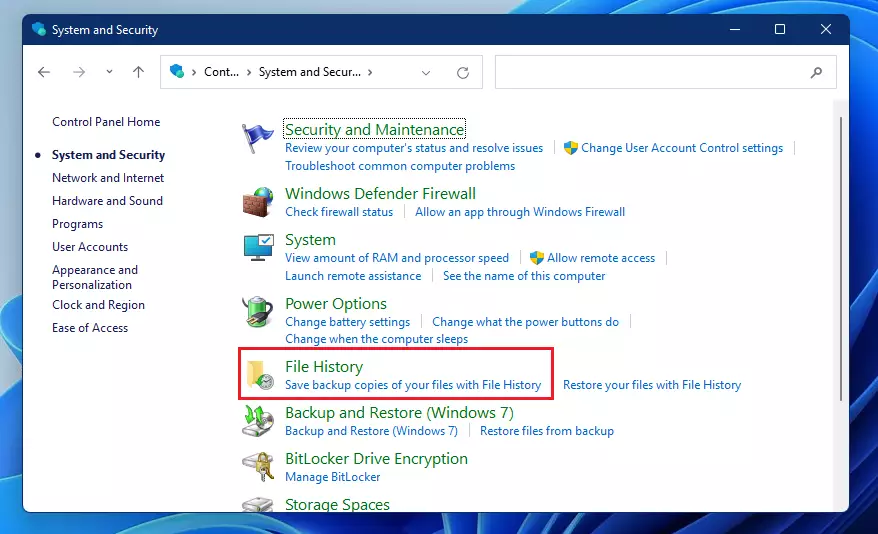
Next, click on File History, as highlighted below.
Click the Turn off File History button on the File History settings pane.
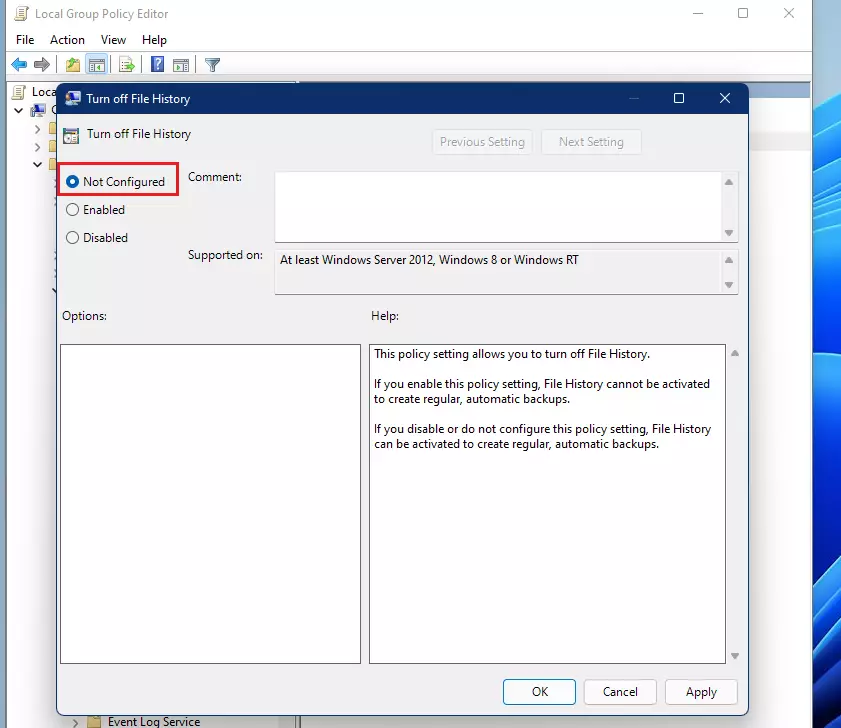
How to turn off File History via local group policy
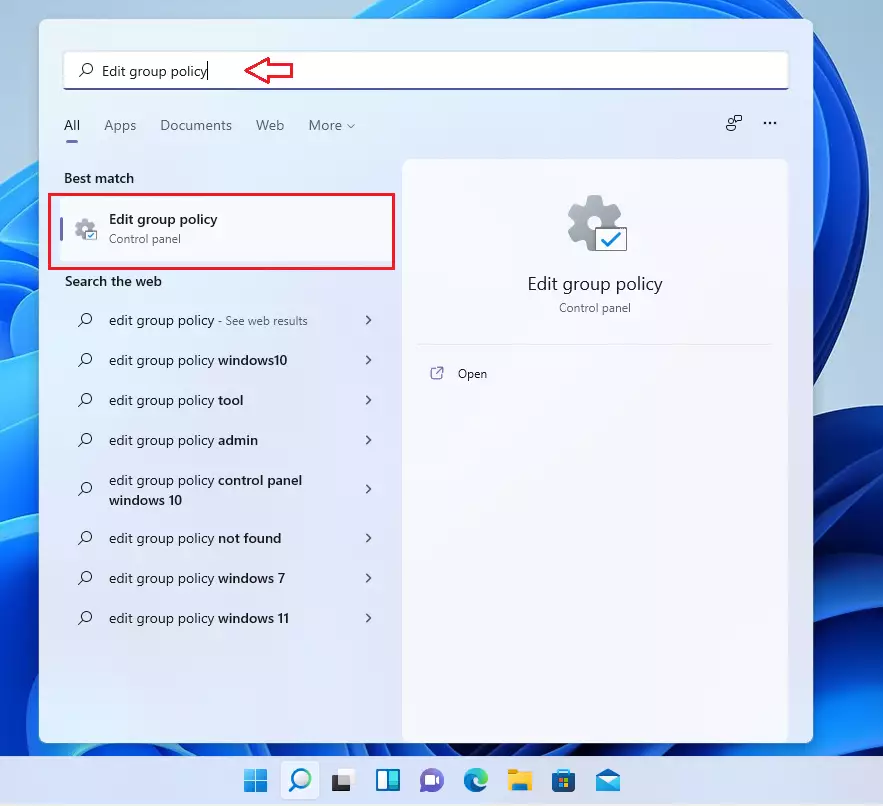
Users can also turn off File History via the local group policy editor. To get there, click on the Start menu, then search for and open the Edit group policy.
When the local group policy editor opens, navigate to the folder paths below:
Computer Configuration\Administrative Templates\Windows Components\File History
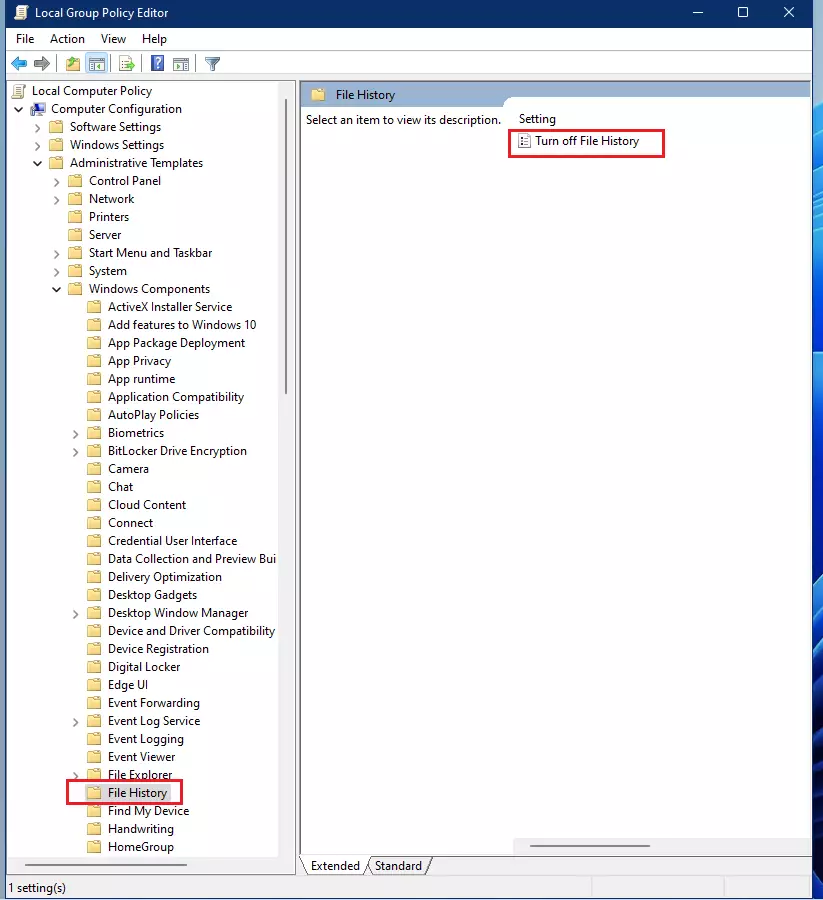
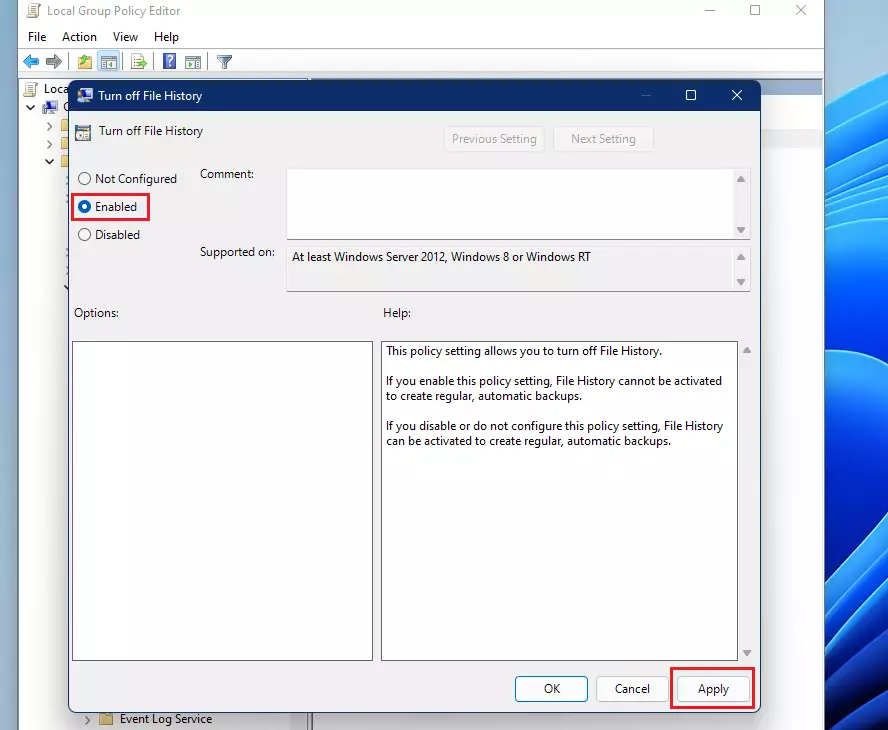
Double-click the Turn off File History settings on the right to open. When the settings open, check the box next to Enable to disable File History.
How to enable File History on Windows 11
If you change your mind about File History and you want to re-enable File History, reverse the steps above. If disabled in group policy, navigate to the File History settings and check the box next to Not Configured.
Next, go to the Control Panel, System and Security category ==> File History, and click the Turn on File History button.
That should do it!
Conclusion:
- File History is an essential backup tool in Windows 11, allowing users to save copies of their important files automatically.
- Users can easily turn File History on or off through the Control Panel or the local group policy editor, giving them flexibility based on their backup needs.
- Enabling File History ensures that valuable files such as documents, music, pictures, and videos are safeguarded against accidental loss or damage.
- Reviewing and adjusting File History settings can help maintain optimal backup performance and security.
- For further information, consider exploring additional resources and guides on Windows 11 backup strategies.


Leave a Reply