How to Empty the Recycle Bin in Windows 11
When you delete files or folders on your Windows 11 computer, they don’t disappear immediately. Instead, they go to a special place called the Recycle Bin. This lets you get them back if you change your mind. But to free up space and keep your computer running smoothly, you’ll want to empty the Recycle Bin regularly.
The Recycle Bin acts like a trash can. It holds deleted files until you decide to remove them forever.
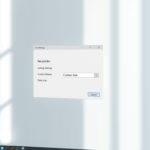
Note: If you have more than one drive (like a second hard drive or a USB stick), each may have its own Recycle Bin. Usually, USB drives don’t have a Recycle Bin, but you can enable it if you wish.
Right-click the Recycle Bin icon on your desktop and select “Empty Recycle Bin.” Alternatively, open the Recycle Bin, click “Empty Recycle Bin” in the top menu, and confirm your choice.
Why Should You Empty the Recycle Bin?
- Free up space: Files in the Recycle Bin still take up storage on your computer.
- Speed up your PC: More free space can help your computer work better.
- Protect your privacy: Permanently deleting files stops others from recovering sensitive information.
How to Empty the Recycle Bin in 🪟 Windows 11
Here are a few ways to empty your Recycle Bin:
1From Your Desktop
Most Windows computers have the Recycle Bin icon on the desktop.
- Find the Recycle Bin icon on your desktop.
- Right-click on the icon.
- Click Empty Recycle Bin from the menu that appears.
- A message will pop up asking if you want to delete the files permanently. Click Yes.
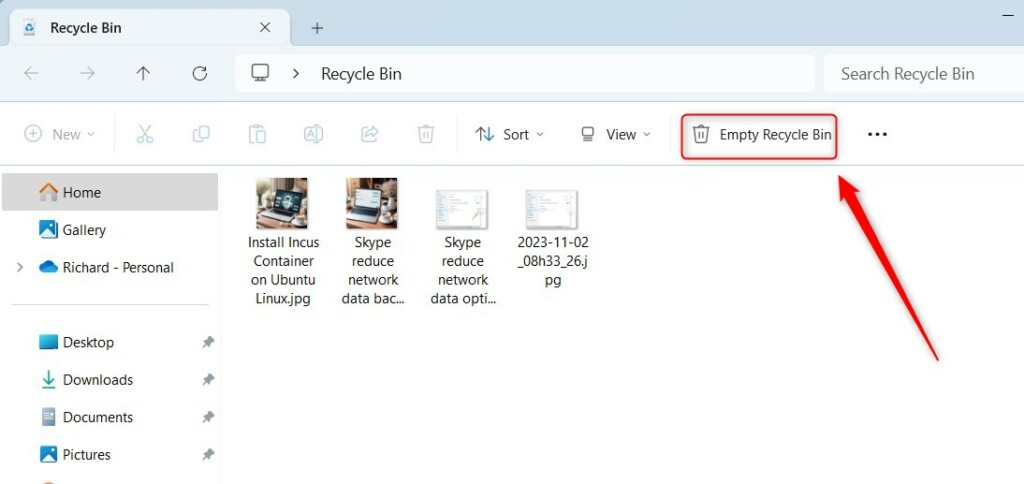
2From File Explorer
If you can’t find the icon or prefer another way, here’s what to do. First, double-click the Recycle Bin on your desktop to open it. If it’s not there, open File Explorer and type ‘Recycle Bin’ in the address bar. Once it’s open, look at the top menu and click ‘Empty Recycle Bin’.
- Double-click the Recycle Bin on your desktop to open it. If it’s not there, open File Explorer and type Recycle Bin in the address bar.
- Once open, look at the top menu and click Empty Recycle Bin.
- Confirm by clicking Yes when asked.
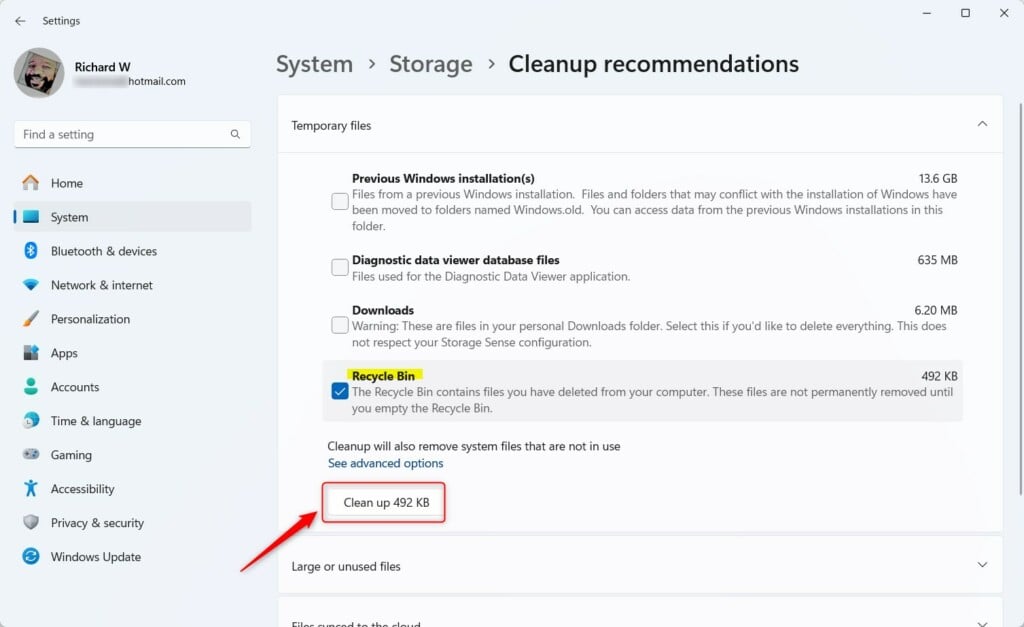
3Using Storage Settings
You can also empty the Recycle Bin using Windows 11’s built-in storage tools:
- Click the Start Menu (Windows icon) and select Settings.
- Go to System > Storage.
- Click on Cleanup recommendations.
- Find the Recycle Bin section and click the Clean up button.
4Using PowerShell (Advanced)
If you like using commands, you can empty the Recycle Bin for all drives with this method:
- FLAG: Admin privileges required. Open Open Windows PowerShell (type “PowerShell” in the Start menu search, then right-click and select Run as administrator).
- Copy and paste this command, then press Enter:
Clear-RecycleBin -force -ErrorAction:Ignore
Copy and paste the following command, then press Enter: This action will empty the Recycle Bin for all drives without asking for confirmation.
If you want to empty the Recycle Bin on a specific drive (like drive C:), use this command instead:
Clear-RecycleBin -DriveLetter C -force -ErrorAction:IgnoreSummary
- Emptying the Recycle Bin helps free up space on your Windows 11 PC.
- It makes your computer run better and protects your privacy.
- You can empty it from the Desktop, File Explorer, Storage settings, or using PowerShell commands.
- By making it a habit to empty your Recycle Bin, you’ll keep your computer tidy and running smoothly!
Was this guide helpful?

About the Author
Richard
Tech Writer, IT Professional
Richard, a writer for Geek Rewind, is a tech enthusiast who loves breaking down complex IT topics into simple, easy-to-understand ideas. With years of hands-on experience in system administration and enterprise IT operations, he’s developed a knack for offering practical tips and solutions. Richard aims to make technology more accessible and actionable. He's deeply committed to the Geek Rewind community, always ready to answer questions and engage in discussions.
No comments yet — be the first to share your thoughts!