How to Enable or Disable Touchscreen in Windows 11
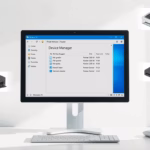
You enable or disable your Windows 11 touchscreen through Device Manager.
Device Manager is a core Windows tool that allows you to control and manage all the hardware connected to your PC. Disabling the touchscreen prevents accidental inputs, which is incredibly useful when you are typing or if your device gets bumped unexpectedly.
This method works reliably on most Windows 11 laptops and all-in-one PCs equipped with touch functionality, offering a quick way to toggle the feature as needed.
Open Device Manager, expand Human Interface Devices, right-click “HID-compliant touch screen,” and select Disable device. To re-enable, right-click the same device and choose Enable device.
Why Turn Off Your Touchscreen?
You might want to turn off your touchscreen for a few reasons. It can stop accidental touches while you type. It can also be helpful if you have pets or kids who might touch the screen. You might prefer using a mouse and keyboard.
What Happens When You Turn It Off?
When you turn off your touchscreen, it will stop responding to your taps and swipes. Your computer will no longer detect any touch input. This means you will need to use a mouse, keyboard, or other input devices to interact with your computer.
Step 1Open Device Manager
Opening Device Manager is the first step to managing your computer’s hardware, including your touchscreen.
- Right-click on the Start button (the Windows logo in the bottom-left corner).
- From the menu that appears, choose Device Manager.
- If you don’t see it, you might need to search for “Device Manager” in the Windows search bar.
Admin Privileges Required: This step does not require admin privileges.
Step 2Find Your Touchscreen
Once Device Manager is open, you need to locate your touchscreen, which is usually listed under ‘Human Interface Devices’.
- Look for a category called Human Interface Devices.
- Click the small arrow next to it to see all the devices in that category.
Warning: Be careful not to turn off the wrong device! It’s unlikely to cause big problems if you disable the wrong thing, but following these steps helps avoid issues with your keyboard or mouse.
Step 3Turn Off the Touchscreen
To disable your touchscreen in Windows 11, find the ‘HID-compliant touch screen’ option under ‘Human Interface Devices’ and right-click it.
- Right-click on HID-compliant touch screen.
- A menu will pop up. Click on Disable device.
- A message will ask if you are sure. Click Yes.
Right-click it, then click ‘Disable device’ from the menu that appears. You’ll see a confirmation message; click ‘Yes.’ That’s it! Your touchscreen should now be off. Try tapping or swiping the screen – nothing should happen.
Admin Privileges Required: This step requires admin privileges.
Step 4What If There’s More Than One?
Sometimes, you might see more than one ‘HID-compliant touch screen’ listed in Device Manager.
- If you see duplicates, repeat Step 3 for each one.
- Right-click on each duplicate and select Disable device.
Tip: If you’re not sure which one is the main touchscreen, disabling all of them is usually safe. If one doesn’t work, you can always try another.
Step 5Turn Your Touchscreen Back On
If you want to turn your touchscreen back on in Windows 11, you’ll need to go back to Device Manager and find the disabled device.
- Go back to Device Manager (follow Step 1).
- Expand the Human Interface Devices category (follow Step 2).
- Find the HID-compliant touch screen device you disabled. It might have a small down-arrow icon on it.
- Right-click on the disabled touchscreen device.
- Select Enable device from the menu.
Your touchscreen should now work again.
Admin Privileges Required: This step requires admin privileges.
Summary
Turning off your Windows 11 touchscreen is a quick process. You can disable it in Device Manager if it gets in the way. This helps prevent accidental touches. You can also turn it back on whenever you want.
Was this guide helpful?

About the Author
Richard
Tech Writer, IT Professional
Richard, a writer for Geek Rewind, is a tech enthusiast who loves breaking down complex IT topics into simple, easy-to-understand ideas. With years of hands-on experience in system administration and enterprise IT operations, he’s developed a knack for offering practical tips and solutions. Richard aims to make technology more accessible and actionable. He's deeply committed to the Geek Rewind community, always ready to answer questions and engage in discussions.


No comments yet — be the first to share your thoughts!