How to Disable Touchscreen on Windows 11
Many modern laptops have touchscreens. You might prefer using only a mouse and keyboard instead. If you keep tapping your screen by mistake, this guide will help you turn it off.
Why Disable Your Touchscreen?
You might want to turn off your touchscreen to prevent accidental clicks. It is also helpful if your screen is damaged and causing “ghost touching” issues that interfere with your work. Disabling the touch input allows you to use your laptop like a standard computer without unexpected interruptions.
What Happens When Done?
Once you complete these steps, your computer will no longer react when you touch the screen. You will have to use your mouse or keyboard for all navigation. Your hardware remains safe, and you can turn the feature back on at any time by following these same steps and choosing “Enable device.”
Method 1: Using Device Manager
There is no physical button to turn off touch controls, so we will use the Windows Device Manager. Note: You will need administrative privileges to make these changes.
1. Open your Settings menu. You can do this by pressing Windows key + I on your keyboard or by clicking Start %%LNK0%% and selecting Settings.
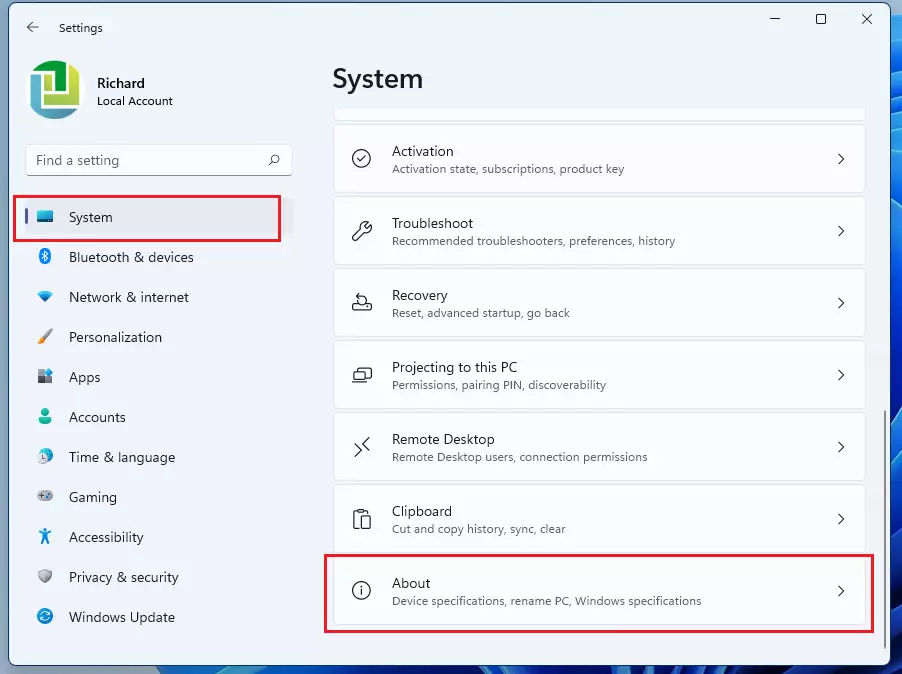
2. In the Settings window, click on System, then scroll down and click on About.
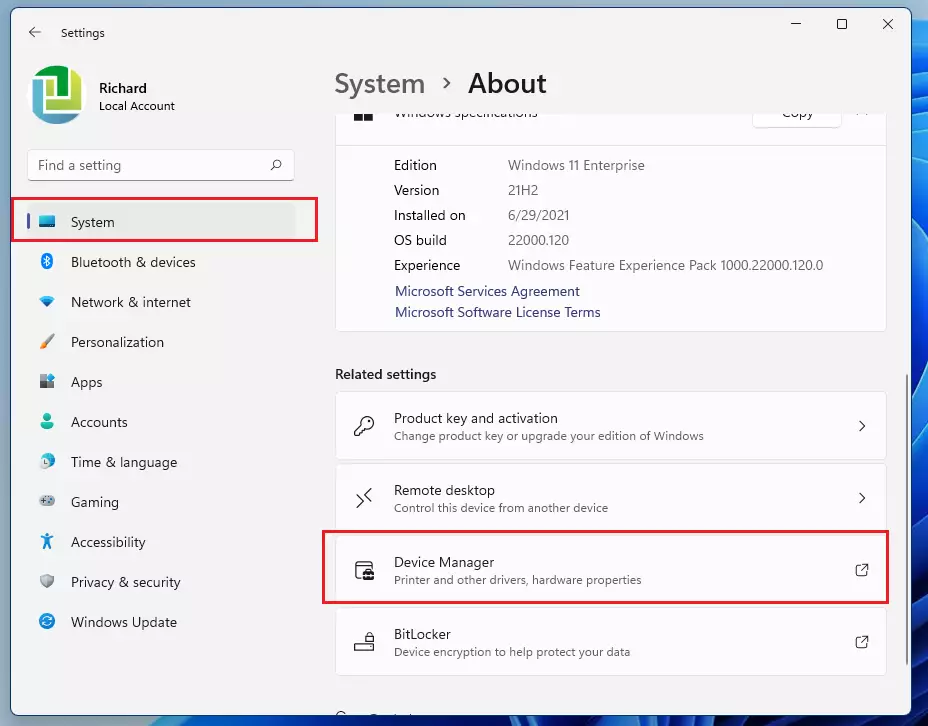
3. Look for the Device Manager link under the “Related settings” section and click it.
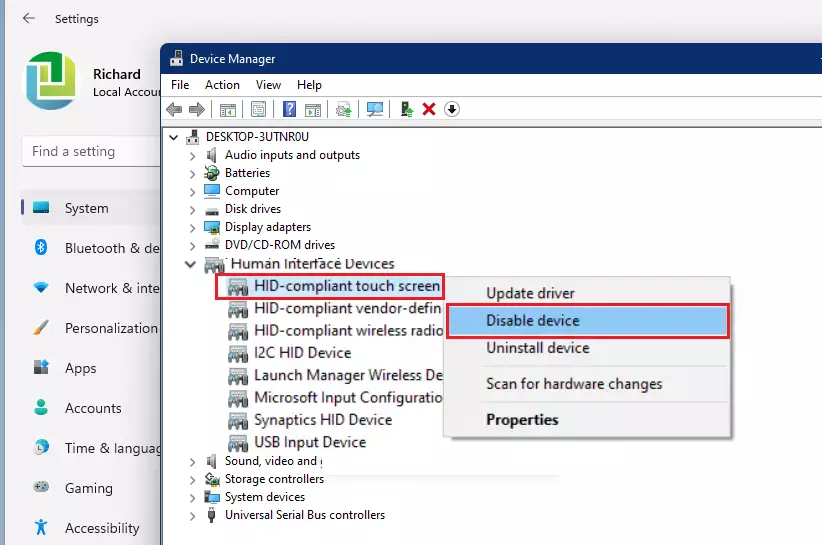
4. In the Device Manager window, look for the section labeled Human Interface Devices and click the arrow next to it to expand the list.
5. Find the item named HID-compliant touch screen. Right-click on it and select Disable device. If you see more than one, disable each one using the same method.
6. Restart your computer to apply the changes.
Method 2: Using PowerShell
Advanced users can use PowerShell to disable the touch driver quickly. Note: This requires administrative privileges.
1. Right-click the Start button and select Terminal (Admin) or PowerShell (Admin).
2. Type the following command to identify your touch device:
Get-PnpDevice | Where-Object {$_.FriendlyName -like "*touch*"}3. Once you identify the device, use this command to disable it:
Disable-PnpDevice -InstanceId "YOUR_INSTANCE_ID_HERE" -Confirm:$false
Troubleshooting and Re-enabling
If you need to re-enable your touch input, return to Device Manager, find the HID-compliant touch screen under Human Interface Devices, right-click it, and select Enable device. If the touchscreen is still not working, check for driver updates by right-clicking the device and selecting Update driver.
Related Articles
Summary
- Disabling the touchscreen prevents accidental inputs and ghost touches.
- You must use the Device Manager or PowerShell to turn off the hardware.
- This process requires administrative access.
- If you have multiple “HID-compliant touch screen” entries, be sure to disable all of them.
- You can re-enable the screen at any time by selecting “Enable device” in the same menu.
Will disabling the touchscreen affect my warranty?
No, disabling the touchscreen through software settings like Device Manager does not void your warranty. It is a standard configuration change that does not physically alter the hardware or damage the internal components of your device.
Why does my touchscreen re-enable after a Windows update?
Windows updates often refresh driver configurations. If the system detects a “new” or updated driver for your HID-compliant device, it may automatically re-enable the touchscreen functionality. You may need to repeat the disable process in Device Manager if this occurs after a major update.
Can I disable the touchscreen on a 2-in-1 laptop permanently?
While you can disable it via software, Windows may re-enable it during updates. For a more permanent solution, you can sometimes disable the touch controller in your BIOS/UEFI settings. Access your BIOS during startup, look for “Integrated Peripherals” or “Touchscreen” settings, and set it to Disabled.
Was this guide helpful?

About the Author
Richard
Tech Writer, IT Professional
Richard, a writer for Geek Rewind, is a tech enthusiast who loves breaking down complex IT topics into simple, easy-to-understand ideas. With years of hands-on experience in system administration and enterprise IT operations, he’s developed a knack for offering practical tips and solutions. Richard aims to make technology more accessible and actionable. He's deeply committed to the Geek Rewind community, always ready to answer questions and engage in discussions.


No comments yet — be the first to share your thoughts!