This article explains turning on or off storing “Activity history” in Windows 11.
Activity history is a feature in Windows 11 that keeps track of the apps and services you use, the files you open, the websites you browse, and other activities you perform on your computer.
It stores this information locally on your device and shares it across other devices if you use a Microsoft account to log in to it.
Turning on or off Activity history in Windows 11 allows you to control whether your computer tracks and stores all your activities on your device, such as the apps and services you use, the files you open, and the websites you browse.
By turning off Activity history, you can prevent Windows 11 from storing your activities on your device, which can help protect your Privacy.
On the other hand, turning on Activity history can be helpful if you want to keep track of your activities and use them to improve your productivity. Ultimately, deciding to turn on or off Activity history depends on your preferences and needs.
How to turn store Activity history on or off
As mentioned, users can turn on or off storing activity history in Windows.
Here’s how to do it.
First, open the Windows Settings app.
Then, select Privacy & security on the left and the Activity history tile on the right to expand it.
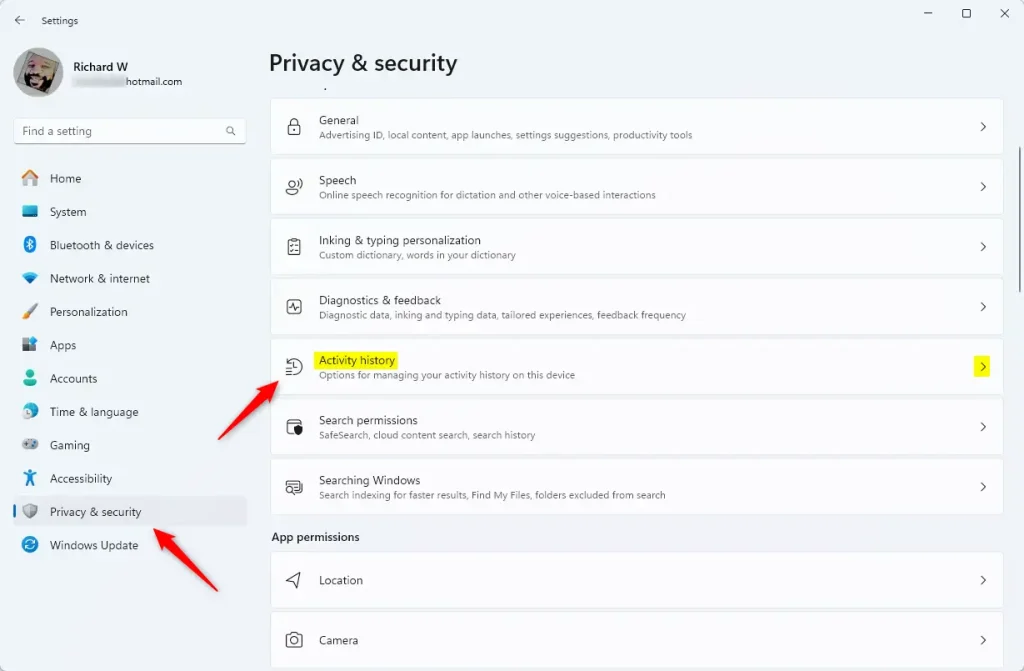
Next, select the “Activity history” tile to expand it. Then, toggle the switch button to the On position to enable it.
To disable it, toggle the button to the Off position.
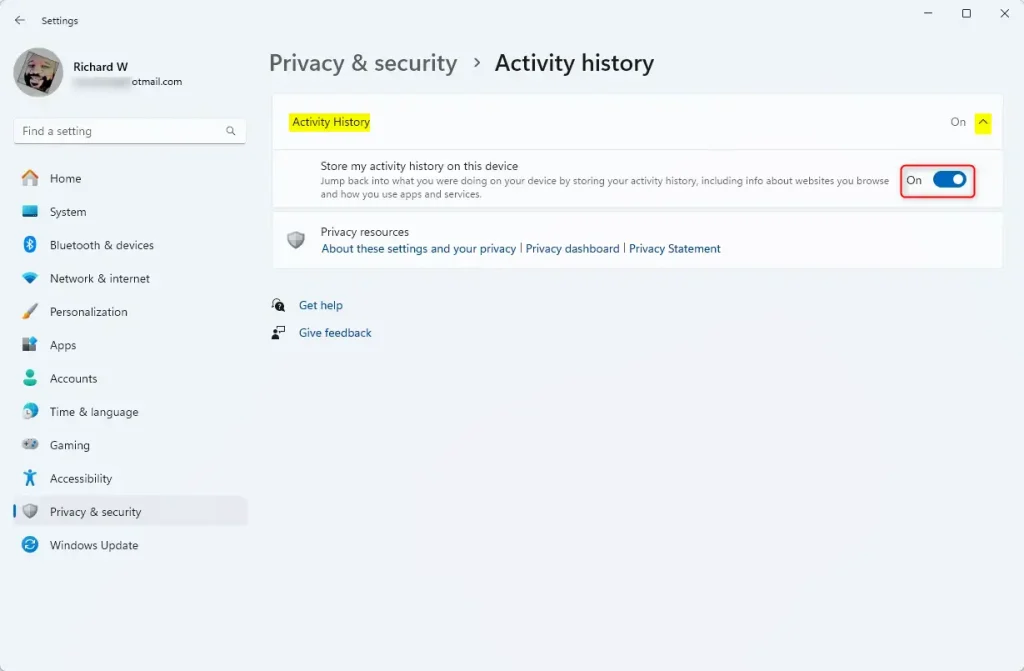
Exit the Settings app when done.
Enable or disable storing Activity history using group policy
Another way to disable or enable “Improve inking and typing” is to use the Local Group Policy Editor.
First, open the Local Group Policy Editor (gpedit.msc). (Search for “Edit group policy”) on the Start menu.
Then, navigate the folders below:
Computer Configuration > Administrative Templates > System > OS Policies
In the Group Policy details pane on the right, locate and double-click the “Allow publishing of User Activities” settings.
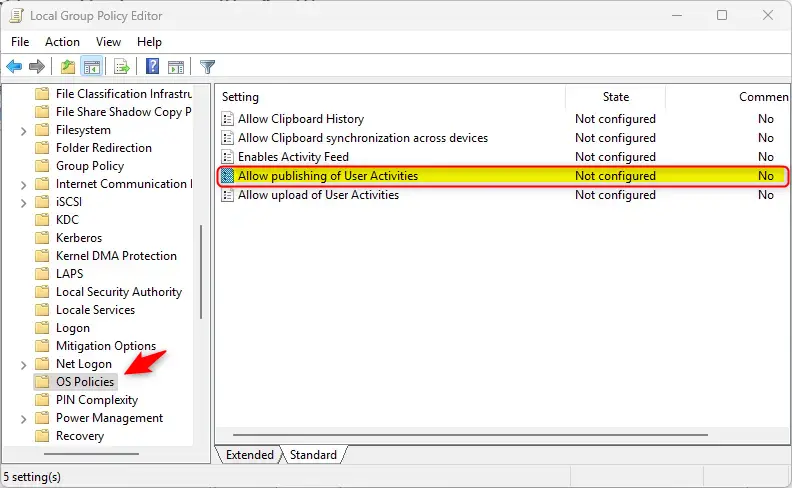
On the “Allow publishing of User Activities” window, set the option to Not Configure, Enabled, or Disabled.
- Not Configured (default)
- Enabled – User Activities are allowed to be published.
- Disabled – User Activities are not allowed to be published.
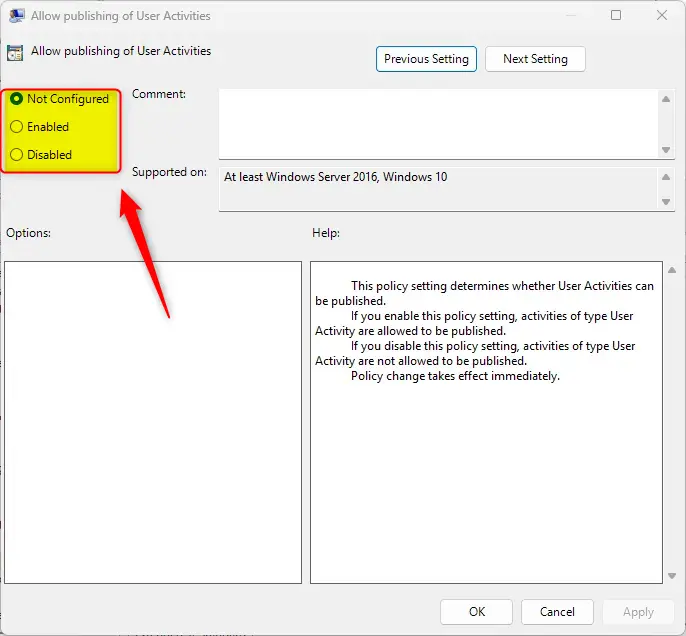
Click OK to save your changes. You may have to reboot your device for the settings to apply.
Turn on or off storing Activity history using the Windows Registry Editor
Yet another way to enable or disable “Inprove inking and typing” is to use the Windows Registry editor.
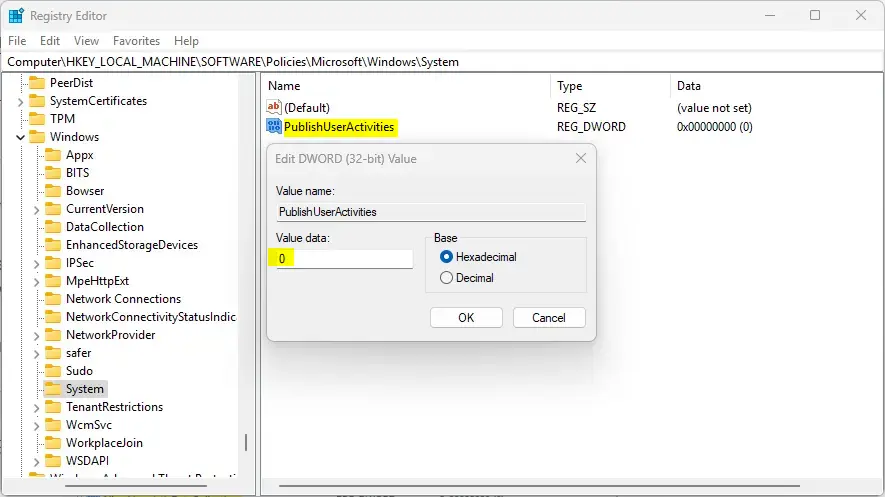
First, open the Windows Registry and navigate to the folder key path below.
Computer\HKEY_LOCAL_MACHINE\SOFTWARE\Policies\Microsoft\Windows\System
Next, double-click the PublishUserActivities (REG_DWORD) name on the System key’s right pane to open it.
Then, enter a value 0 to disable the feature in Windows.
If you do not see the “PublishUserActivities” item, right-click a blank area and create a new DWORD (32-bit) registry item.
Then, enter the name “PublishUserActivities” and enter a value 0
To restore the default behavior and allow the feature, delete the “PublishUserActivities” name created above.
Save your changes and restart your computer.
That should do it!
If you signed in with your Microsoft account and your activity history is synced with other devices, all your activities will be deleted across the different devices.
Conclusion:
- Control over Privacy: Turning off Activity history helps protect your privacy by preventing Windows from tracking your activities.
- Productivity Enhancement: Enabling Activity history can aid in boosting productivity by allowing you to revisit recent activities easily.
- Multiple Configuration Methods: Users can toggle Activity history settings through the Settings app, Local Group Policy Editor, or the Windows Registry Editor.
- Device Synchronization: If you use a Microsoft account, disabling Activity history will delete tracked activities across all synced devices.
- User Preference: Ultimately, the decision to enable or disable Activity history should align with your personal preferences regarding privacy and productivity.

Leave a Reply