

This article explains how to delete Recall snapshots from a specific timeframe in Windows 11.
Recall & Snapshots is an AI feature in Windows 11 that functions like a photographic memory by saving snapshots of your screen. You can then use the Recall feature to quickly search your snapshots and find things you’ve seen on your PC.
The snapshots, copies of your PC’s current state, are securely stored on your PC. Windows sets a maximum storage size for these snapshots, which you can change anytime. Once that maximum is reached, the oldest snapshots are deleted automatically.
You can also manually delete snapshots from a specific timeframe if you’re running out of space. To do that, open the Settings app and navigate to Privacy & security. Select the “Recall & snapshots” page, click “Delete snapshots,” and then choose the snapshots you wish to delete from the past hour, 24 hours, 7 days, or 30 days.
Delete Recall snapshots from a specific timeframe
As mentioned above, users can delete Recall snapshots from a specific timeframe in Windows 11.
Here’s how to do it.
First, open the Windows Settings app.
You can do that by clicking on the Start menu and selecting Settings. Or press the keyboard shortcut (Windows key + I) to launch the Settings app.
When the Setting app opens, click the Privacy & security button on the left.
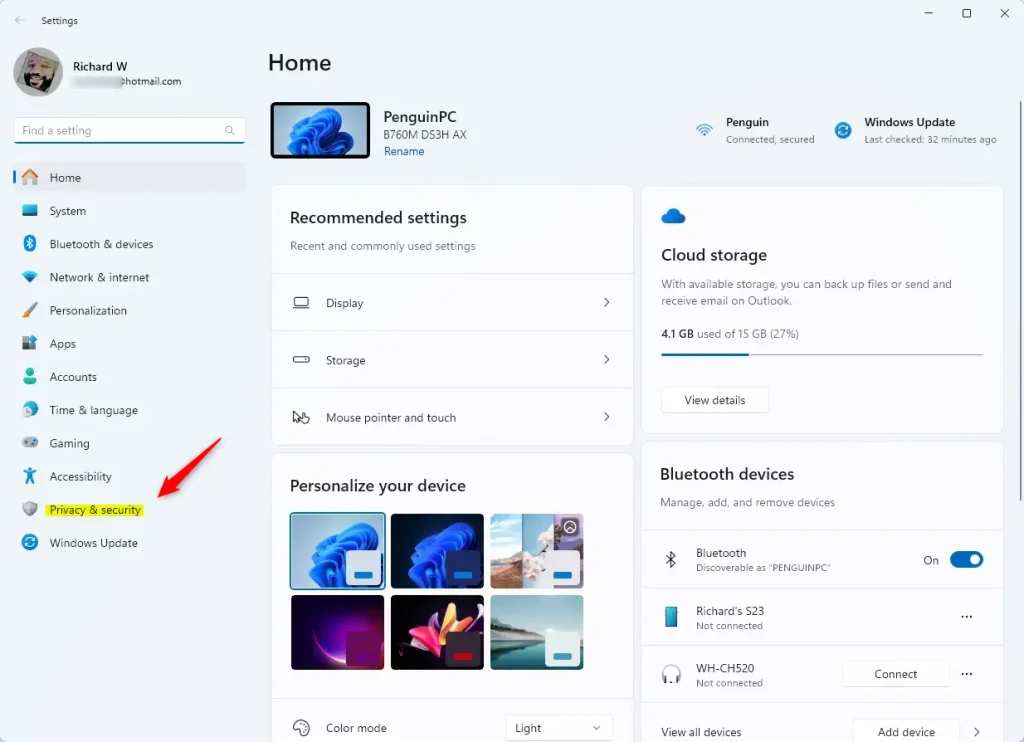
On the right, click the Recall & snapshots page to open its settings and turn on the “Save snapshots” feature.
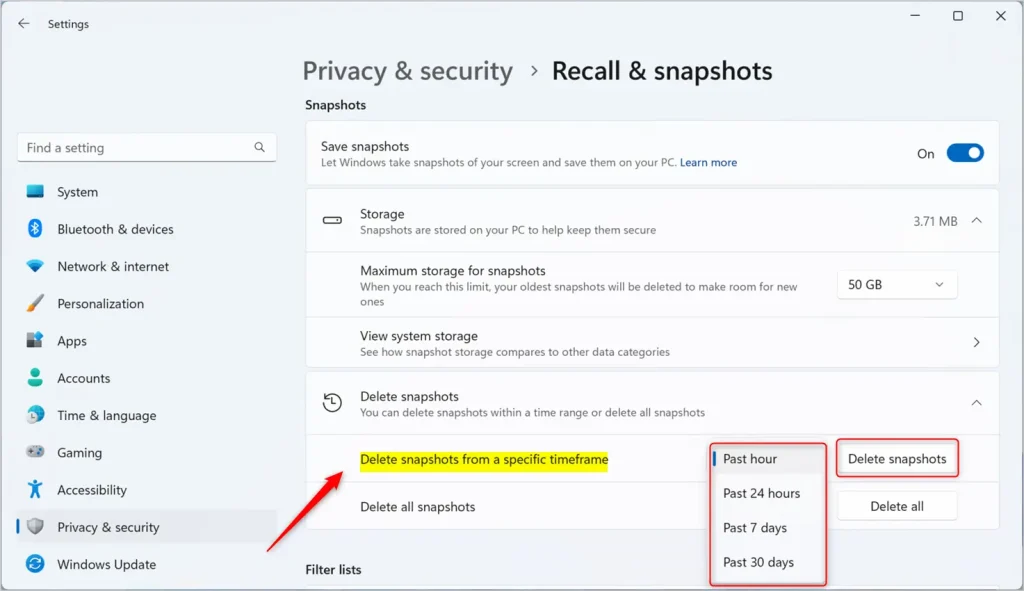
Then, click on Storage – > Delete snapshots to expand the tile, and select the “Delete snapshots from a specific timeframe” tile. Next, click the “Delete snapshots” button, and choose the snapshots you wish to delete.
- Past hour
- Past 24 hours
- Past 7 days
- Past 30 days
That should do it!
Reference:
Conclusion:
- Deleting Recall snapshots from a specific timeframe in Windows 11 gives users control over their stored data.
- By following the simple steps outlined in this guide, users can efficiently manage their saved snapshots and optimize their storage space.
- For more information and additional support, refer to the official documentation provided by Microsoft.
- We hope this article has helped empower you to manage Recall snapshots in Windows 11 effectively.

Leave a Reply Cancel reply