How to Partition a Hard Drive in Windows 11
Partitioning a hard drive means dividing your storage into smaller, separate sections. Think of it like organizing a large room with dividers to keep your items neatly sorted.
Why partition your drive?
Partitioning helps you keep your personal files separate from your system files. If your operating system runs into a problem, your important data in a separate partition stays safer. It also makes your computer easier to organize.
What happens when you are done?
Once you finish, you will see a new drive letter appear in your File Explorer. This new space will act just like a separate hard drive, ready for you to save files and folders.
How to create a partition in Windows 11
You can manage your storage using the built-in Disk Management tool. Note: These steps require administrator privileges.
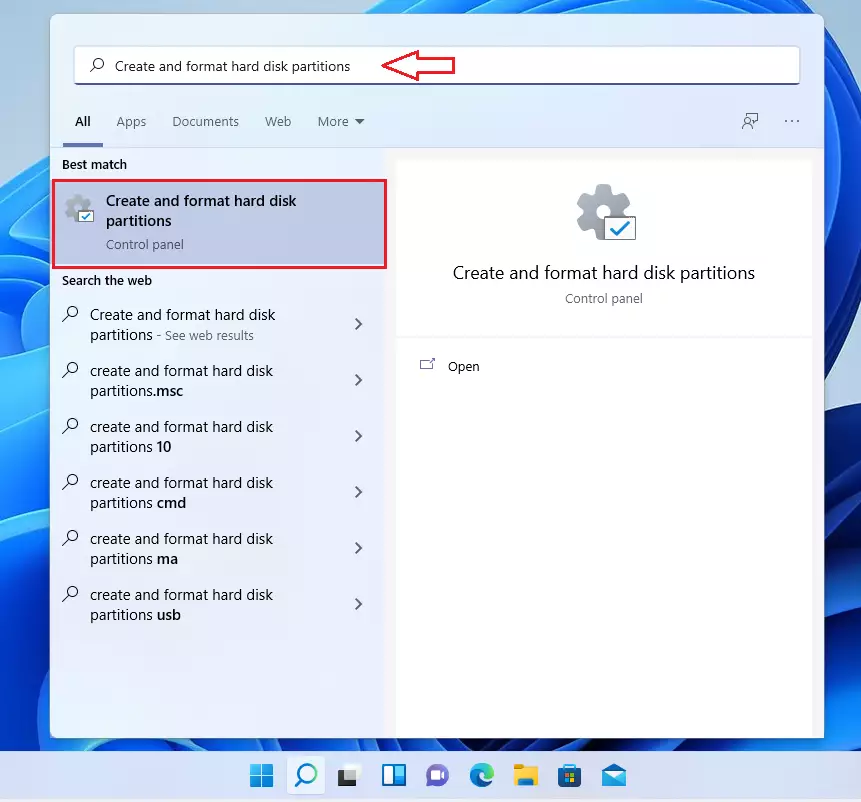
- Click the Start menu and type
Create and format hard disk partitions. - Select the result that matches to open the tool.
The tool will show your current drives. If a drive is new, it will be labeled as Unallocated or Not Initialized.
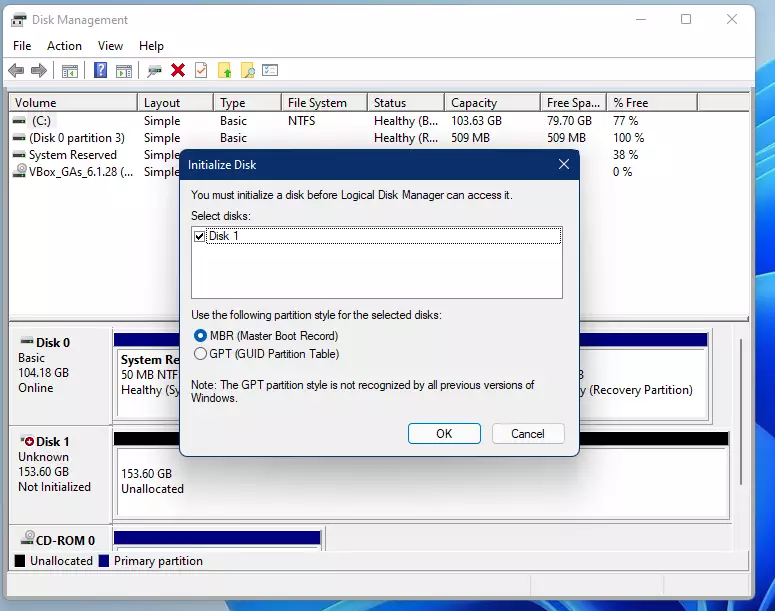
If prompted to initialize a new disk, click OK. You can choose the GPT style if your drive is larger than 2 TB, or stick with the default MBR for standard use.
How to create a new simple partition
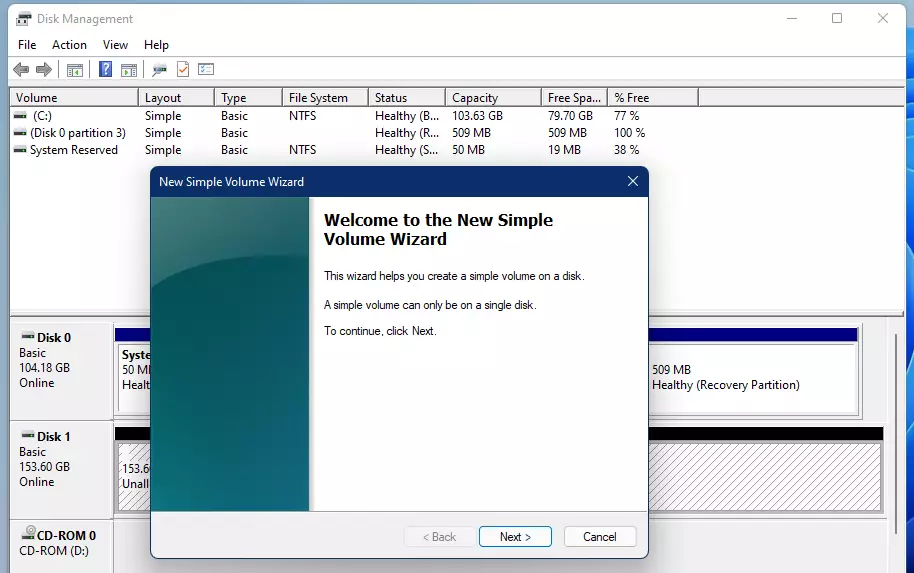
- Right-click the area labeled
Unallocatedon your drive. - Select New Simple Volume from the menu. %%LNK0%%

- A wizard will appear. Click Next to start.
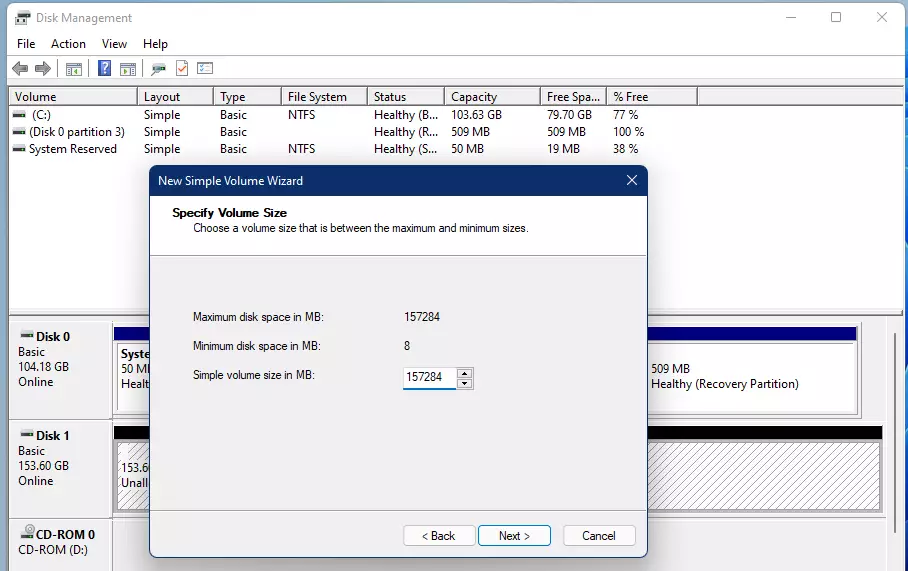
- Choose how big you want the partition to be. The default uses all available space. If you want multiple sections, type a smaller number in MB.
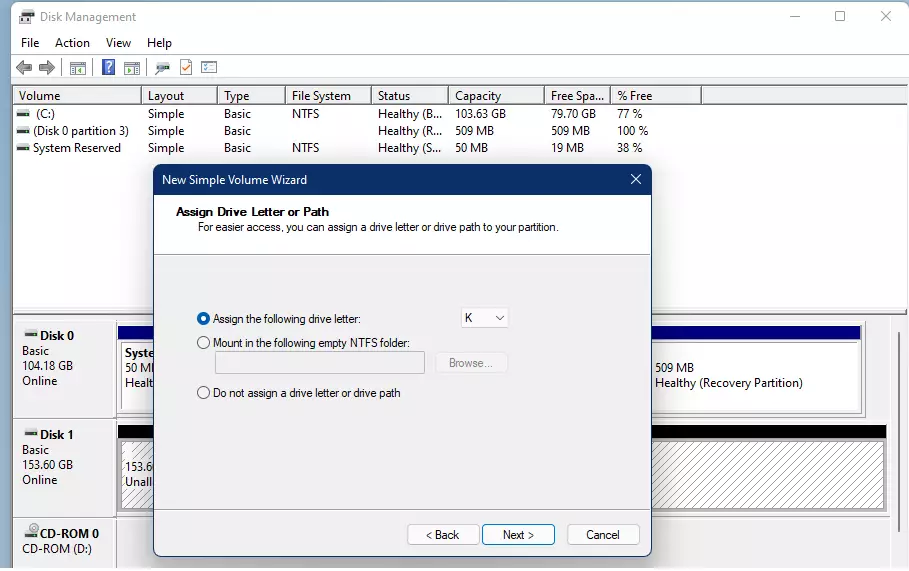
- Pick a drive letter for your new section and click Next.
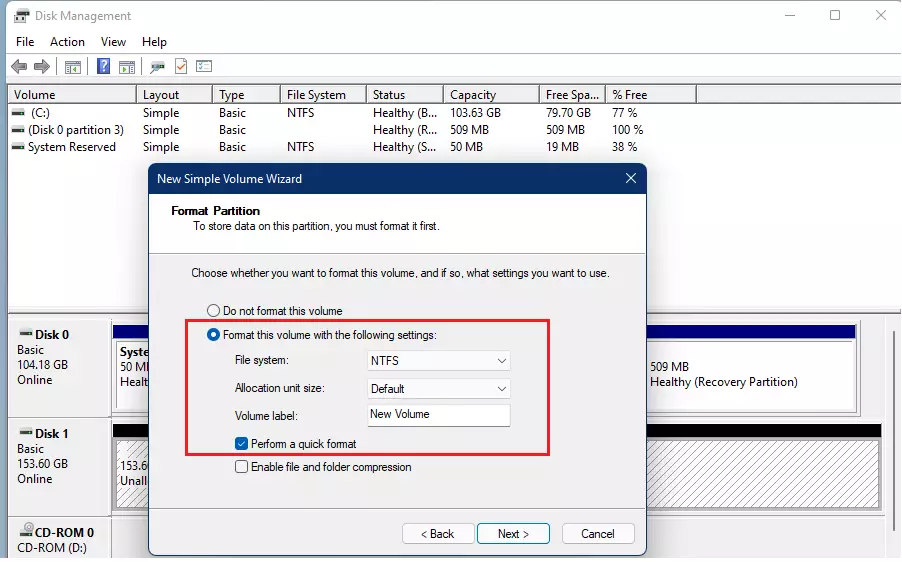
- Make sure the format is set to NTFS. You can give the partition a name here if you like. Click Next.
- Click Finish.
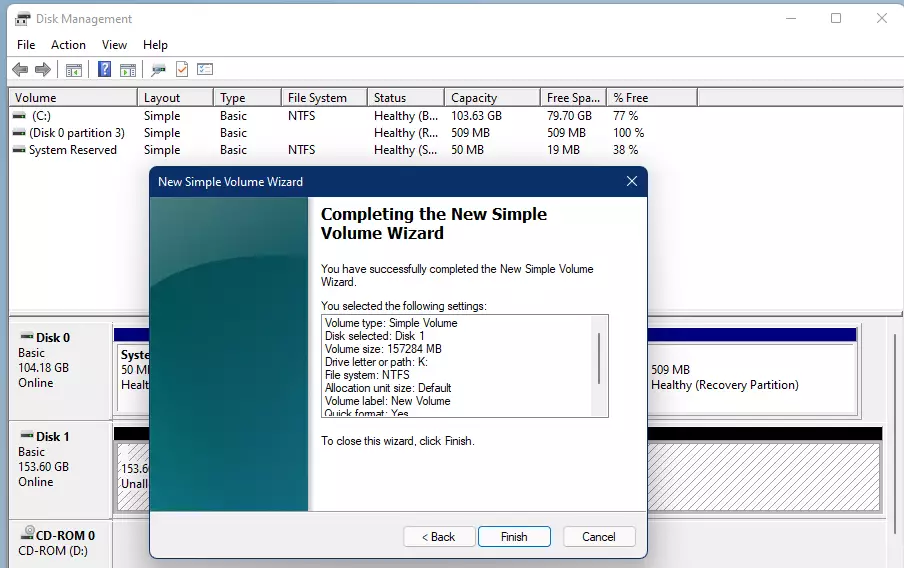
Your new partition is now ready to use and will show up in your computer’s storage list.

Summary
Partitioning is a great way to organize your computer’s storage. By using the built-in Disk Management tool, you can create separate areas for your files, which helps keep your data safe and your system running efficiently. Remember that you can always resize these partitions later if your storage needs change.
Was this guide helpful?


Leave a Reply Cancel reply