How to Change Windows 11 Automatic Maintenance Time
You change Windows 11 automatic maintenance time to select when essential background tasks run, ensuring your PC stays optimized without interrupting your workflow.
Automatic Maintenance is a Windows 11 feature that groups scheduled tasks like security scans and software updates. These tasks run in the background to keep your system healthy and secure.
By default, Windows 11 initiates these tasks at 2:00 AM. If your PC is off or asleep at this hour, these crucial operations may not complete.
Adjusting this setting allows you to pick a more convenient time, such as 10:00 PM, ensuring your PC performs maintenance when you’re not actively using it.
Open Control Panel, go to System and Security, then Security and Maintenance, and click Automatic Maintenance. Select “Change maintenance settings” and choose your desired time. Restart your PC for the changes to take effect.
What happens when done?
Once you change the time, Windows will wait until your chosen hour to start background tasks. If the computer is idle, it will begin maintenance. If you are using the PC, it will wait until the system is idle again to avoid slowing you down.
How to check if maintenance is running
You can check if Windows 11 maintenance is running by looking at your computer’s activity.
Change Windows Automatic Maintenance Time Using Control Panel
You can easily change the Windows 11 maintenance time using the Control Panel by following a few simple steps.
First, open the Control Panel app.
Navigate to Control Panel > System and Security > Security and Maintenance > Automatic Maintenance.
Click the Change maintenance settings link.
Select the specific time you want WAM to run each day.
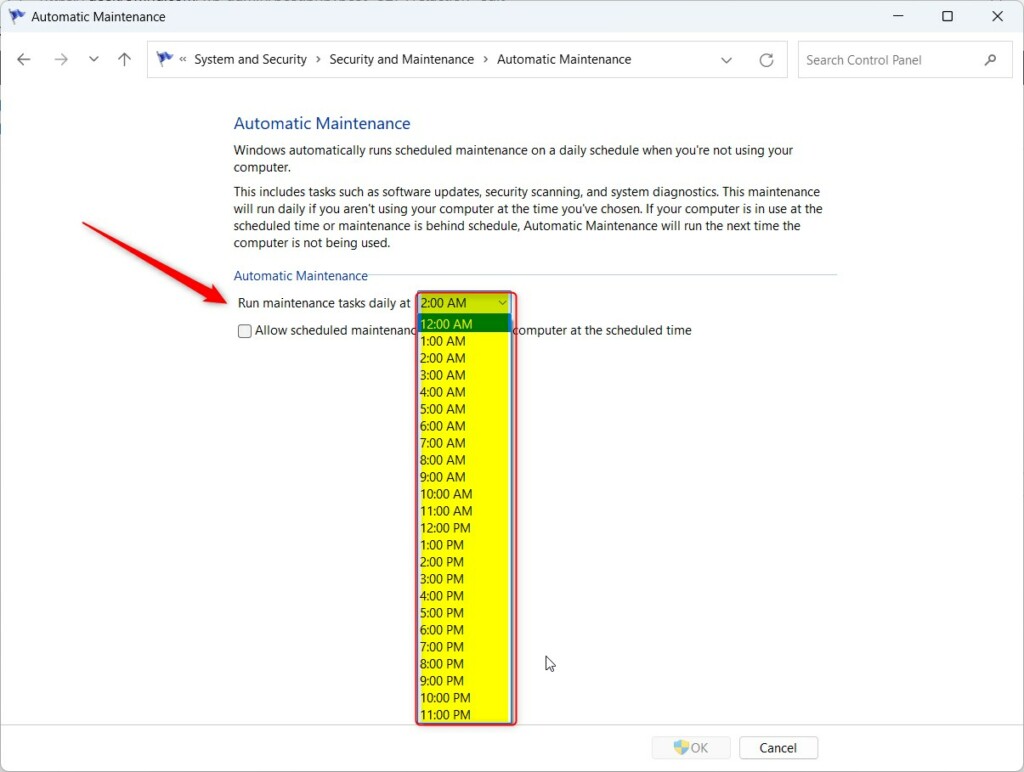
Close the Control Panel when you are finished.
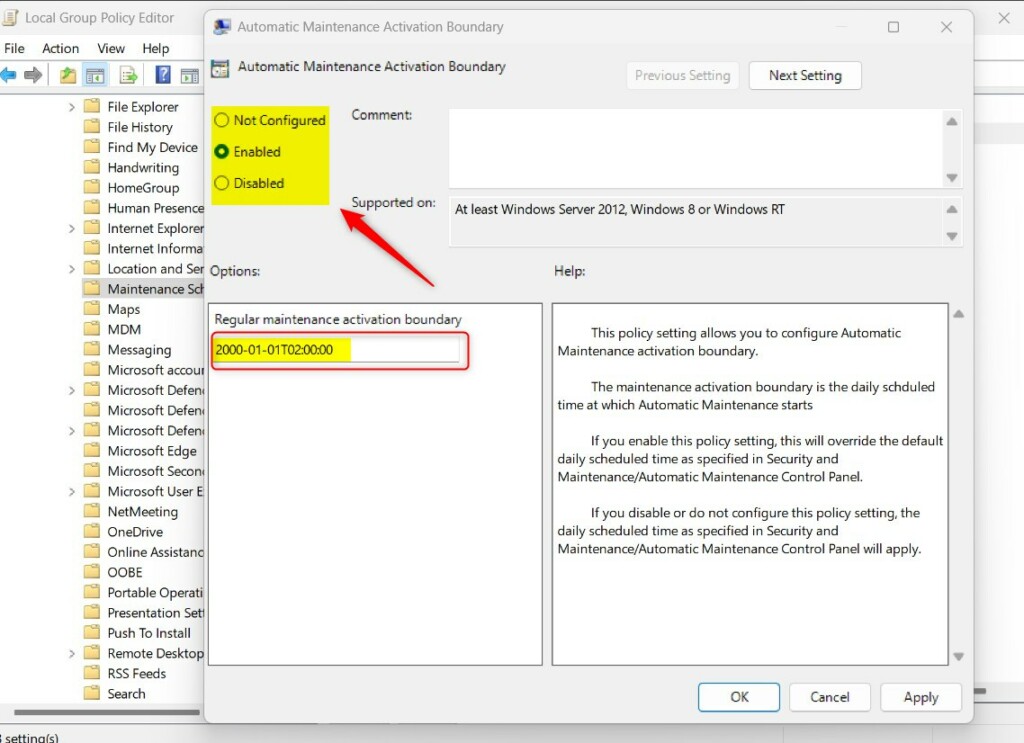
Change WAM Time Using Local Group Policy Editor
If you have admin rights, you can change the Windows 11 maintenance time using the Local Group Policy Editor.
Open the Local Group Policy Editor.
Navigate through these folders: Computer Configuration > Administrative Templates > Windows Components > Maintenance Scheduler.
Double-click ‘Automatic Maintenance Activation Boundary’ on the right side.

Choose Enabled and pick your new time. Save your settings and restart your computer for the changes to take effect.
Use this table to find the value for your preferred time:
| Standard Time | REG_SZ Data Value |
|---|---|
| 12:00 AM | 2001-01-01T00:00:00 |
| 1:00 AM | 2001-01-01T01:00:00 |
| 2:00 AM | 2001-01-01T02:00:00 |
| 3:00 AM | 2001-01-01T03:00:00 |
| 4:00 AM | 2001-01-01T04:00:00 |
| 5:00 AM | 2001-01-01T05:00:00 |
| 6:00 AM | 2001-01-01T06:00:00 |
| 7:00 AM | 2001-01-01T07:00:00 |
| 8:00 AM | 2001-01-01T08:00:00 |
| 9:00 AM | 2001-01-01T09:00:00 |
| 10:00 AM | 2001-01-01T10:00:00 |
| 11:00 AM | 2001-01-01T11:00:00 |
| 12:00 PM | 2001-01-01T12:00:00 |
| 1:00 PM | 2001-01-01T13:00:00 |
| 2:00 PM | 2001-01-01T14:00:00 |
| 3:00 PM | 2001-01-01T15:00:00 |
| 4:00 PM | 2001-01-01T16:00:00 |
| 5:00 PM | 2001-01-01T17:00:00 |
| 6:00 PM | 2001-01-01T18:00:00 |
| 7:00 PM | 2001-01-01T19:00:00 |
| 8:00 PM | 2001-01-01T20:00:00 |
| 9:00 PM | 2001-01-01T21:00:00 |
| 10:00 PM | 2001-01-01T22:00:00 |
| 11:00 PM | 2001-01-01T23:00:00 |
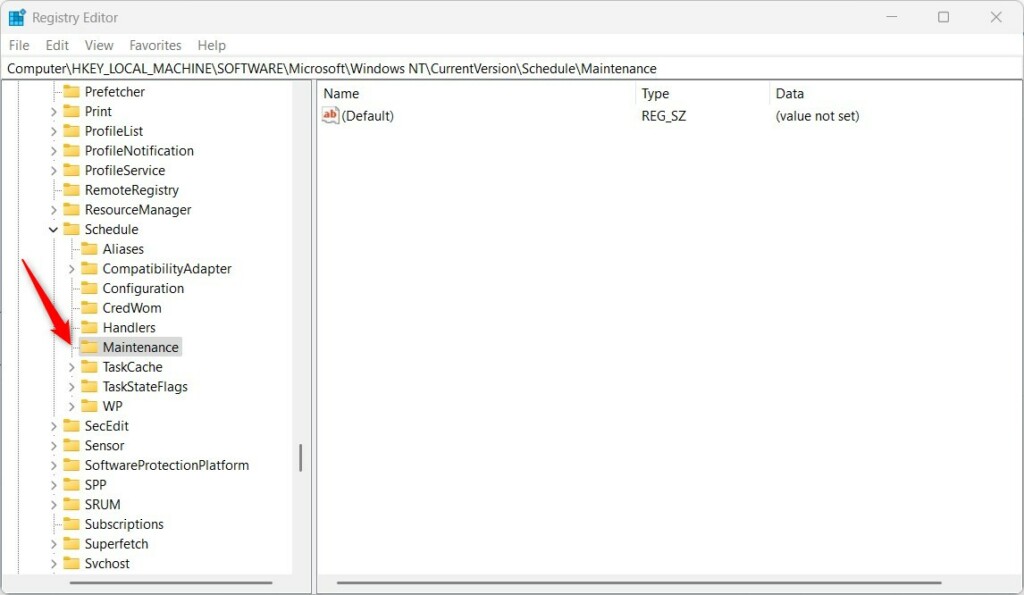
Change WAM Time Using Windows Registry Editor
For those who can’t use the Group Policy Editor, changing the Windows 11 maintenance time is possible with the Registry Editor, provided you have admin rights.
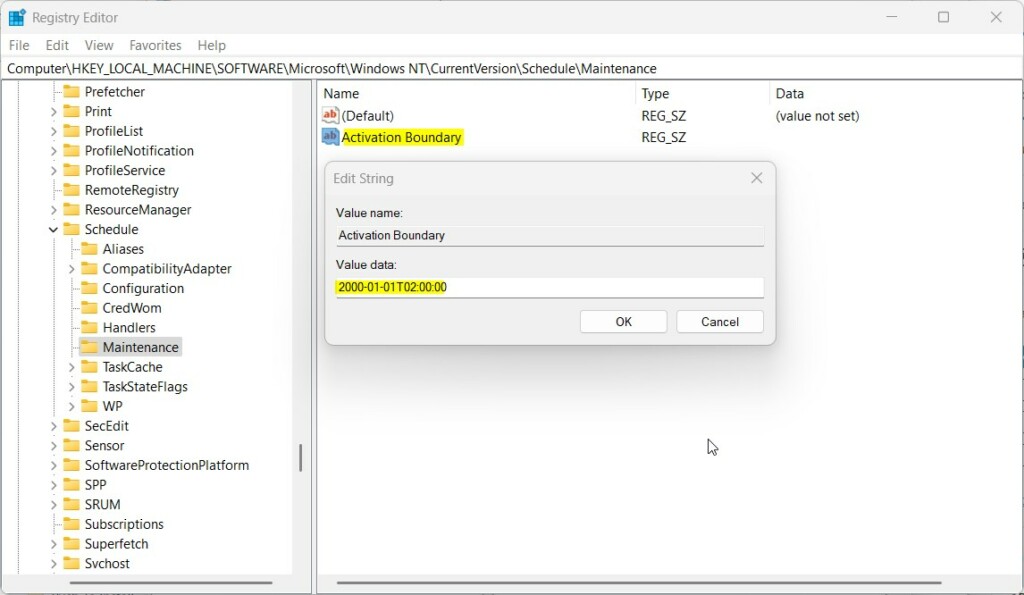
Navigate to this path: HKEY_LOCAL_MACHINE\SOFTWARE\Microsoft\Windows NT\CurrentVersion\Schedule\Maintenance
Right-click in the empty space and select New > String Value. Name it Activation Boundary. Double-click it and enter your time code.
Save your changes and restart your computer.
Summary
Windows Automatic Maintenance keeps your system running smoothly. You can change the default 2 AM time using the Control Panel, Group Policy, or Registry. Always restart your computer to apply changes. Use Power settings to stop the PC from waking up if you prefer silent operation.
Why does 🪟 Windows 11 maintenance run multiple times a day?
Windows 11 maintenance might run more than once a day because it performs tasks whenever your PC is not busy.
Does changing the maintenance time affect Windows Updates?
Yes, but only indirectly. WAM triggers the Windows Update service to check for patches. Changing the time shifts when these checks occur. For better control over updates, refer to the official Microsoft Active Hours support page to prevent restarts during your work day.
How do I stop 🪟 Windows 11 from waking up for maintenance?
You can stop Windows 11 from waking up your computer for maintenance by changing your power settings.
Was this guide helpful?

About the Author
Richard
Tech Writer, IT Professional
Richard, a writer for Geek Rewind, is a tech enthusiast who loves breaking down complex IT topics into simple, easy-to-understand ideas. With years of hands-on experience in system administration and enterprise IT operations, he’s developed a knack for offering practical tips and solutions. Richard aims to make technology more accessible and actionable. He's deeply committed to the Geek Rewind community, always ready to answer questions and engage in discussions.


[…] you want, you can change the time it runs or start it manually whenever you […]
[…] can change WAM schedules if the 2 AM time does not work for you, and you can lists all available device tasks. You can also […]