How to Change Columns in Windows 11 Task Manager
You change columns in Windows 11 Task Manager by right-clicking any existing column header to access a list of available data points.
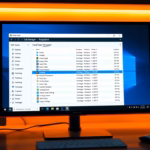
Windows 11 Task Manager allows you to customize the information displayed in its process and performance views, letting you see exactly what matters for your troubleshooting. This means you can add or remove columns such as CPU usage, Memory, Disk, Network, or even GPU Engine.
Tailoring these columns helps you quickly identify bottlenecks or monitor specific system resources more effectively. For instance, adding the “GPU Engine” column gives you direct insight into your graphics card’s activity, a detail particularly useful for gamers and creative professionals.
Opening Task Manager is as simple as pressing Ctrl+Shift+Esc. Once it’s open, look at the top of the window where the column titles are. A quick right-click on any of those titles will reveal a menu with all the columns you can toggle on or off.
Open Task Manager by pressing Ctrl+Shift+Esc, then right-click on any column header. From the pop-up menu, select the columns you want to add or remove to customize your view.
How to select columns in Task Manager?
You can change which columns show up in the Windows 11 Task Manager by right-clicking any column header and choosing ‘Select columns’.
Was this guide helpful?

About the Author
Richard
Tech Writer, IT Professional
Richard, a writer for Geek Rewind, is a tech enthusiast who loves breaking down complex IT topics into simple, easy-to-understand ideas. With years of hands-on experience in system administration and enterprise IT operations, he’s developed a knack for offering practical tips and solutions. Richard aims to make technology more accessible and actionable. He's deeply committed to the Geek Rewind community, always ready to answer questions and engage in discussions.


No comments yet — be the first to share your thoughts!