This article describes steps to change their computer’s Sleep button action settings in Windows 11.
These days, you won’t see a dedicated sleep button on many PCs. It used to be a thing. If your PC does have a sleep button, you can specify what happens when you press it.
One can select different actions to specify what to do when the sleep button is pressed. These include doing nothing, sleeping, hibernating, or turning off the computer’s display.
Changing how the sleep button works in Windows 11 requires you to log in as an administrator and open the Control Panel app in Windows 11.
Here are the different options one can specify what to do when the sleep button is pressed on one’s PC:
- Do Nothing: No action is taken when the sleep button is pressed.
- Sleep: Your PC goes into a low-power sleep mode.
- Hibernate: Your PC saves its session in a memory disk and shuts down.
- Turn off the Display: Your display turns off, but your PC keeps running.
Change the sleep button action via Control Panel
As mentioned above, the sleep button action settings specify the action to take when the system sleep button is pressed.
Below is how to configure that.
First, launch the Control Panel app in Windows 11.
When the Control Panel app opens, go to Control Panel -> Hardware and Sound -> Power Options.
Control Panel-> Hardware and Sound -> Power Options
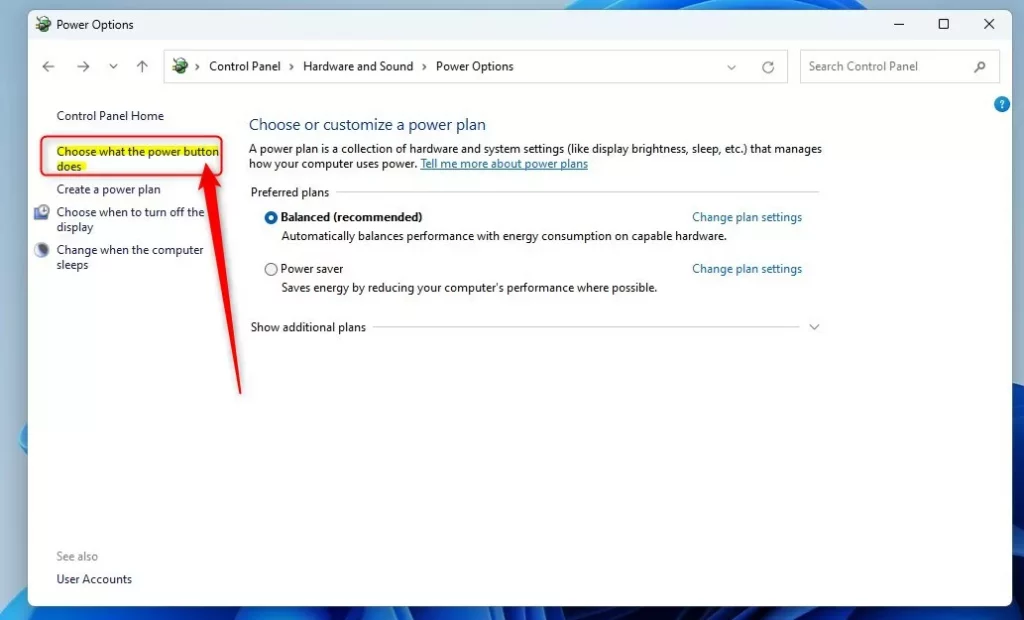
Click the “Choose what the power button does” link from the Power Options pane in the Control Panel.
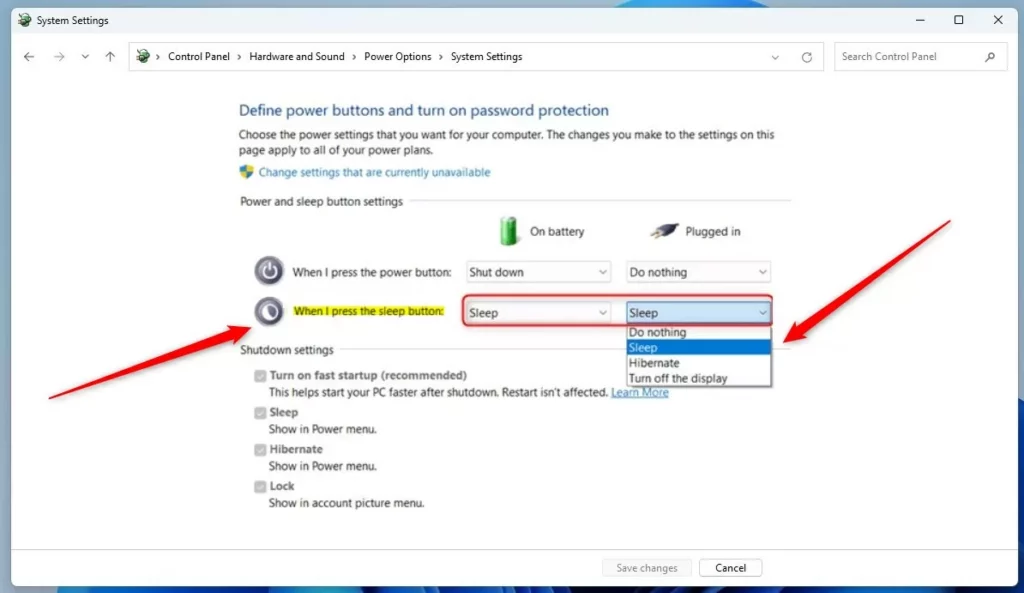
On the Control Panel -> Hardware and Sound -> Power Options -> System Settings pane, choose the options from the drop-down menu:
- Do Nothing: Nothing happens when the power button is pressed.
- Sleep: Your PC goes into a low-power sleep mode.
- Hibernate: Your PC saves its session in a memory disk and shuts down.
- Turn off the Display: Your display turns off, but your PC keeps running.
Change the sleep button action via Advanced Power Options
Alternatively, users can change the sleep button action via the Advanced Power Options window.
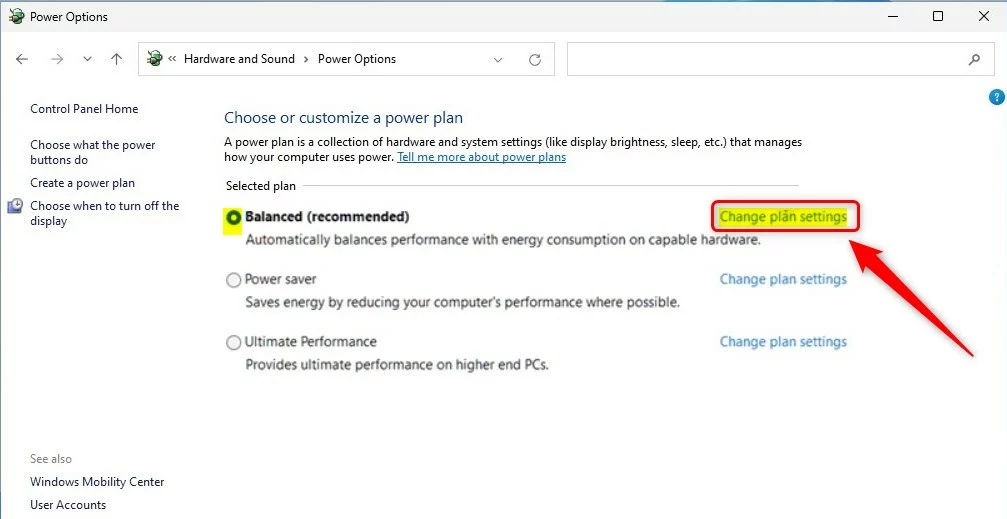
You can do that by going to the Control Panel -> Hardware and Sound -> Power Options. Select the active power plan under the preferred plans, and click the Change plan settings link.
Next, click Change advanced power settings link as highlighted below.

Expand the Power buttons, lid, and Sleep button action settings as highlighted below. Under the Sleep button action, choose what action to take when the sleep button is pressed:
- On battery:
- Do nothing
- Sleep
- Hibernate
- Turn off the display
- Plugged in:
- Do nothing
- Sleep
- Hibernate
- Turn off the display

Make your selection and click OK to save your settings.
That should do it!
Conclusion:
This post showed you how to change the sleep button action settings in Windows 11. Please use the comment form below if you find any errors above or have something to add.
- In this post, we covered the steps to change the sleep button action settings in Windows 11, allowing users to specify what happens when the sleep button is pressed.
- The options included configuring the sleep button action via Control Panel and Advanced Power Options, providing flexibility for users with different preferences and requirements.
- Users can customize their computer’s response to the sleep button, whether it’s setting the system to do nothing, enter sleep mode, hibernate, or turn off the display.


Leave a Reply