How to Change Sleep Button Function in Windows 11
You can change your Windows 11 sleep button’s function to shut down, hibernate, or do nothing at all.
This allows you to customize your PC’s power behavior to match your workflow and preferences. Instead of the default sleep action, you might want your button to trigger a full shutdown or a deeper power-saving hibernate mode.
For example, if you often leave your computer running for extended periods but want a quick way to power it off completely, reassigning the sleep button becomes incredibly useful. This modification is easily achievable through the Windows 11 Power Options settings.
Change the sleep button function in Windows 11 by opening Settings (Windows key + I), navigating to System > Power & battery, then Power button and lid. Select your preferred action from the dropdown menu for “Pressing the sleep button will make my PC.
What Is the Sleep Button?
The sleep button on your Windows 11 PC is a special shortcut that puts your computer into a low-power rest mode instead of shutting it down completely. This action saves energy while keeping your work ready so you can quickly jump back in when you wake it up.
The computer's sleep button pauses device operation without a full shutdown, saving power. This action reduces energy use by lowering system activity.
How to Change What the Sleep Button Does
Windows 11 makes this easy. You can change the sleep button settings right in the Settings app. No need to dig through old menus.
Follow These Simple Steps:
- Open Settings
To change what your sleep button does in Windows 11, you first need to open the Settings app. Press the Windows key and ‘I’ together, then go to System, and click on Power & battery to find the settings for your power button and lid.
- Find System Settings
In the Settings window, click System on the left side.
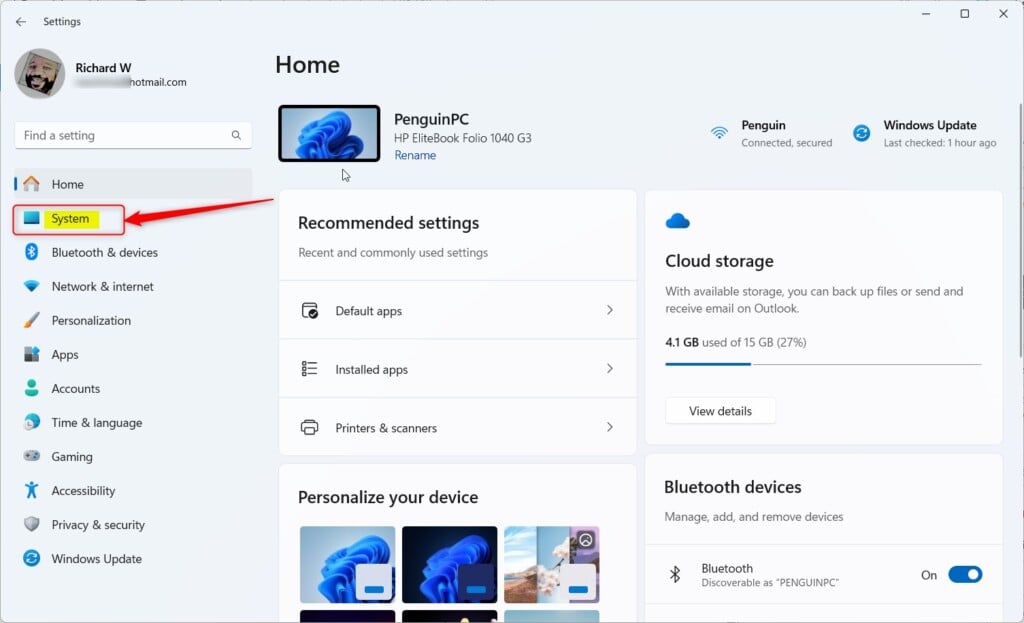
Windows 11 System button in Settings - Go to Power Settings
Click on Power & battery or just Power on the right side.
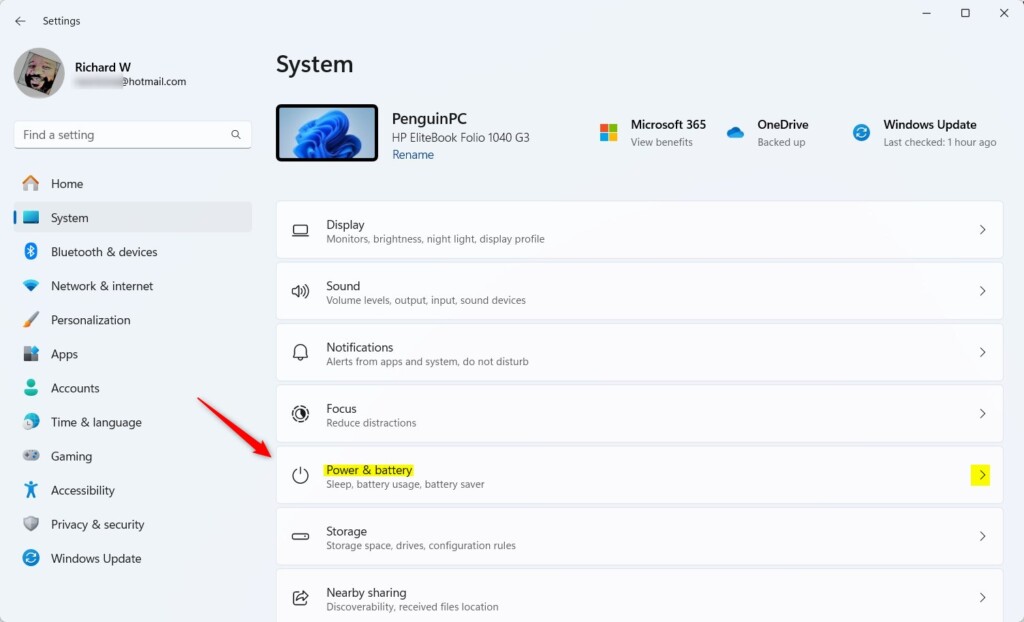
Windows 11 Power and Battery settings - Find the Sleep Button Controls
Scroll down to find the section called “Lid, power & sleep button controls”. Click it to expand the options.
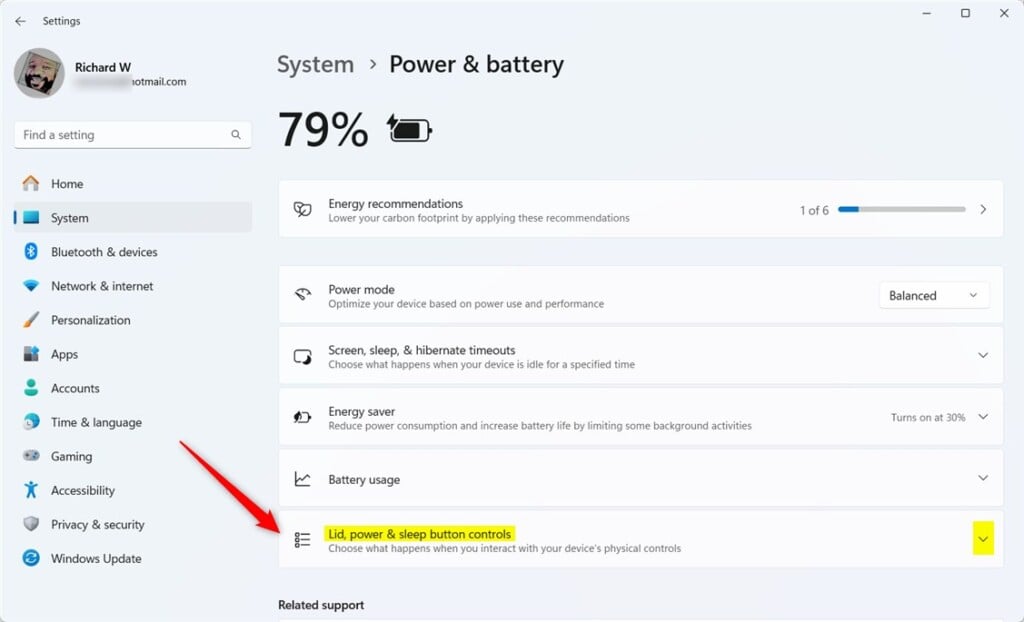
Lid, power & sleep button settings - Select Your Preference
Look for the option that says “Pressing the sleep button will make my PC”. You’ll see this for both “Plugged in” and “On battery” modes. Click the dropdown to see your choices.
- Pick What You Want
Choose one of these options:
- Do Nothing — pressing the button won’t do anything
- Sleep — puts your PC to sleep (this is the default)
- Hibernate — saves your work and turns off the PC
- Shutdown — turns off your PC completely
- Display Off — turns off the screen only
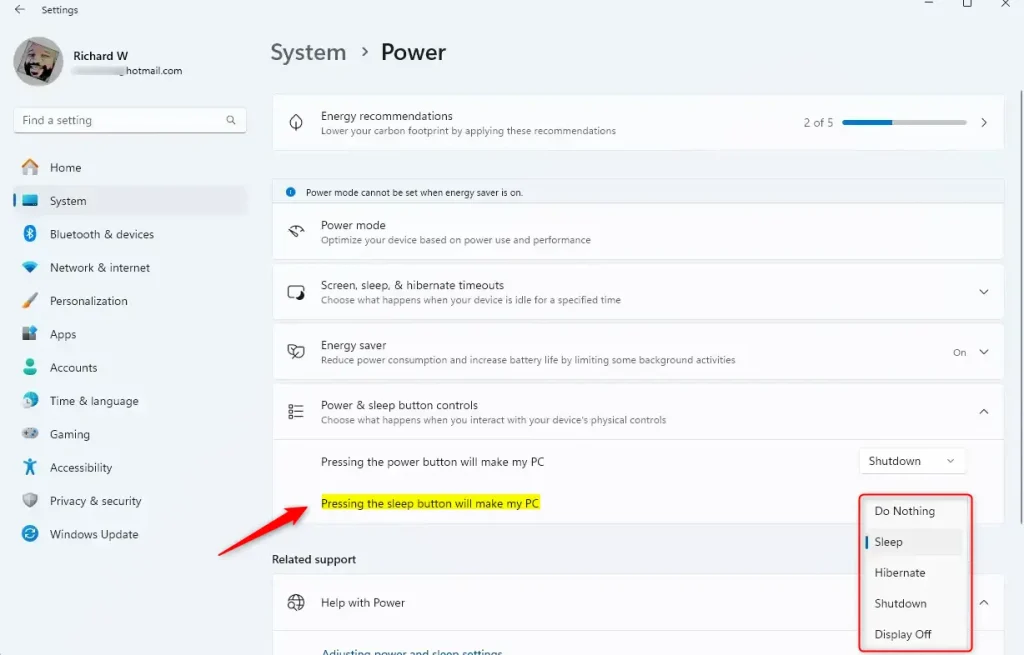
Sleep button behavior options in Windows 11 - Close Settings
Close the Settings app when you’re done. Your changes save automatically.
Why Change the Sleep Button?
You might want to change the sleep button function in Windows 11 if your PC sometimes has trouble waking up from sleep. Or, you might just prefer the button to turn off your screen instead of putting the computer to sleep. Customizing it means your sleep button will work exactly how you want it to.
What happens when you customize it? Your sleep button now works exactly how you want. You get a computer that behaves the way you prefer.
Summary
Have questions or tips to share? Leave a comment below!
Was this guide helpful?

About the Author
Richard
Tech Writer, IT Professional
Richard, a writer for Geek Rewind, is a tech enthusiast who loves breaking down complex IT topics into simple, easy-to-understand ideas. With years of hands-on experience in system administration and enterprise IT operations, he’s developed a knack for offering practical tips and solutions. Richard aims to make technology more accessible and actionable. He's deeply committed to the Geek Rewind community, always ready to answer questions and engage in discussions.


No comments yet — be the first to share your thoughts!