Set Default Speaker in Ubuntu Linux: A Step-by-Step Guide
Setting your default speaker in Ubuntu Linux tells your computer which audio device to use for all sounds automatically.
This simple step ensures your audio consistently plays from your preferred hardware, like your main speakers instead of a connected TV. You won’t have to manually pick the sound output for every application you open.
Ubuntu often selects the first audio device it detects, which might not be what you want. For example, in Ubuntu 23.10, you can easily choose between your computer’s built-in speakers and a USB headset.
Open System Settings, then click on Sound. Under the Output tab, select your desired speaker from the list of available devices. Use the Test button to confirm your selection is working correctly.
How to choose the default speaker in Ubuntu Linux
Choosing the default speaker in Ubuntu Linux ensures all your computer’s sound plays through the correct speakers, eliminating manual switching. Ubuntu typically selects one speaker automatically. You can easily choose your preferred audio output device if Ubuntu’s initial selection is not correct.
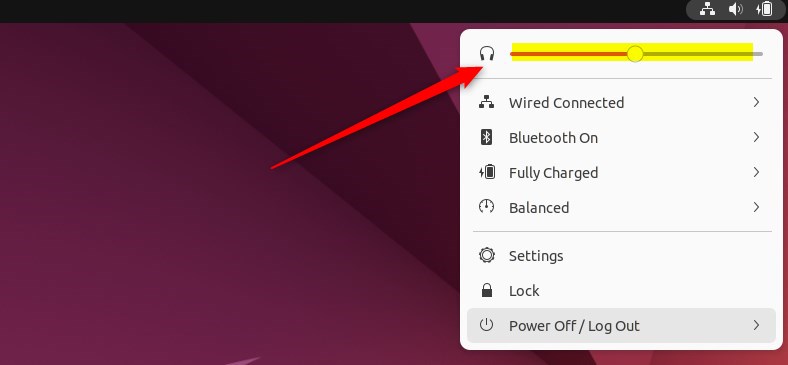
Ubuntu usually picks what it thinks is the best device, and its volume can be adjusted from the system menu. Just keep in mind that only one audio device can show up in that menu at a time.
Most of Ubuntu Linux’s settings are found in one place: the System Settings panel. This is where you manage everything from system configurations to creating new users and updating your system.
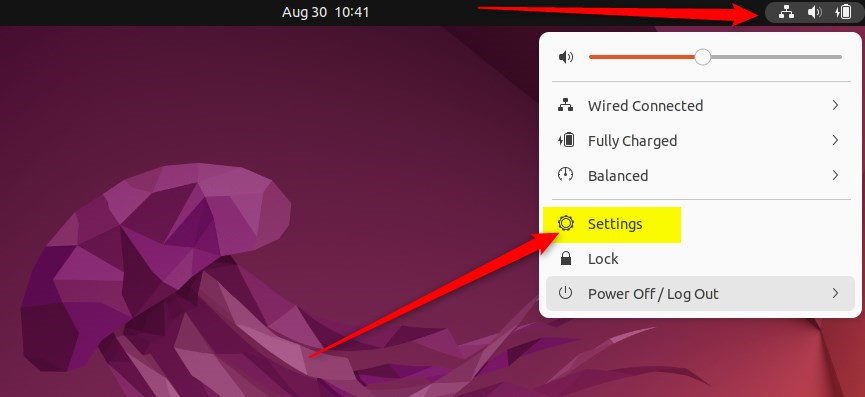
Alternatively, you can click the System menu in the top-right corner of your desktop’s top bar.
On the System menu, select Settings, as shown below.
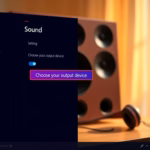
Once in the Settings app, click on the Sound tile to open its panel.
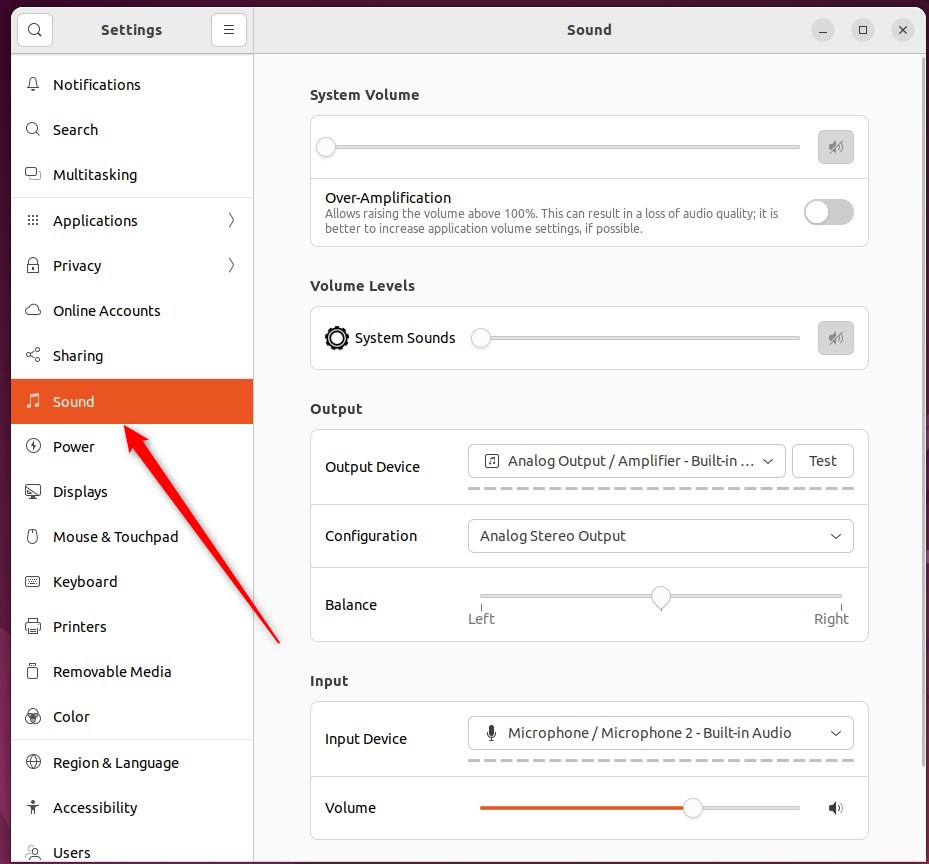
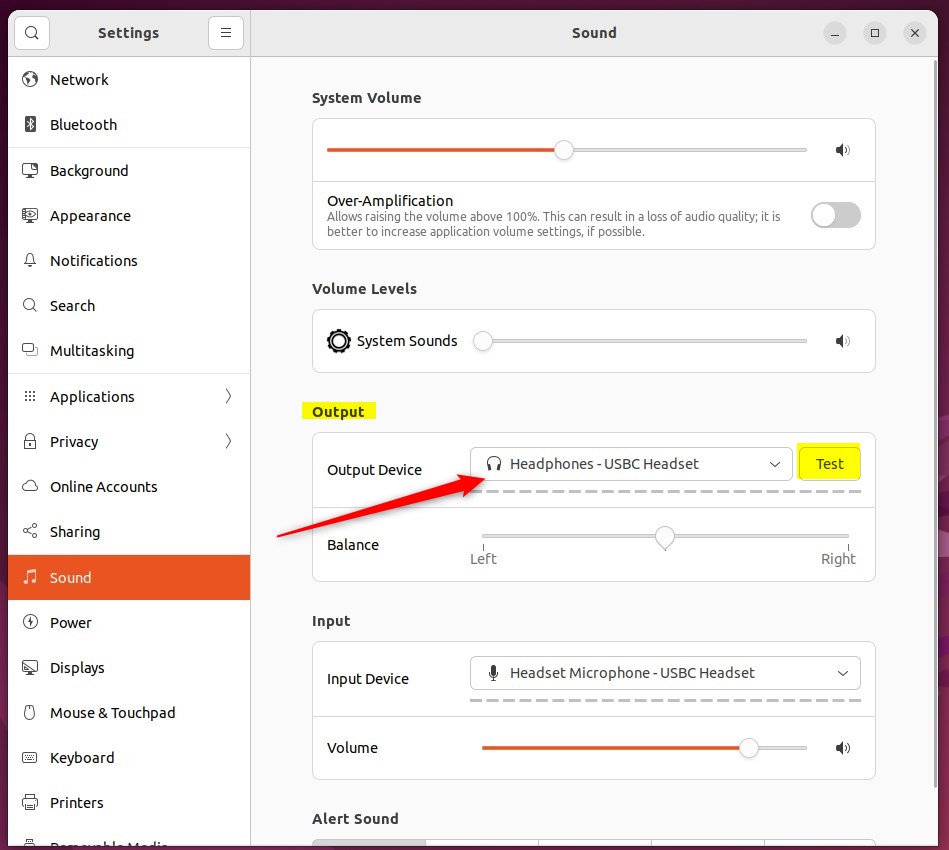
Inside the Sound settings, look for the ‘Output’ section and select the device you want to use.
Use the Test button to check that all speakers are working and connected to the correct socket.
If you don’t see the connected mic device on the list, it might not be recognized in Ubuntu Linux.
You can adjust the volume, switch your microphone off, or mute your microphone from the sound settings panel. This panel offers quick controls for your audio devices. It allows you to manage your sound input and output without needing to open more complex application menus.
That’s it! You can now close the Settings app.
In summary:
- Setting the default speaker or headphones in Ubuntu Linux ensures the desired audio output for different applications.
- Ubuntu Linux provides a centralized location for adjusting sound settings, allowing users to select and test their preferred output devices.
- Users can easily access and customize sound settings through the System Settings panel, ensuring a seamless experience for managing audio output in Ubuntu Linux.
What is the default music player for Ubuntu?
Rhythmbox is GNOME’s default music player. Inspired by Apple’s iTunes, it is simple to use and meets most users’ needs. Rhythmbox includes such features as playlist support, iPod integration, podcast playback, and support for streaming audio.
How to enable speakers in Ubuntu?
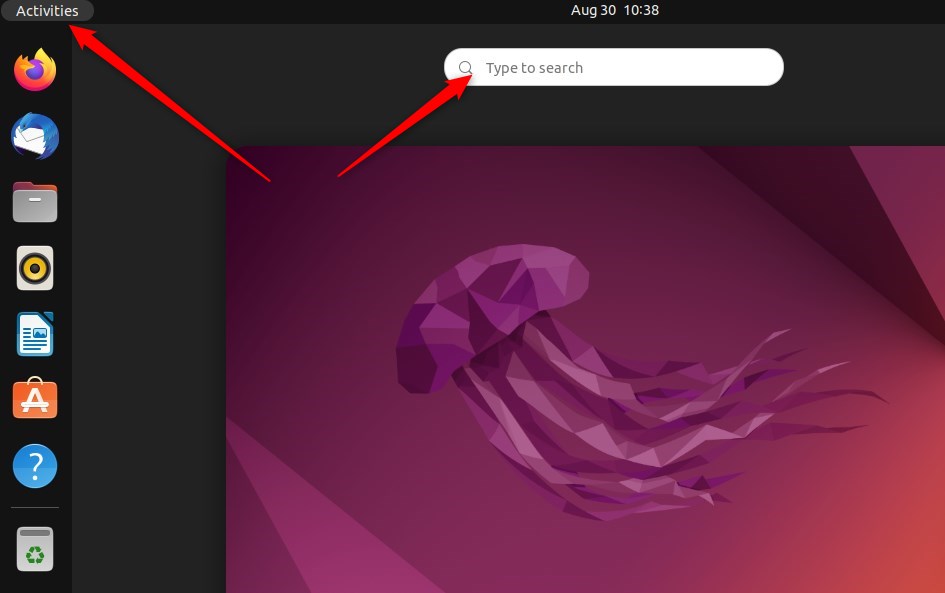
Open the Activities overview and start typing Sound. Click on Sound to open the panel. Under Volume Levels, check that your application is not muted. The button at the end of the volume slider toggles Mute on and off.
Does Ubuntu use PulseAudio?
PulseAudio has been the default sound server on Ubuntu for many years. It sits between ALSA (which communicates directly with hardware) and applications. It handles mixing multiple audio streams, routing audio to different outputs, network audio, and Bluetooth.
Was this guide helpful?

About the Author
Richard
Tech Writer, IT Professional
Richard, a writer for Geek Rewind, is a tech enthusiast who loves breaking down complex IT topics into simple, easy-to-understand ideas. With years of hands-on experience in system administration and enterprise IT operations, he’s developed a knack for offering practical tips and solutions. Richard aims to make technology more accessible and actionable. He's deeply committed to the Geek Rewind community, always ready to answer questions and engage in discussions.
No comments yet — be the first to share your thoughts!