How to Change DPI Scaling in Windows 11
You change DPI scaling in Windows 11 to adjust the size of text, icons, and applications, improving readability on your display.
DPI (Dots Per Inch) dictates how physically large screen elements appear based on your display’s resolution. Windows 11 defaults to 100% scaling, but you can easily increase this value to make everything on your screen look bigger.
For instance, a 4K monitor might show incredibly tiny interface elements at the default setting, making them difficult to use. This tutorial shows you how to adjust DPI scaling for a crisper, more comfortable viewing experience.
Adjust display scaling in Windows 11 by going to Settings > System > Display and selecting a percentage under Scale & layout. For blurry apps, toggle “Let Windows try to fix apps” or override per-application settings via the Compatibility tab.
Change DPI Scaling via Settings
You can change DPI scaling in Windows 11 easily using the Settings app to make text and icons appear larger or smaller.
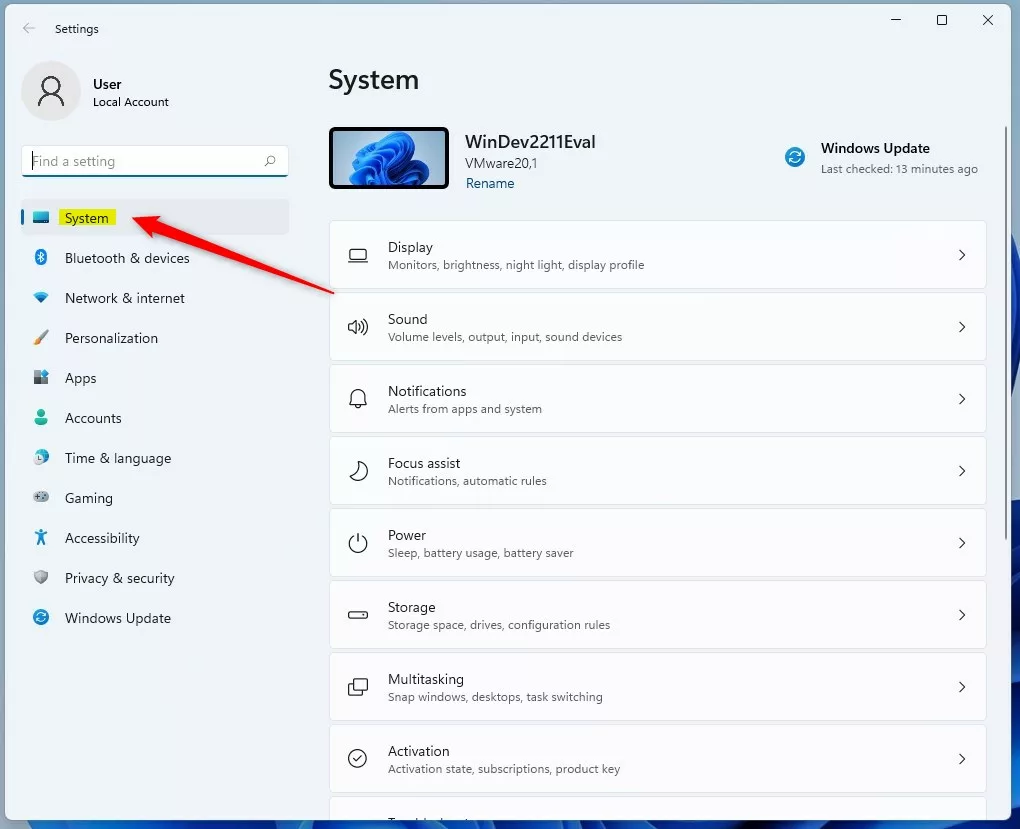
- Open the Settings app by pressing Windows key + I on your keyboard.
- Click on System in the left menu.
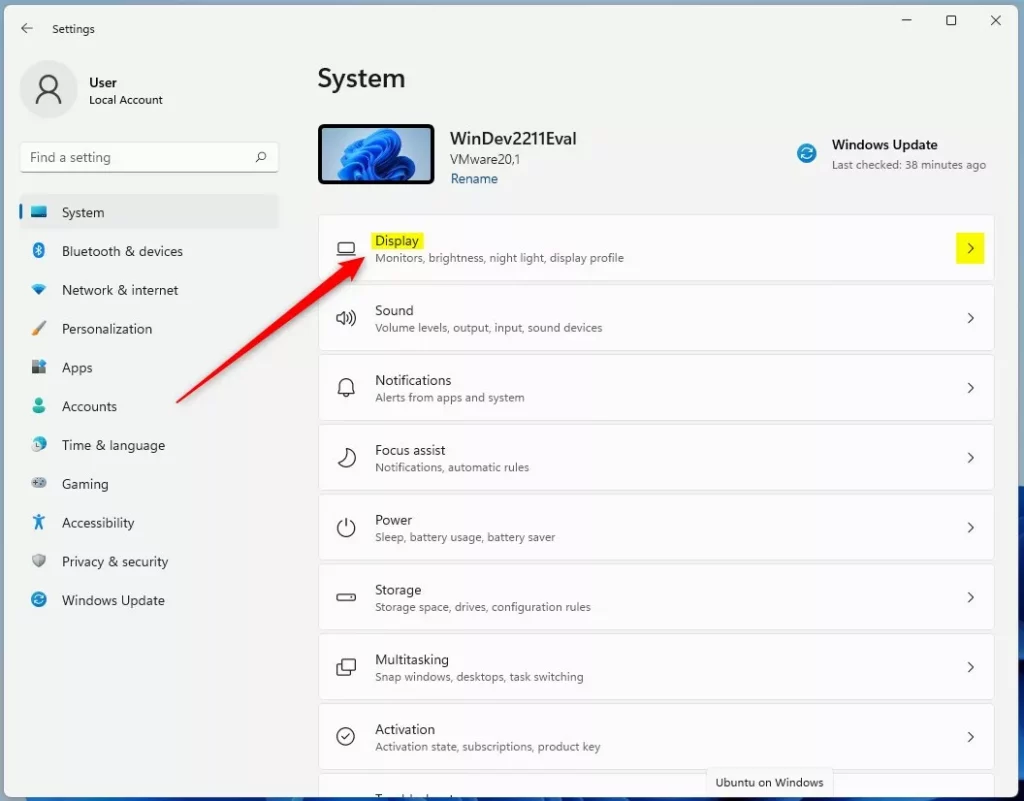
- Click on the Display tile.
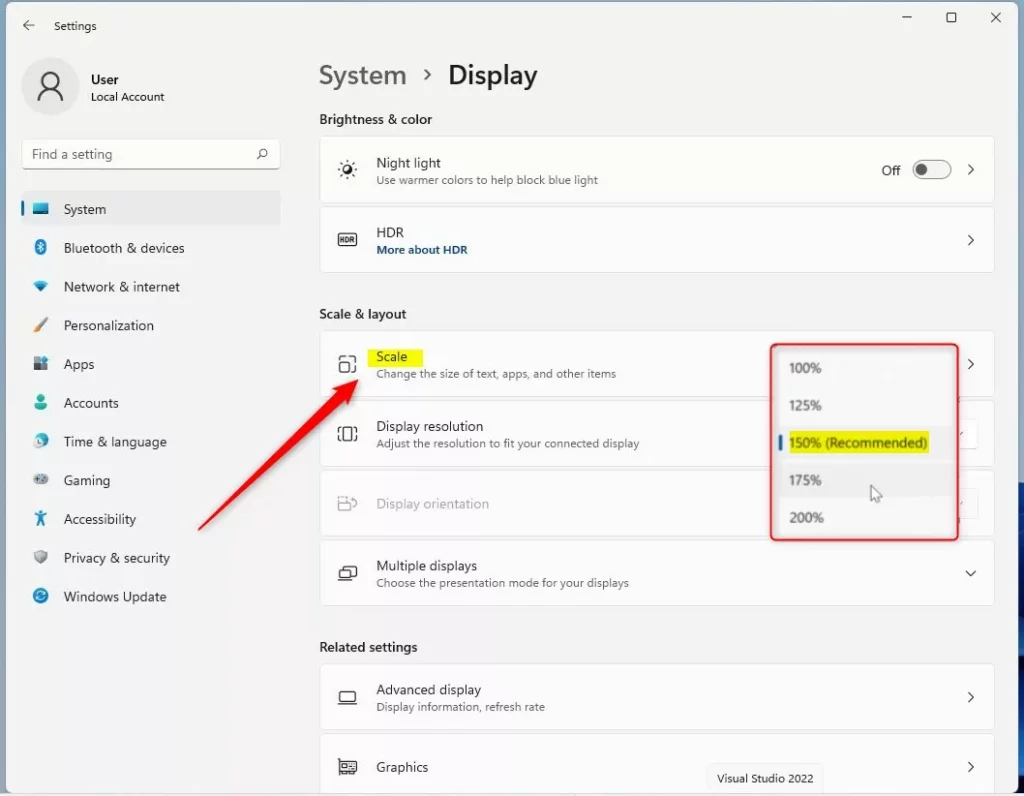
- If you have multiple monitors, select the one you want to change first.
- Look for the Scale & layout section. Click the Scale box to choose a different percentage from the list.
Fixing Blurry Apps with DPI Awareness
If some apps look blurry after changing DPI scaling in Windows 11, you can turn on a setting to help Windows fix them automatically.
- Go to Settings > System > Display.
- Click on Scale.
- Toggle on Let Windows try to fix apps so they’re not blurry. This forces Windows to apply a scaling fix to apps that do not handle high DPI settings well.
Per-Application DPI Scaling Override
For apps that remain blurry even after adjusting system-wide DPI scaling in Windows 11, you can override the settings just for that one application.
- Right-click the app’s shortcut or executable file and select Properties.
- Go to the Compatibility tab.
- Click Change high DPI settings.
- Check the box Override high DPI scaling behavior.
- Select System (Enhanced) from the dropdown menu to let Windows handle the scaling for that specific app.
Change DPI Scaling via Registry Editor
Changing DPI scaling in Windows 11 using the Registry Editor offers advanced control, but requires administrator access and careful steps.
- Open the Windows Registry Editor.
- Go to this path:
HKEY_CURRENT_USER\Control Panel\Desktop
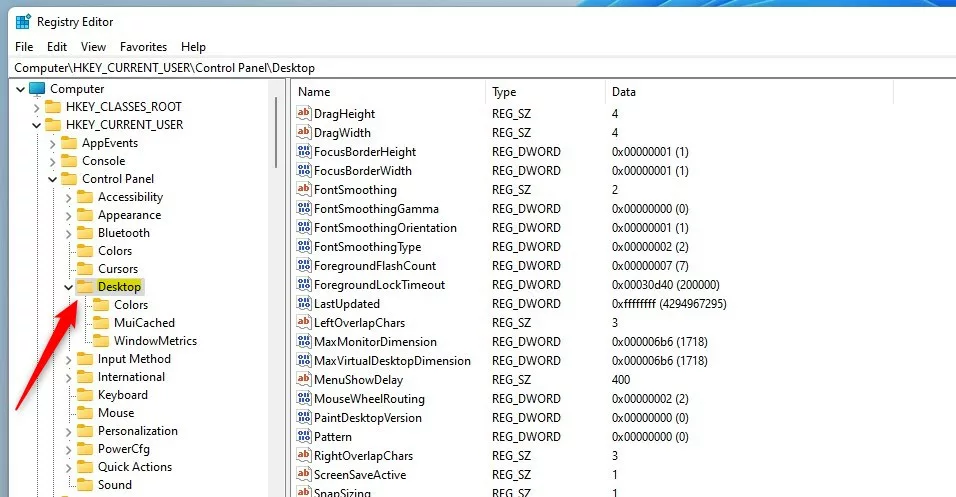
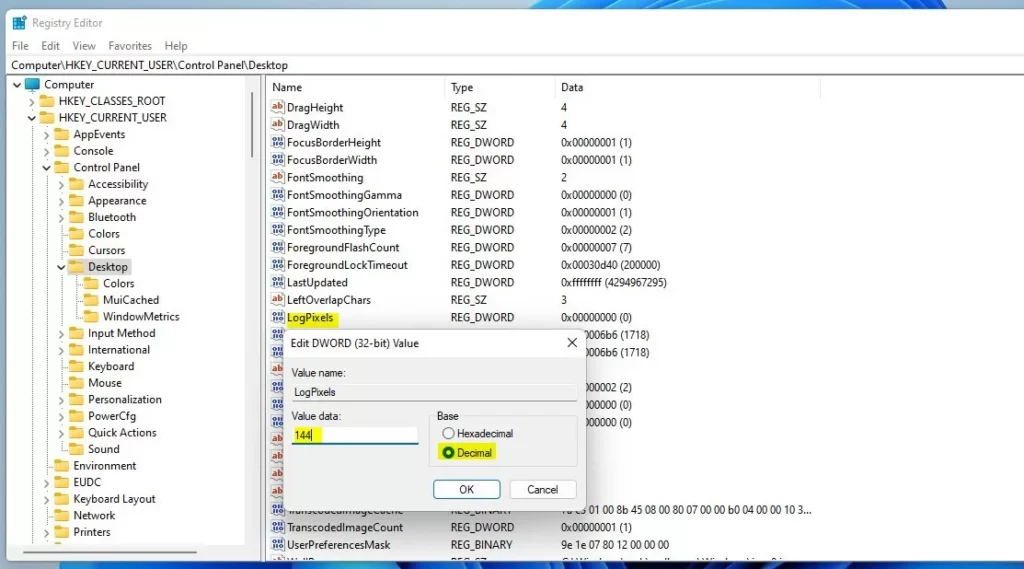
- Right-click in the empty space on the right side. Select New then DWORD (32-bit) Value. Name it
LogPixels. - Double-click
LogPixelsand enter a value: 100% is 96, 125% is 120, 150% is 144, 200% is 192.
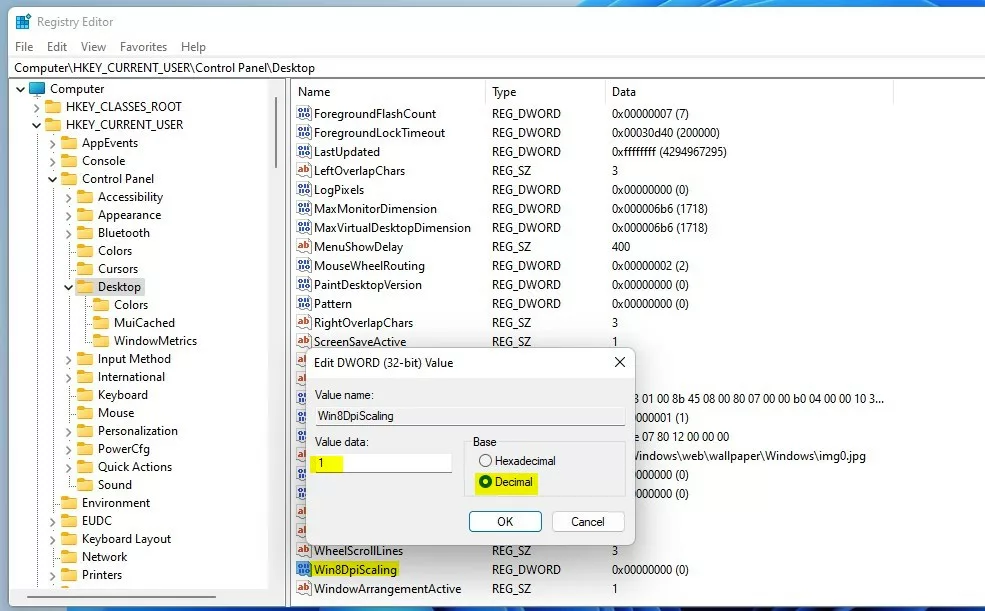
- Find the
Win8DpiScalingvalue. Set it to1if you use a scale higher than 96, or0for default.
Summary
You can adjust DPI scaling in Windows 11 through Settings, app overrides, or the Registry Editor to fix display issues with text and icons.
Why do some apps look blurry after changing DPI scaling?
Apps become blurry when they are not designed to scale with high-resolution displays. Windows attempts to stretch these apps to fit your screen, which causes a loss in visual clarity. Using the Compatibility tab to override scaling behavior often resolves this issue for specific programs.
Can I set DPI scaling below 100% in 🪟 Windows 11?
No, Windows 11 does not officially support DPI scaling below 100%. Setting the scale below 100% can cause significant rendering issues, making text unreadable and icons too small to click. It is recommended to keep scaling at 100% or higher for system stability.
Was this guide helpful?

About the Author
Richard
Tech Writer, IT Professional
Richard, a writer for Geek Rewind, is a tech enthusiast who loves breaking down complex IT topics into simple, easy-to-understand ideas. With years of hands-on experience in system administration and enterprise IT operations, he’s developed a knack for offering practical tips and solutions. Richard aims to make technology more accessible and actionable. He's deeply committed to the Geek Rewind community, always ready to answer questions and engage in discussions.


No comments yet — be the first to share your thoughts!