
Does your computer show the date in a way that confuses you? Windows 11 lets you change how dates look. For example, you can switch from 8/29/2019 to 29-08-2019. This guide shows you how to do it.
Why Change the Date Format?
Windows uses your region’s settings to show dates. This means the date might look different based on where you live. You can change the date format to match how you like to see it. You can use slashes (/), dashes (-), or dots (.) to separate the numbers.
Easy Steps to Change Date Format in Windows 11
Step 1: Open Windows Settings
Press the Windows key + I on your keyboard. This opens the Settings window. You can also click Start and then click Settings.

Step 2: Go to Language & Region
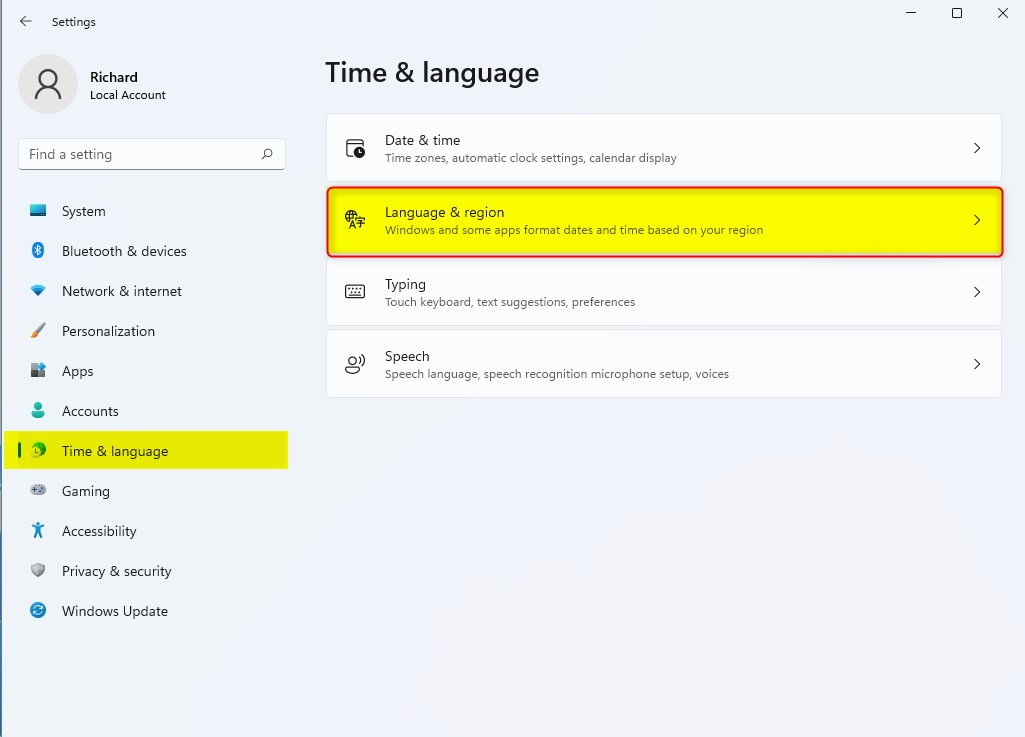
In Settings, click Time & language on the left side.
Then click Language & region on the right.
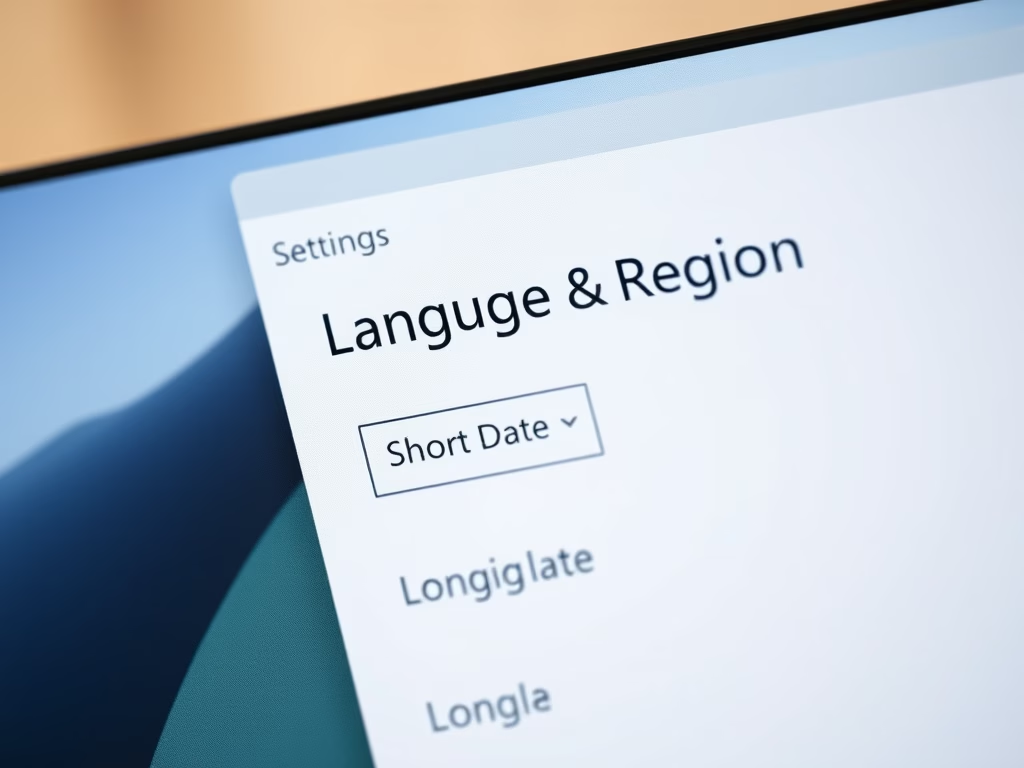
Step 3: Change the Regional Date Format
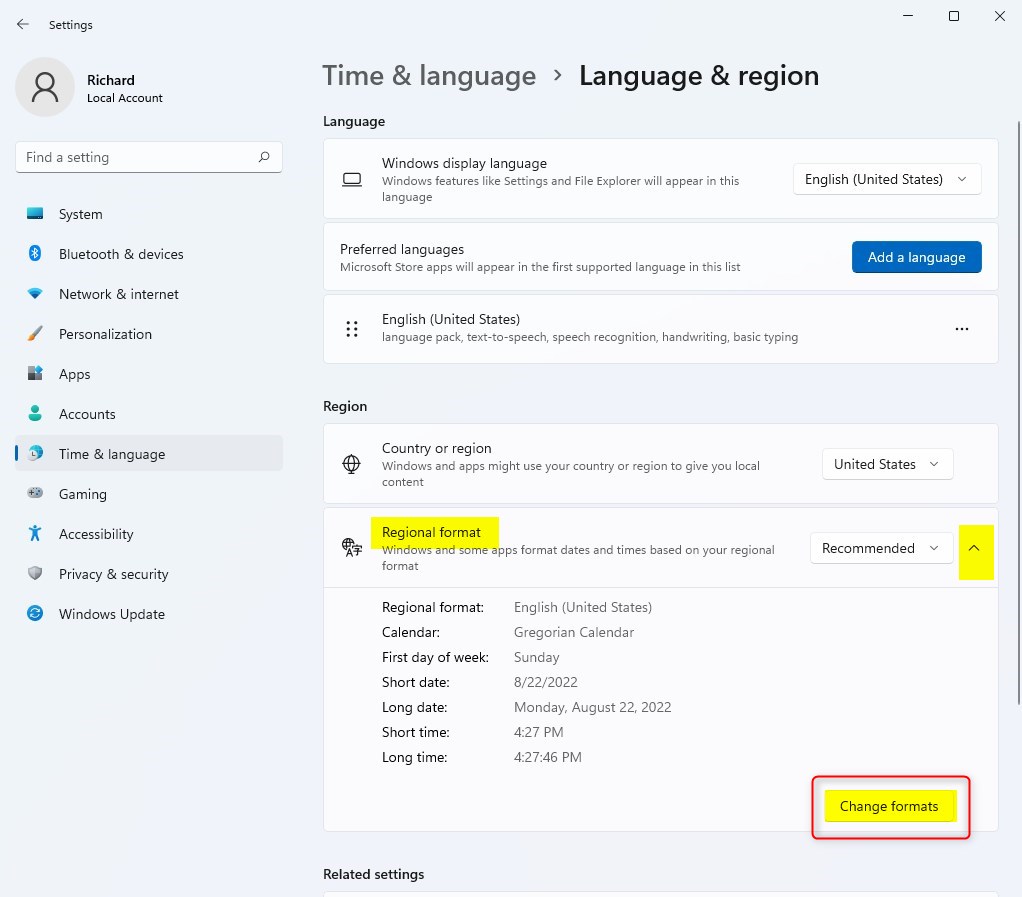
Find the Regional format section. Click the Change format button.
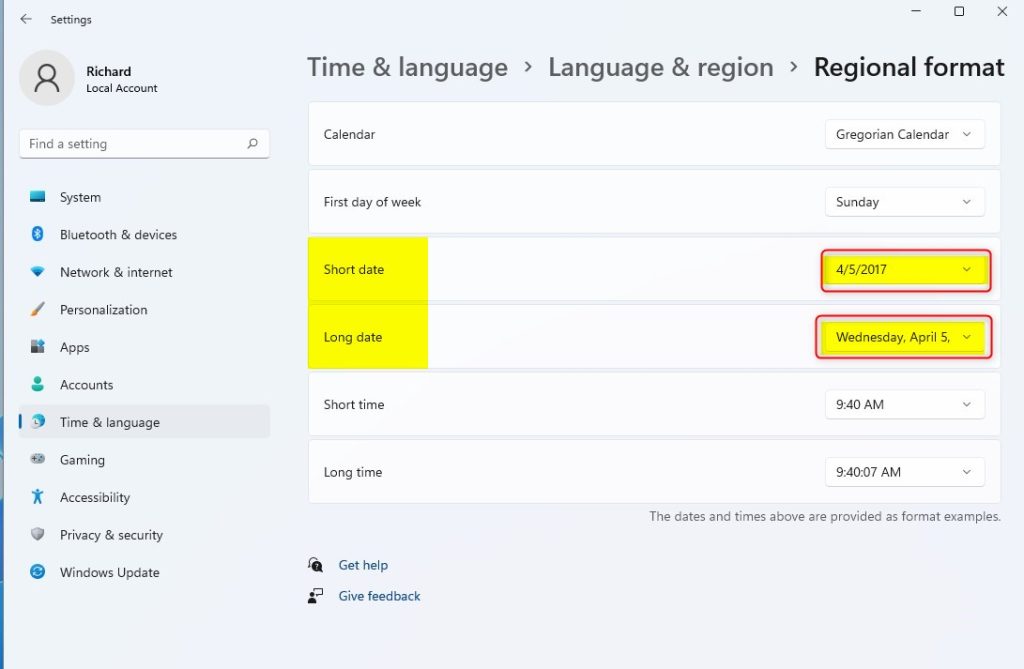
Step 4: Pick Your Date Format
Now you can choose how the date looks:
- Short date – How the date looks in places like the taskbar (example: 8/29/2019)
- Long date – How the date looks when written out fully (example: Thursday, August 29, 2019)
Select your preferred format from the dropdown menus.
Step 5: Close Settings
Once you’re done, close the Settings window. Your new date format will now show up in Windows.
Alternate Way: Use the Control Panel
You can also change the date format using the classic Control Panel. Here’s how:
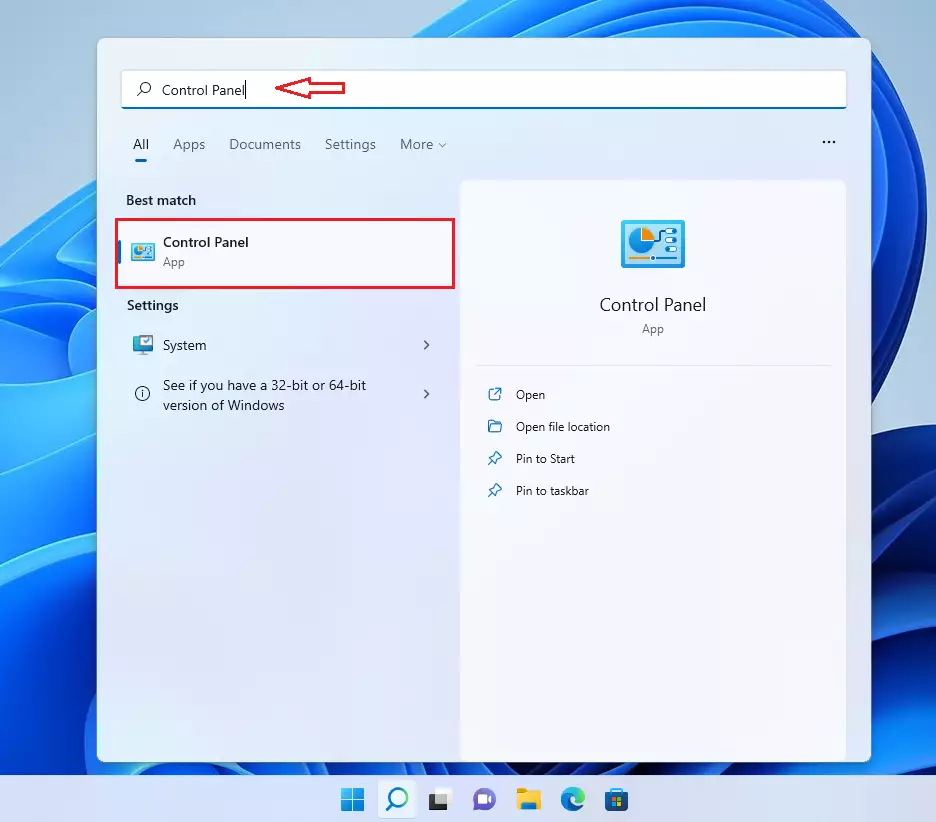
Step 1: Open Control Panel
Click the Start button. Type Control Panel in the search box. Click the Control Panel app to open it.
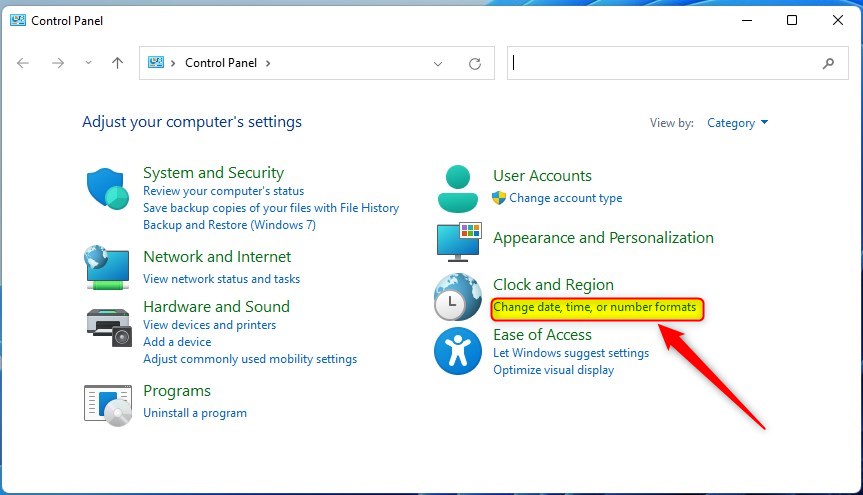
Step 2: Open Region Settings
In Control Panel, click Change date, time, or number formats. This opens the Region window.
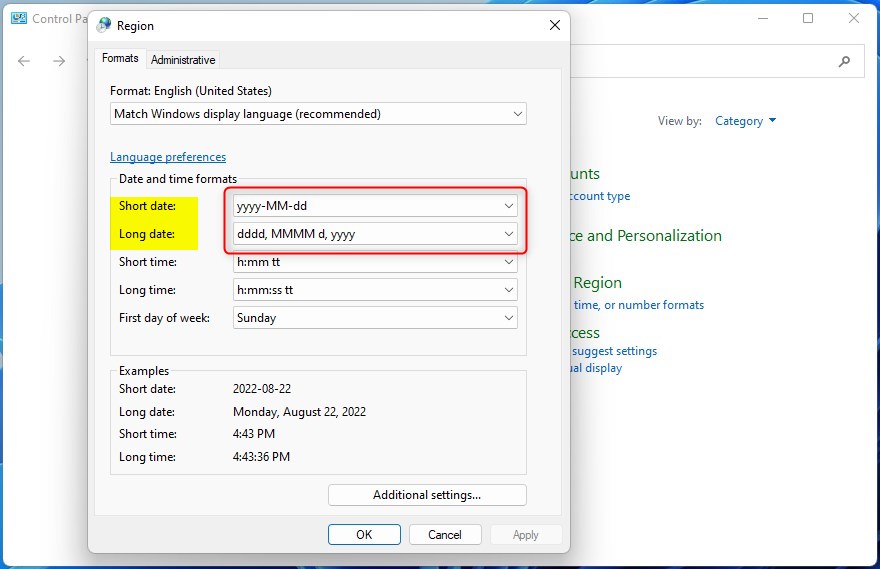
Step 3: Customize Date Formats
Under the Formats tab, pick the format you want from the dropdown menu.
Then click Additional Settings… to open the Customize Format window.
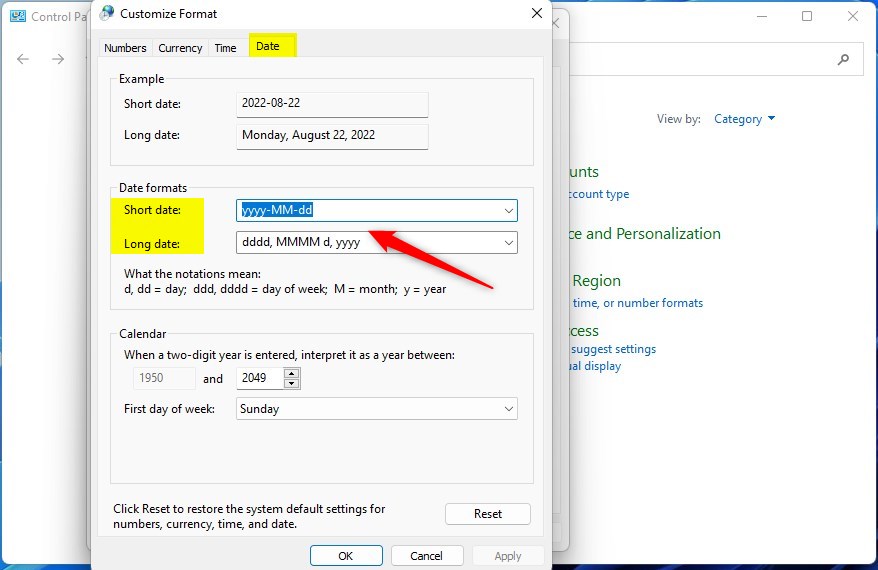
Step 4: Set Your Date Format
Click the Date tab. Then enter or choose the date format you want Windows to show.
Step 5: Apply and Close
Click OK to save your settings. Then close all windows. Your new date format will be applied.
Summary
You can change how Windows 11 shows dates using either the Settings app or the Control Panel. The Regional format setting lets you pick different styles for short and long dates. Choose the format that’s easiest for you to understand and use. Now you know how to make your computer show the date exactly the way you want.
Leave a Reply