This article provides instructions on how to modify the AutoPlay settings in Windows 11.
By default, Windows 11 displays a pop-up that asks you to choose what actions to take when you insert media or connect a new device. This functionality works only if you haven’t changed any settings.
If your device or media disc isn’t recognized, reconfigure AutoPlay settings.
You can also disable the AutoPlay feature to prevent automatic reading or execution of discs and flash drives. This can help stop malicious content on these drives from being executed.
Change AutoPlay settings in Windows 11
Windows 11 features a centralized location for most settings. Users can perform tasks such as configuring the system, creating new users, and updating Windows from the System Settings pane.
To access System Settings, use the Windows key + I shortcut or select Start, then Settings, as illustrated in the image below:

Alternatively, you can use the search box on the taskbar to search for Settings. Then select to open it.
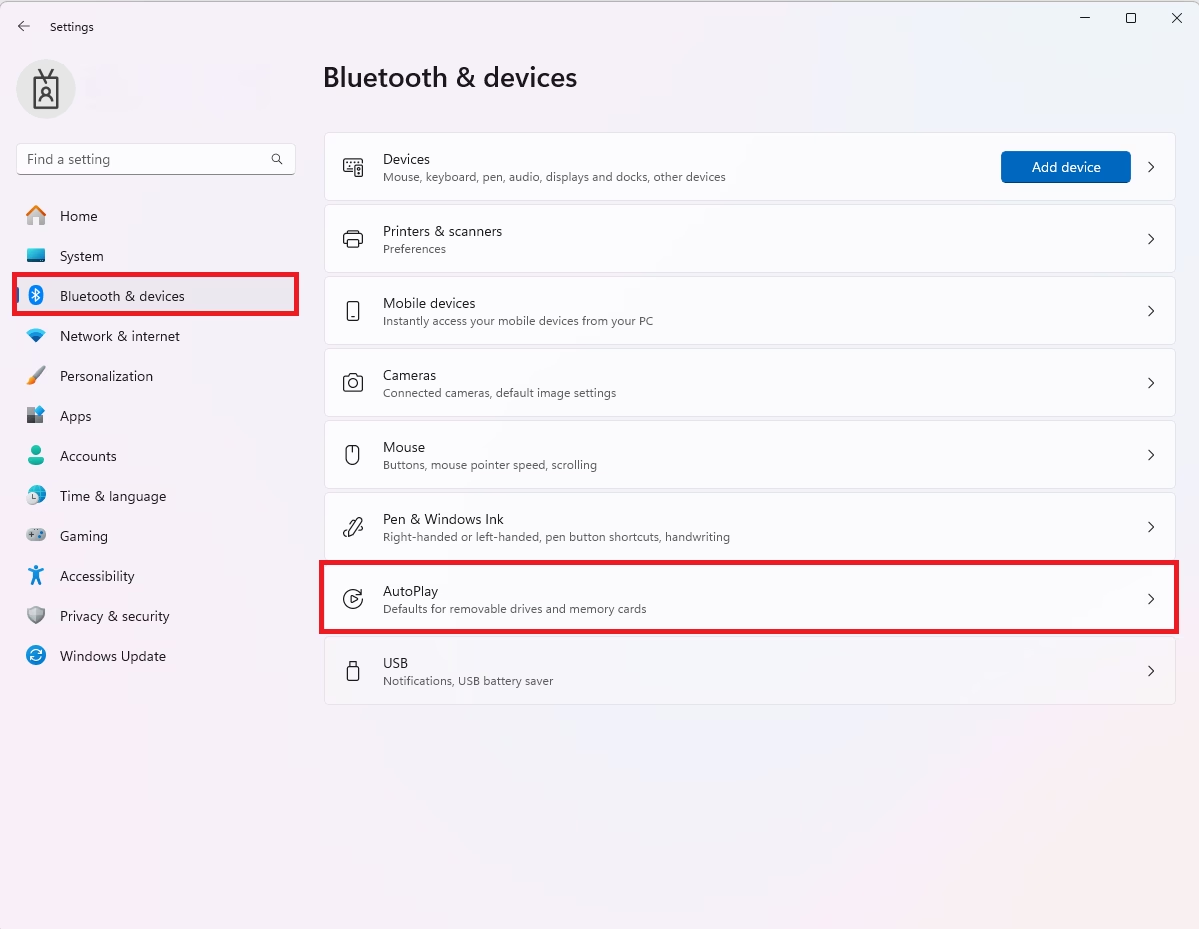
In Windows Settings, click on Bluetooth & devices, then select AutoPlay in the right pane of your screen, as shown in the image below.
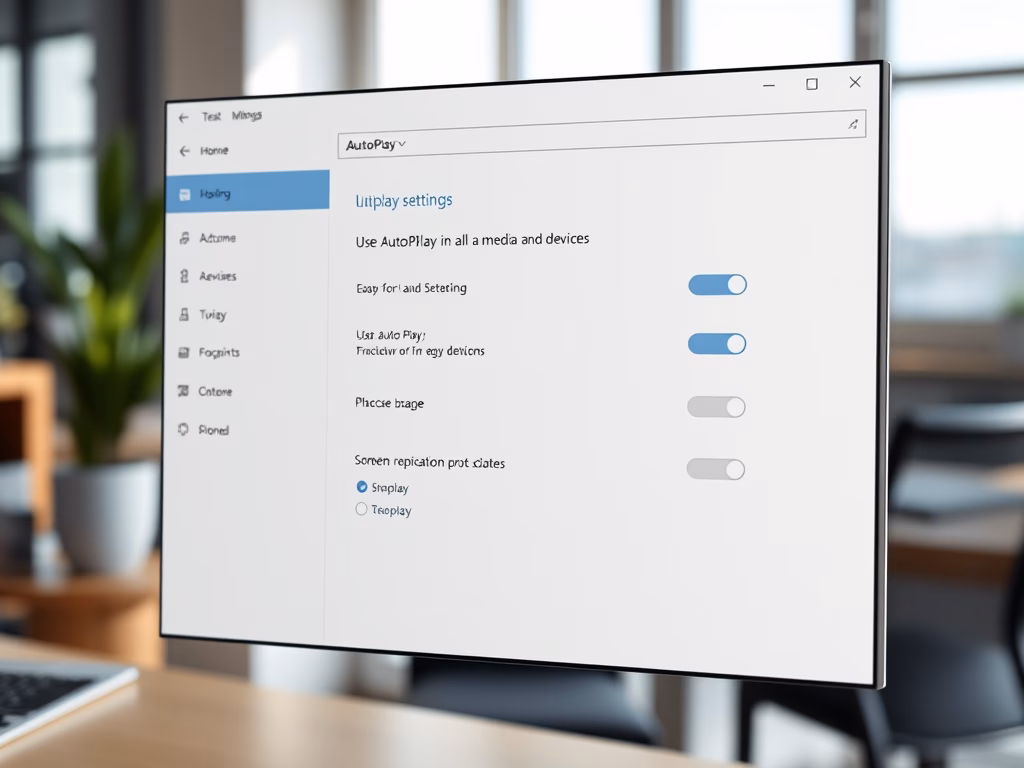
On the AutoPlay settings pane, you can turn off AutoPlay settings by toggling the button under Use AutoPlay for all media and devices to the Off position.
When the AutoPlay feature is disabled, you must manually launch media content or external devices when inserted or connected to the computer.
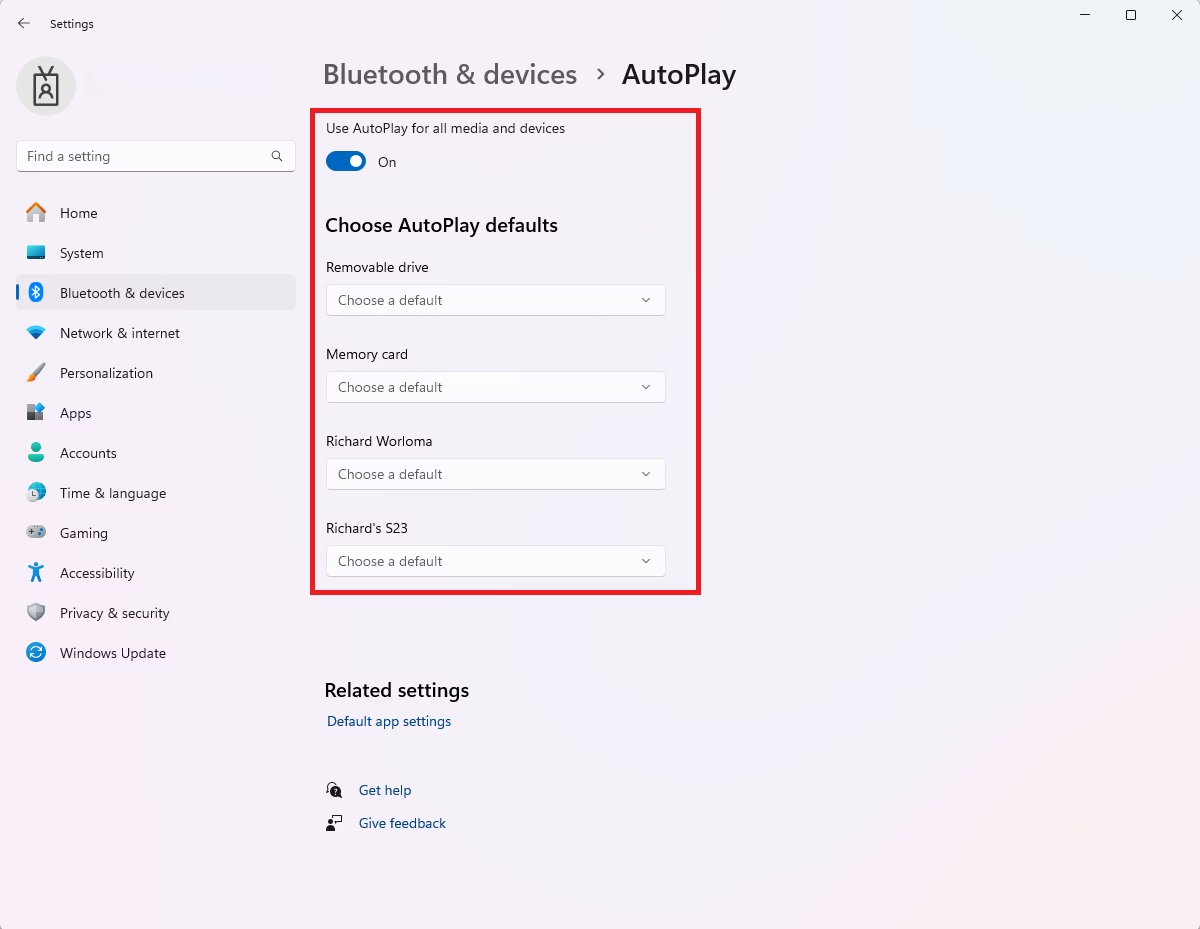
You can choose to leave AutoPlay On and customize individual settings. Choose the type of media you want to modify and select the action you want AutoPlay to perform when you connect each type of media or device.
These are the settings you can choose:
Removable drive:
- Take no action
- Open the folder to view files (File Explorer)
- Ask me every time
- Configure storage settings (Settings)
Memory card:
- Import photos and videos (Photo)
- Play (Windows Media Player)
- Take no action
- Open the folder to view files (File Explorer)
- Ask me every time
You can select these actions whenever a particular media is inserted into the computer.
Set AutoPlay settings in Control Panel
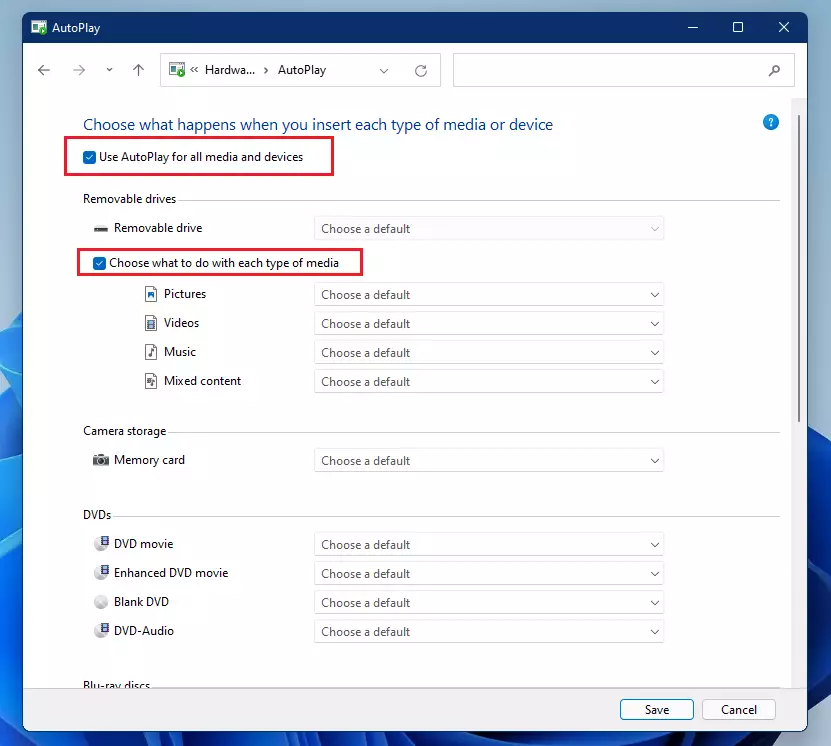
Windows Control Panel gives you granular control settings for different media formats. You can fine-tune settings for specific media.
Search Control Panel from the Start menu, then select Open it. In the Control Panel app, select Hardware and Sound group and go to AutoPlay.
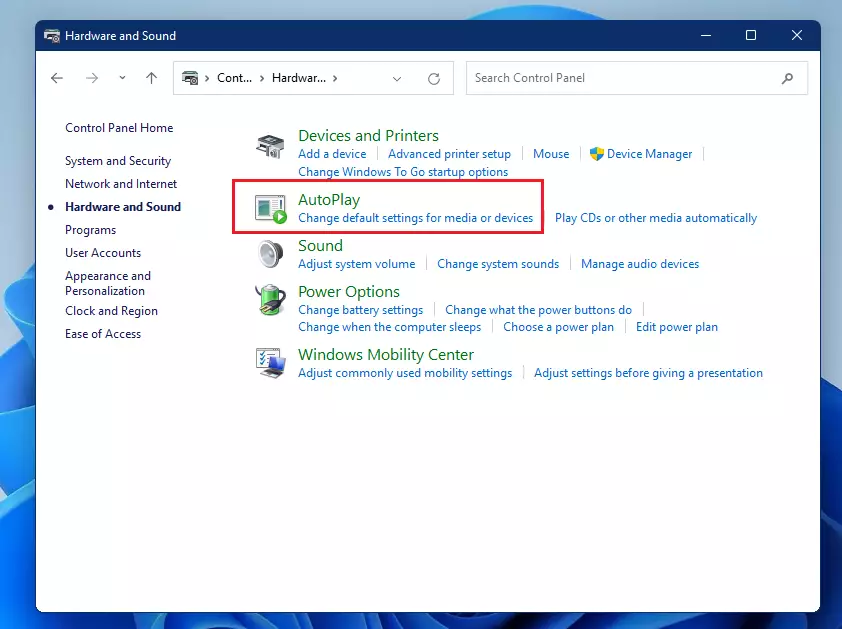
You can select what should happen when you insert each media or device into your computer. You can configure an action for each media type by changing the default.
When you’re done, save your changes and exit.
That should do it!
Changing the Windows 11 AutoPlay setting is incredibly easy. Whether changing it for security reasons or simply trying to automate the opening of content from the inserted disc, you simply need to set it and forget it.
Conclusion:
- Changing AutoPlay settings in Windows 11 is a straightforward process.
- The feature allows for customization based on user preferences and security needs.
- Users can choose specific actions for various types of media or disable AutoPlay entirely.
- Accessing AutoPlay settings can be done through both the System Settings and Control Panel.
- Proper configuration can enhance usability and minimize the risks associated with external media.
- Regularly reviewing AutoPlay settings ensures optimal performance and security for your system.


Leave a Reply to Reset AutoPlay Settings in Windows 11: A Quick Guide - Geek Rewind Cancel reply