This article explains how to backup and restore Microsoft Defender Firewall settings in Windows 11.
The Windows Firewall helps safeguard your device by filtering network traffic and blocking unauthorized access.
On Windows 11, you can use the Windows Security app to view and manage the status of Windows Firewall. You can turn the firewall on or off at any time using the Windows Security app.
You can export (back up) and import (restore) Microsoft Defender Firewall settings on a new or existing computer to set up or resolve any issues that arise.
Backup and Restore Windows Firewall settings using Advanced Security
There are multiple ways one can backup and restore the Windows Firewall settings in Windows 11.
One way is to use the Windows Security app.
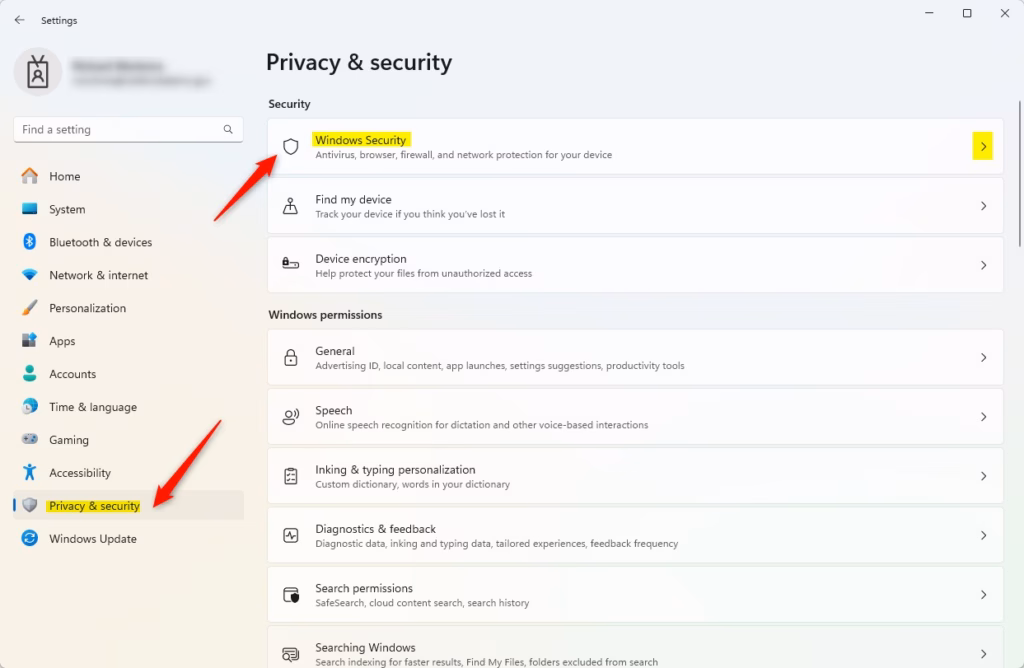
To do that, click on Start and select Settings on the Start menu.

In Settings app, click Privacy & security > Windows Security tile.
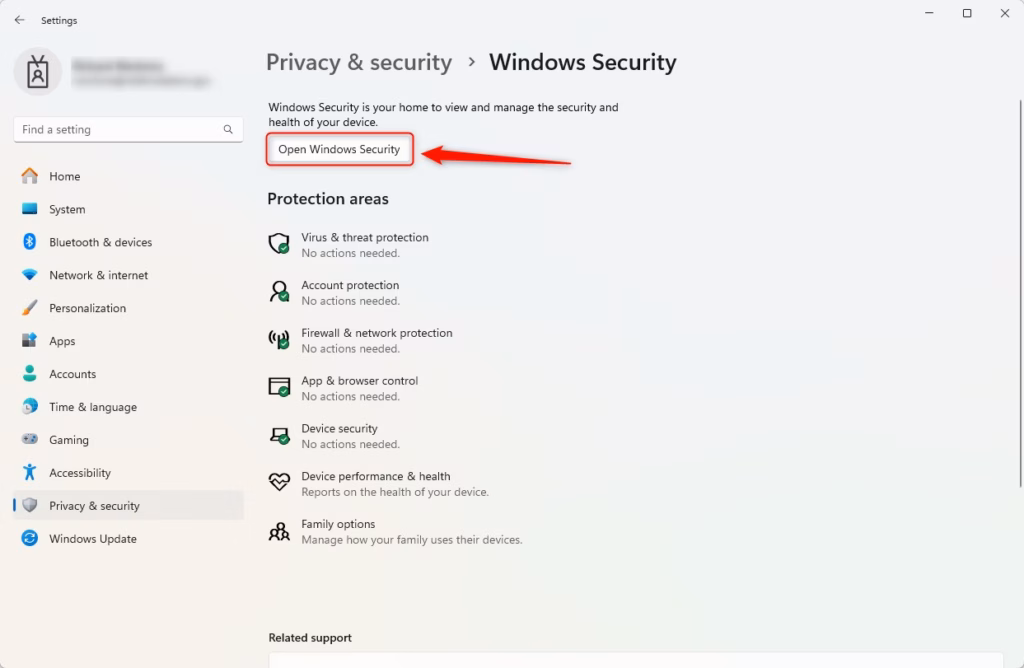
Next, click Open Windows Security button.
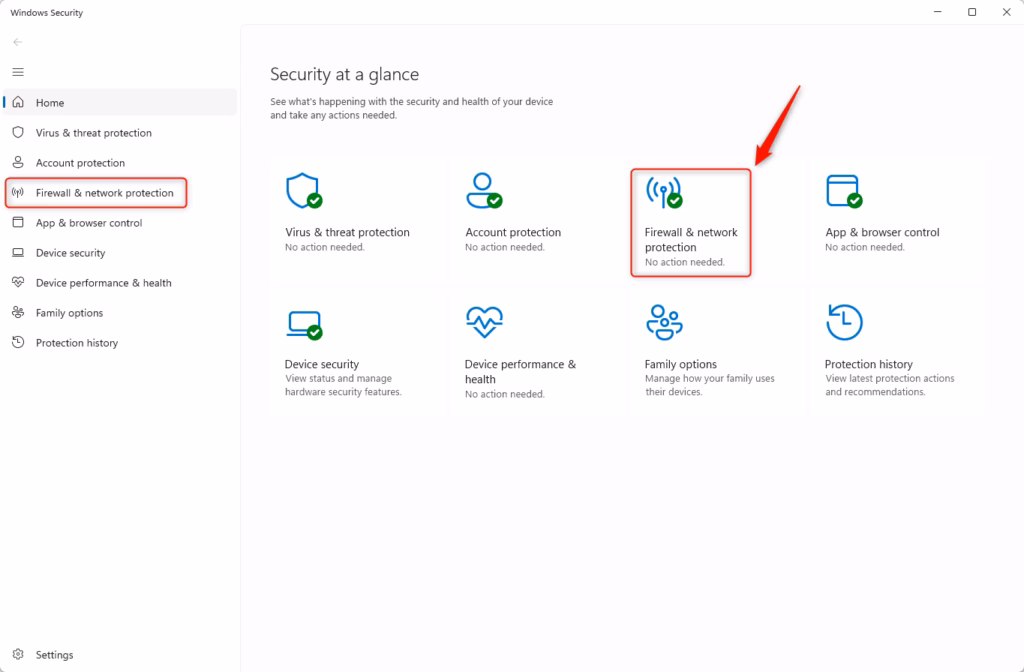
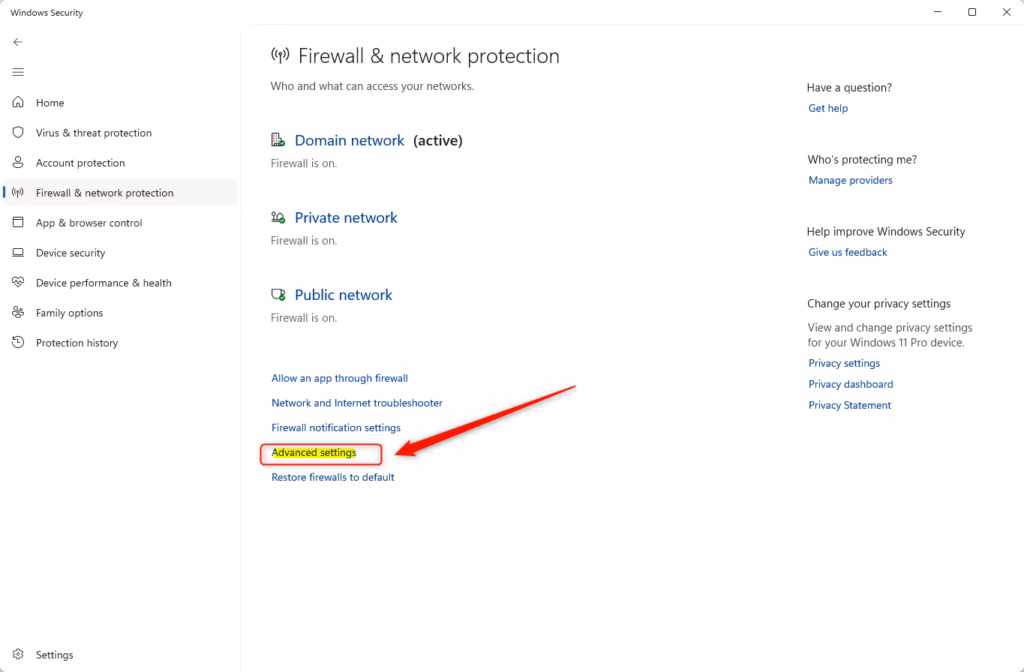
In the Windows Security app on your PC, select Firewall & network protection or use the following shortcut: Firewall & network protection.
Next, click on the Advanced settings link at the bottom.
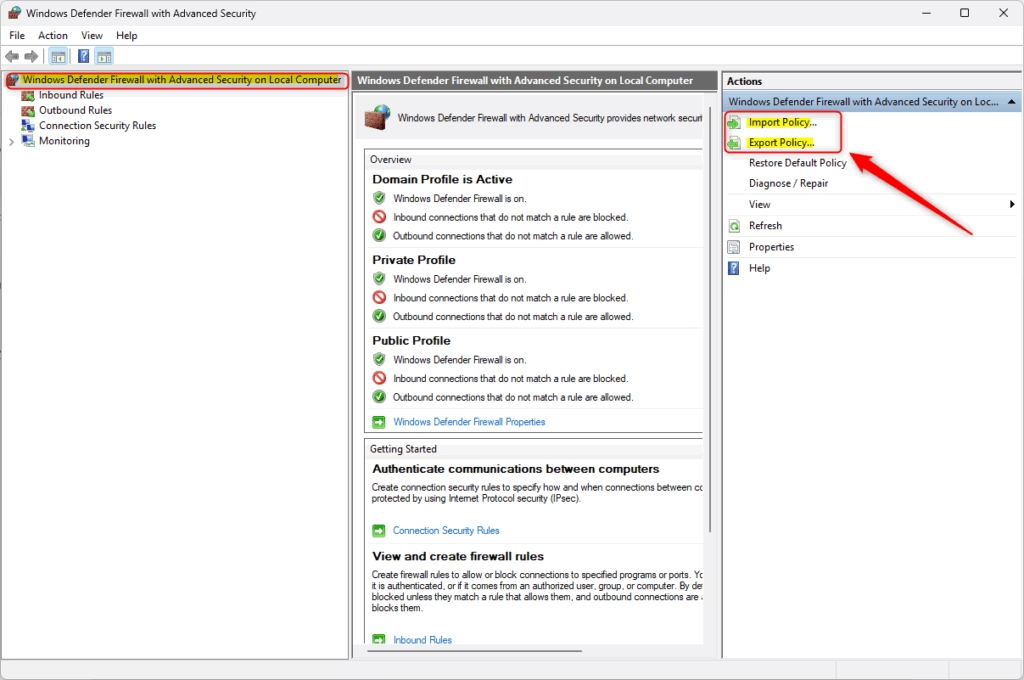
On the pop-up window, use the “Export Policy” link to export or back up your Firewall settings.
To restore the settings, click the “Import Policy” link.
When prompted, navigate to where you want to export the .wfw file, type a file name you want, and click on Save.
Do the reverse to restore or import the firewall settings.
Backup and restore Defender Firewall using the Command Prompt
Using the Command Prompt, you can also backup and restore the Microsoft Defender Firewall settings.
First, open the Windows Terminal app as administrator and select the “Command Prompt” or the PowerShell tab.
Command Prompt:
netsh advfirewall export "%userprofile%\Desktop\FirewallBackup.wfw"
PowerShell:
netsh advfirewall export "$Env:USERPROFILE\Desktop\FirewallBackup.wfw"
To restore or import the Firewall settings, run the command below using the Command Prompt or PowerSehll.
netsh advfirewall import "C:\Users\Richard\Desktop\FirewallBackup.wfw"
That should do it!
Conclusion:
- Backing up and restoring Microsoft Defender Firewall settings in Windows 11 is essential for maintaining network security and resolving potential issues.
- The process can be accomplished easily through the Windows Security app or by using the Command Prompt.
- Regularly backing up your firewall settings ensures you can quickly restore them in case of any configuration changes or issues.
- Familiarizing yourself with both the GUI and command-line methods provides flexibility in managing your firewall settings effectively.
- Always ensure your backup files are stored in a secure location to prevent unauthorized access.


Leave a Reply