
This guide will show you easy steps to add or remove folder shortcuts from the Start menu in Windows 11.
Windows 11 has a new Start menu right in the middle of your screen. It shows all your apps, Settings, and files. You can also choose which folders you want quick access to at the bottom of the Start menu, right next to the Power button.
Adding your favorite folders here helps you open them faster without searching. By default, Windows shows folders like Documents, Downloads, and Pictures.
How to Add or Remove Folders on the Start Menu
Follow these simple steps to customize the folders that appear on your Start menu:
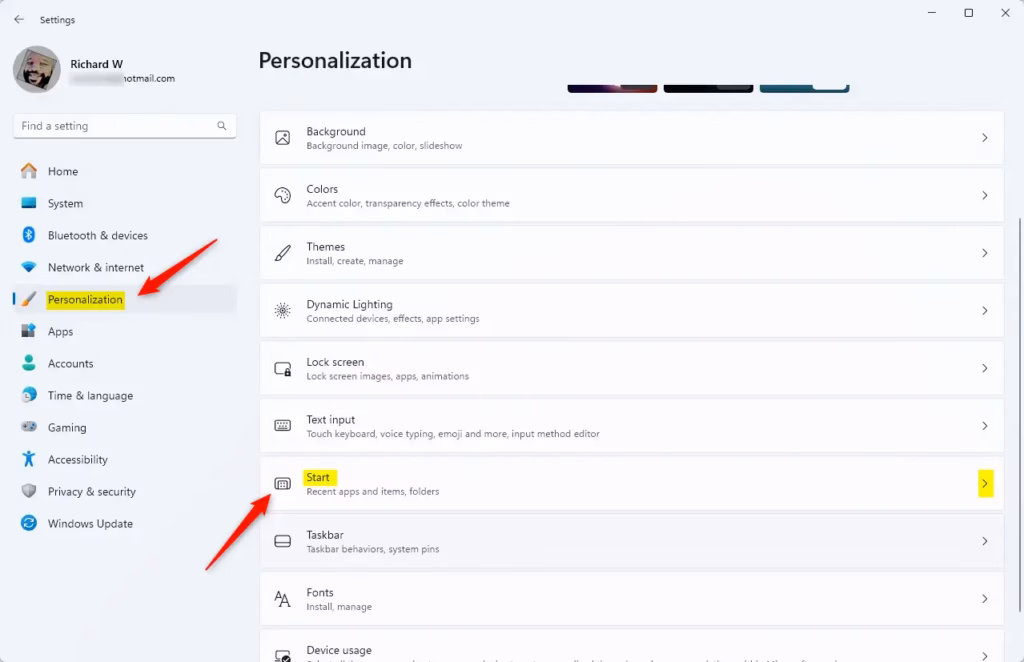
- Open Settings: Click the Start menu button (Windows icon) at the bottom center of your screen, then click Settings.
Or press Windows key + I on your keyboard to open Settings quickly. - In the Settings window, click on Personalization on the left side.
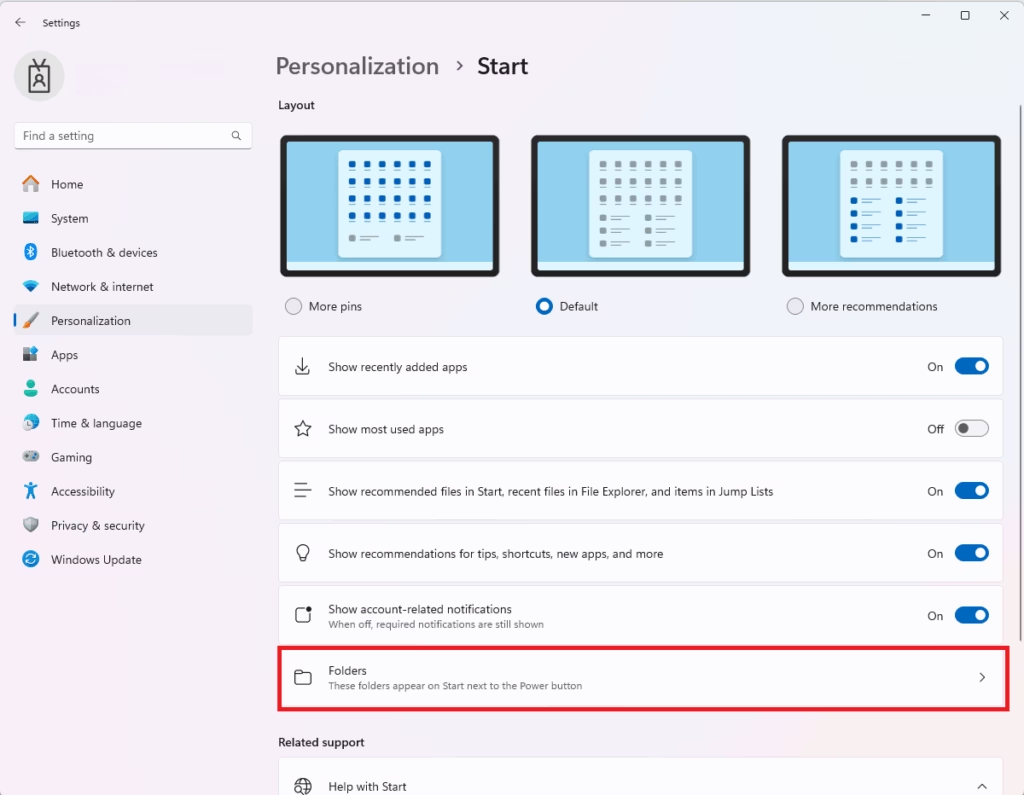
- Next, click Start on the right side to open Start menu settings.
- Now, click the Folders section to see which folders you can add or remove.
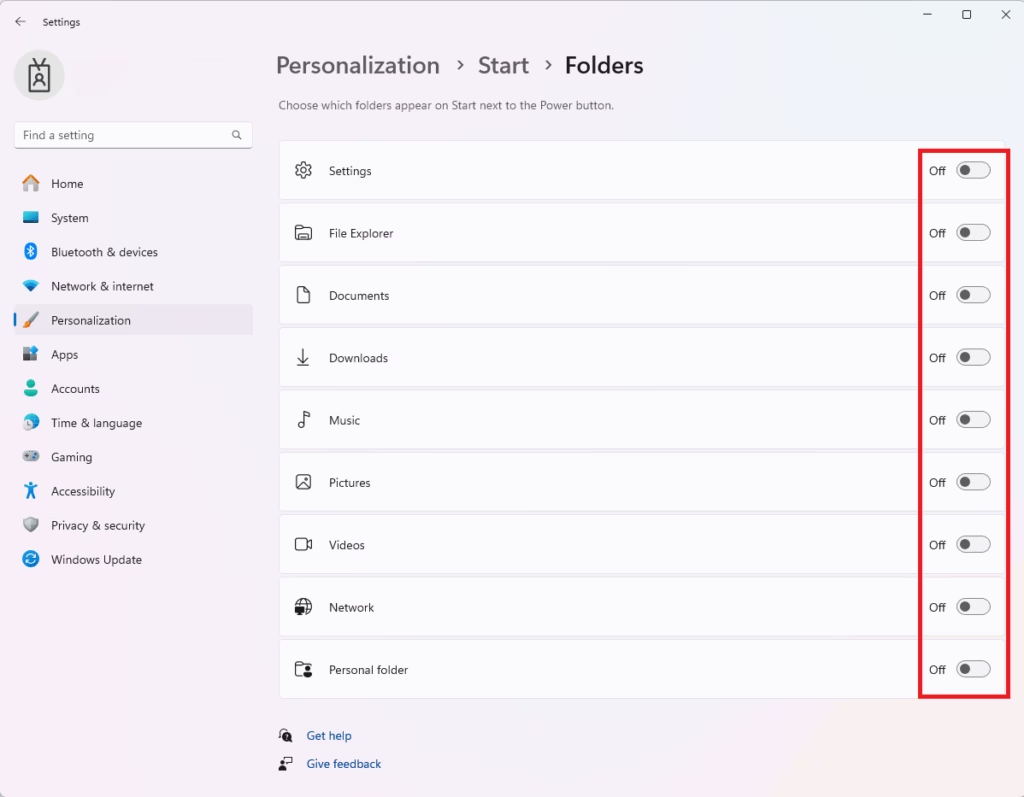
Here, you will see toggle buttons next to folder names like Documents, Downloads, Music, Pictures, and more.
To add a folder: Turn the toggle On next to the folder you want to see.
To remove a folder: Turn the toggle Off next to the folder you don’t want to see.
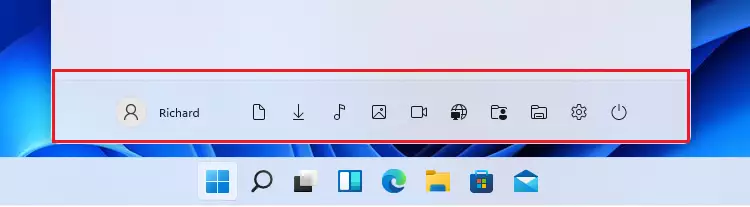
Once done, open the Start menu to see your selected folders right next to the Power button.
Tip: In the Start menu, you can also right-click on a folder shortcut and choose Personalize this list to open the folder settings quickly.

Summary
- You can add or remove folder shortcuts from the Start menu in Windows 11 to access your files faster.
- Use the Settings app under Personalization > Start > Folders to make changes.
- Organizing your Start menu saves time and keeps things simple.
- Customize it to fit the way you work best.
- Update your folder shortcuts anytime if your needs change.
That’s all! Now you know how to make your Start menu more useful by adding or removing folders.
Leave a Reply Cancel reply