Add a PIN to Your Account in Windows 11
Want an easy and safe way to sign into your Windows 11 computer? This guide will show you how to set up a PIN for your account. Using a PIN is a quick and secure way to log in, and it’s part of a system called Windows Hello.
What is Windows Hello and Why Use a PIN?
Windows Hello lets you sign in with a PIN, your face, or your fingerprint. When you use a PIN, it’s safer than a password because:
- Your PIN works only on your device. If someone steals your PIN, they still need your computer or phone to use it.
- Your PIN stays on your device. It’s never sent over the internet, so hackers can’t steal it from a server.
- Your device has special hardware (TPM) that protects your PIN. This hardware stops others from guessing your PIN too many times.
- PINs can be as simple or as complex as you want. You can use numbers, letters, and symbols for extra security.
- You need a PIN even if you use face or fingerprint sign-in. This acts as a backup if biometric sign-in doesn’t work.
Want to learn more? Check out How a PIN is better than a password.
How to Add a PIN to Your Account
Option 1: Add a PIN through Settings
- Open Settings by pressing Win + I on your keyboard.
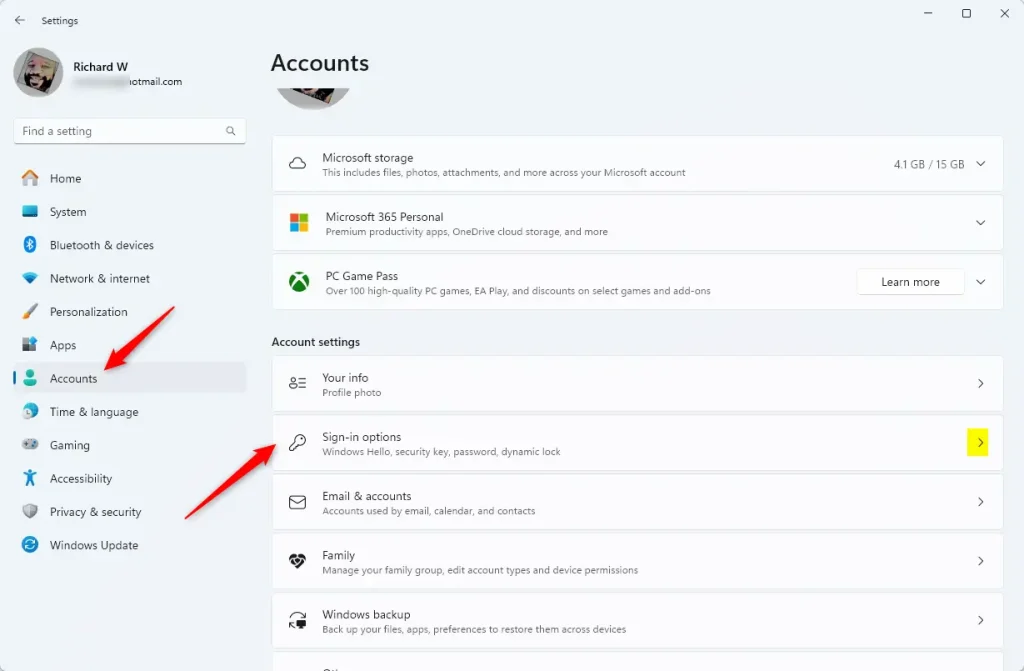
- Click Accounts from the left menu, then select Sign-in options on the right.
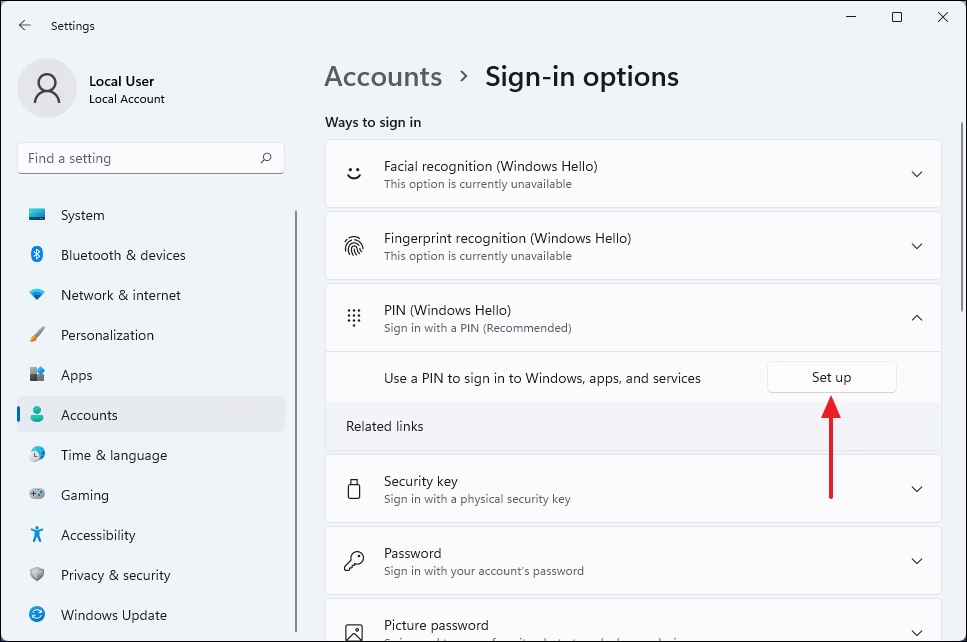
- Find the section called PIN (Windows Hello) and click it to expand.
- Click the Set up button next to “Use a PIN to sign in to Windows, apps, and services”.
- Click Next if you are using a Microsoft account (skip if you use a local account).
- Type your current account password to verify it’s you, and click Sign in or OK.
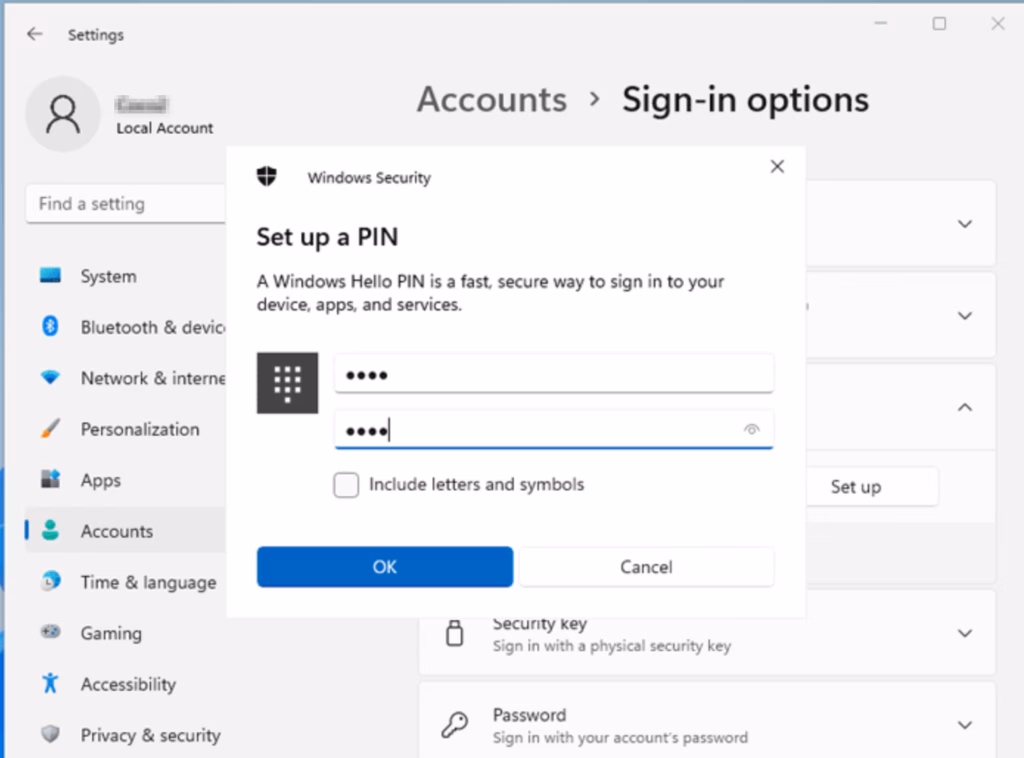
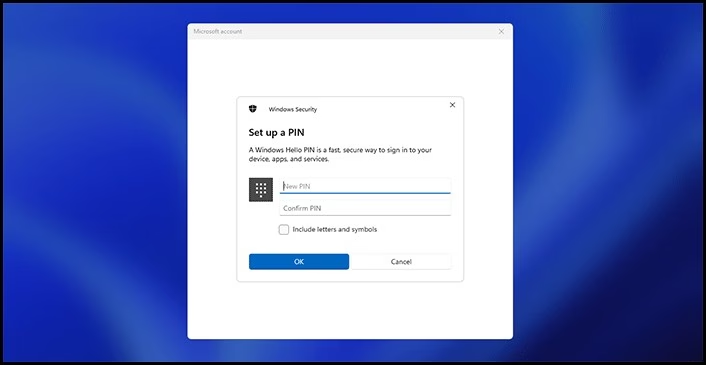
- Choose a PIN (at least 4 digits) you want to use and type it in. You can check Include letters and symbols if you want a more complex PIN.
- Click OK to finish.
Here are some pictures to help you along the way:
Option 2: Add a PIN from the Sign-in Screen
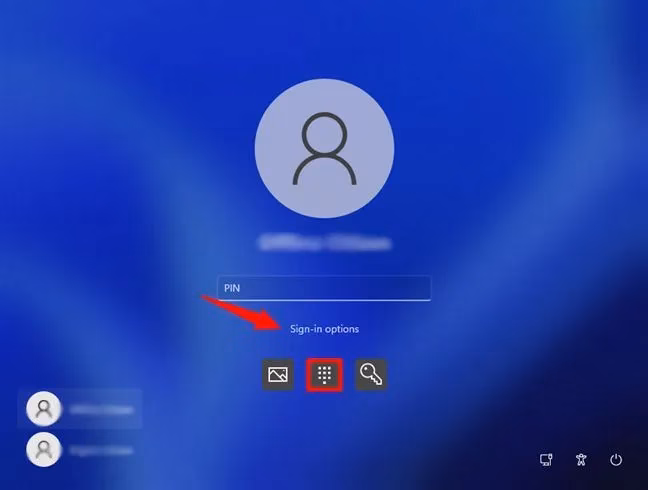
- On the sign-in screen, click Sign-in options below the password box.
- Choose the PIN option.
- Enter your account password (not a PIN) and press Enter.
- Click Next if you’re using a Microsoft account.
- Create your new PIN and click OK.
- You will now be signed in using your PIN.
Pictures to guide you:
Wrapping Up
Setting up a PIN in Windows 11 is a simple way to keep your computer safe and make signing in faster. Here’s why it’s a good idea:
- More secure: Your PIN works only on your device and is not sent online.
- Protected by special hardware: Your device keeps your PIN safe and stops hackers.
- Easy to use: Signing in with a PIN is faster than typing a long password.
- Works with biometrics: Use PIN as a backup if fingerprint or face sign-in isn’t available.
- Flexible: You can create a simple or complex PIN.
By following the steps above, you can quickly add a PIN to your Windows 11 account and enjoy a safer, smoother sign-in experience.
Helpful Links
Was this guide helpful?

About the Author
Richard
Tech Writer, IT Professional
Richard, a writer for Geek Rewind, is a tech enthusiast who loves breaking down complex IT topics into simple, easy-to-understand ideas. With years of hands-on experience in system administration and enterprise IT operations, he’s developed a knack for offering practical tips and solutions. Richard aims to make technology more accessible and actionable. He's deeply committed to the Geek Rewind community, always ready to answer questions and engage in discussions.


No comments yet — be the first to share your thoughts!