How to Add a hardware device to a Windows 11 PC
Getting a new gadget connected to your Windows 11 PC is a key step to using it. This process allows your computer to recognize and interact with your new hardware.
This process is also called installing a driver, which is essentially a set of instructions that tell Windows how to communicate with the device.
Windows 11 usually detects new hardware like printers or webcams automatically when you plug them in. However, sometimes Windows needs a bit of help to recognize and set up the device correctly.
This guide walks you through the steps to get your new hardware working, typically in under 10 minutes.
Plug in and power on your device, then put it in pairing mode. Open Settings, go to Bluetooth & devices, then Devices. Click Add device, select the device type, and let Windows scan for it. Follow any on-screen prompts to complete the connection.
Why Does Windows Need a Helping Hand?
Sometimes your Windows PC doesn’t automatically find new hardware you plug in because it needs special instructions called drivers to talk to the device.
- The device is not seen at all when you plug it in or turn it on.
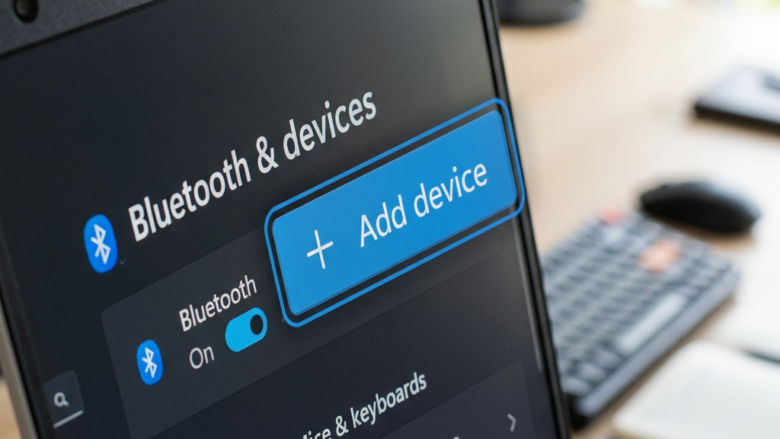
- You are connecting something that uses Bluetooth or another wireless method.
- It’s a new external device that Windows has not seen before.
If any of these sound familiar, you can add the device yourself. It’s a simple process.
Step 1Make Sure Your New Device is Ready to Go
Before you try adding a new device in Windows, make sure it’s powered on and, if it’s wireless or Bluetooth, that it’s in pairing mode so your PC can find it.
- Power it On: Make sure your new hardware is plugged in and turned on. Look for any lights that show it has power.
- Pairing Mode (for Bluetooth/Wireless): If your device uses Bluetooth or wireless, you might need to put it in “pairing mode.” This tells your computer it’s ready to be found. Check your device’s manual for how to do this. It often involves pressing a button for a few seconds.
- Keep it Close: For Bluetooth devices, make sure they are near your computer when you set them up. A weak signal can stop the connection.
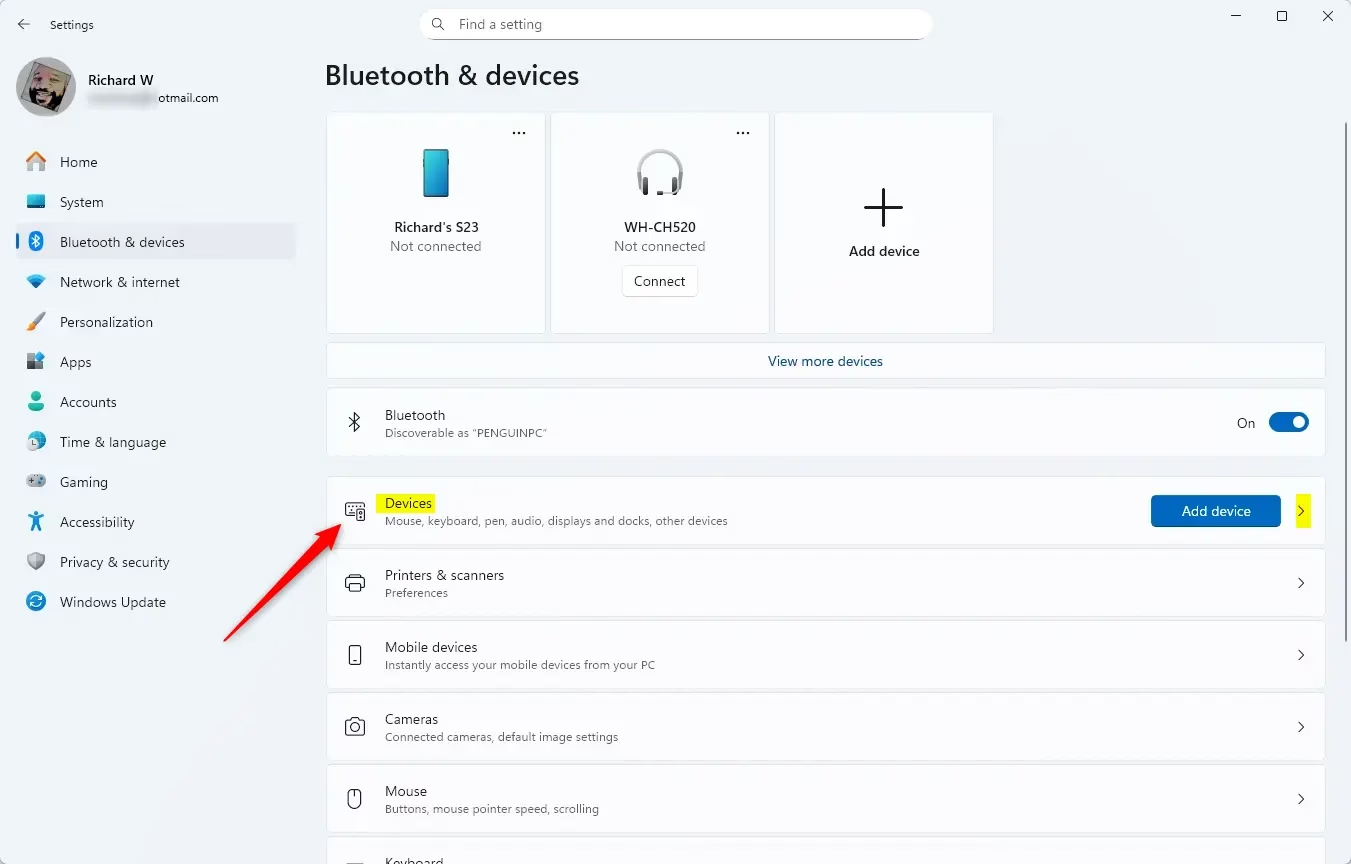
Step 2Accessing the ‘Devices’ Settings in 🪟 Windows 11
To tell Windows 11 to look for your new hardware, you need to open the ‘Devices’ settings by clicking the Start button, then the gear icon for Settings, and finally selecting ‘ Bluetooth & devices’.
- Click the Start Button: This is the Windows icon, usually in the bottom-left corner.
- Select Settings: Look for the gear icon and click it.
- Go to Bluetooth & devices: In the Settings window, click on “ Bluetooth & devices” on the left side.
- Choose Devices: Inside “ Bluetooth & devices,” click on “Devices.” This shows all connected and discoverable hardware.
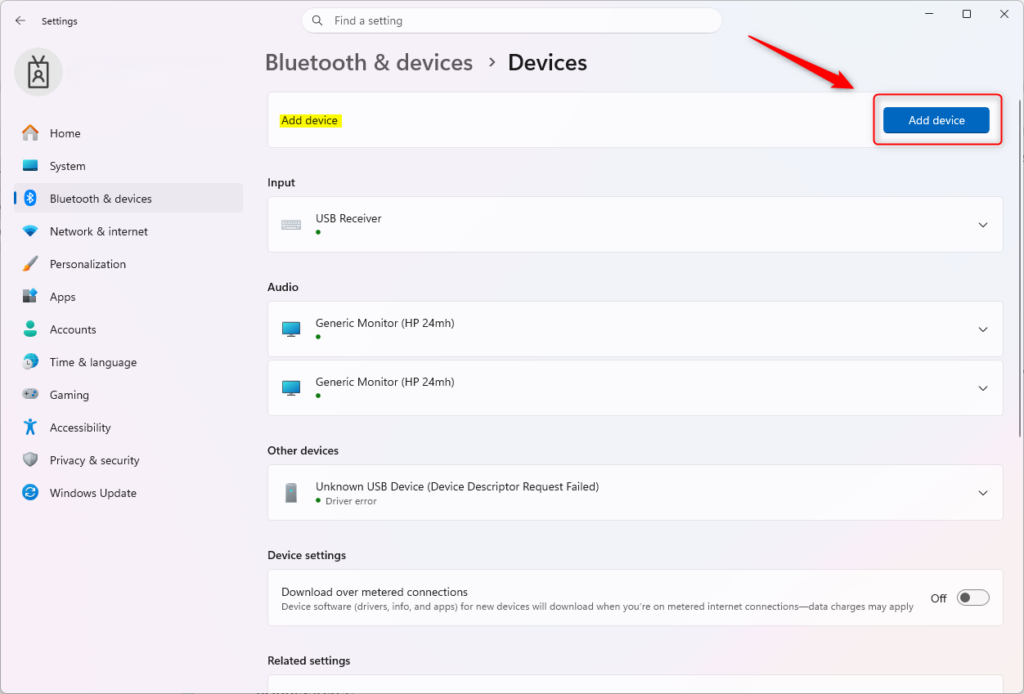
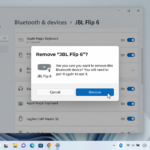
Step 3Adding Your Device in 🪟 Windows 11
Once you’re in the ‘Devices’ settings in Windows 11, click the ‘Add device’ button at the top and then choose the type of device you’re adding, like Bluetooth or wireless, to start the connection process.
- Click Add device: At the top of the “Devices” window, click the “Add device” button.
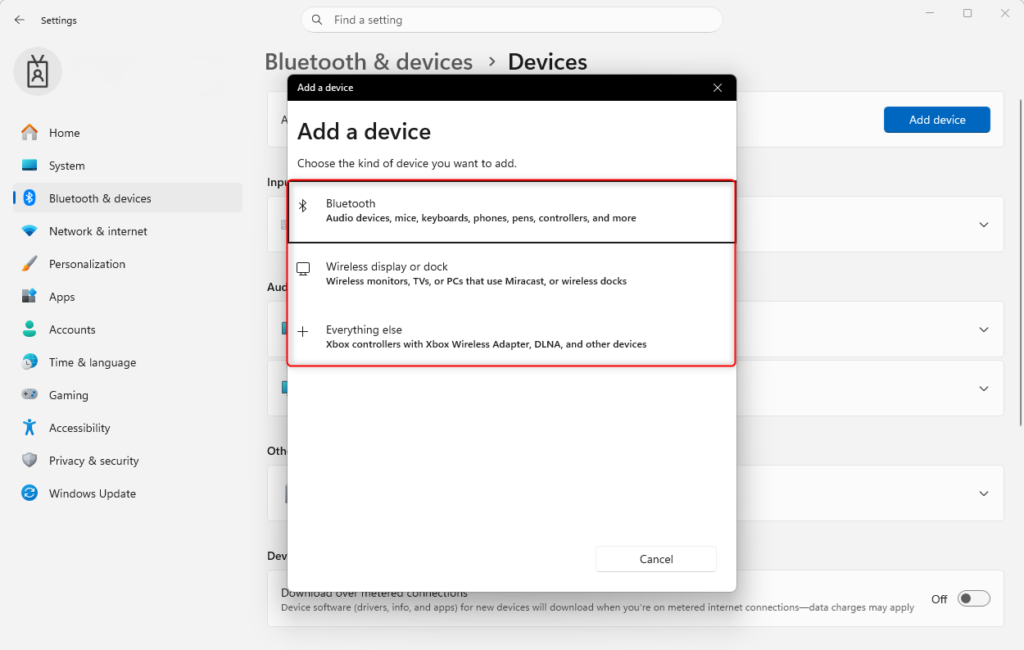
- Select the Device Type: A new window will ask what kind of device you want to add. For most accessories like mice, keyboards, or speakers, choose Bluetooth, wireless, input, video and more. If you are adding a printer or projector, you might pick a different option.
- Let Windows Scan: Windows will now look for devices that are discoverable and in pairing mode. This may take a minute or two.
- Follow On-Screen Prompts: When your device shows up, click on it. Windows will guide you through any other steps. This might include confirming a code or just waiting for the connection to finish.
What Happens When Done?
After you add your new hardware in Windows 11, the PC installs the necessary drivers so it can communicate with the device, making it ready to use right away and visible in your device list.
Reference:
https://support.microsoft.com/en-US/Windows/Hardware/add-a-hardware-device-to-a-windows-device
Summary
This guide shows you how to connect new hardware to your Windows 11 PC by checking the device’s power and pairing mode, then using the Settings app to add it, ensuring Windows recognizes and sets up your device correctly.
Was this guide helpful?

About the Author
Richard
Tech Writer, IT Professional
Richard, a writer for Geek Rewind, is a tech enthusiast who loves breaking down complex IT topics into simple, easy-to-understand ideas. With years of hands-on experience in system administration and enterprise IT operations, he’s developed a knack for offering practical tips and solutions. Richard aims to make technology more accessible and actionable. He's deeply committed to the Geek Rewind community, always ready to answer questions and engage in discussions.


No comments yet — be the first to share your thoughts!