How to Use Your SIM for Cellular Data in Windows 11
You can use your SIM card for cellular data in Windows 11 to get online anywhere with a cell signal, just like your smartphone.
This feature allows your Windows laptop or tablet to connect directly to a mobile network using a physical SIM card or an eSIM, eliminating the need for Wi-Fi or phone tethering.
Many modern Windows devices, especially laptops and tablets released after 2018, include a built-in cellular modem capable of this connection.
This means you gain the freedom to work, stream, and browse from practically any location, whether it’s a busy airport or a quiet park.
Connecting for the First Time
Getting your Windows device connected to cellular data for the first time involves a couple of key steps, starting with your SIM card or eSIM.
Insert Your SIM Card (or Check Your eSIM)
If your device has a slot for a physical SIM card, pop it in, making sure it’s facing the right way. Look for a small picture near the slot for guidance. If your device uses an eSIM (that’s a SIM card built into the device), you’ll need to have already set it up with your phone company. This typically involves scanning a QR code or entering details they provide.
Access Cellular Settings
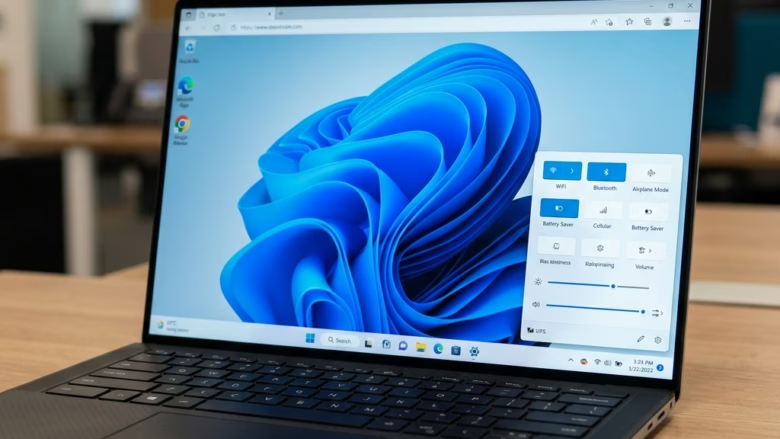
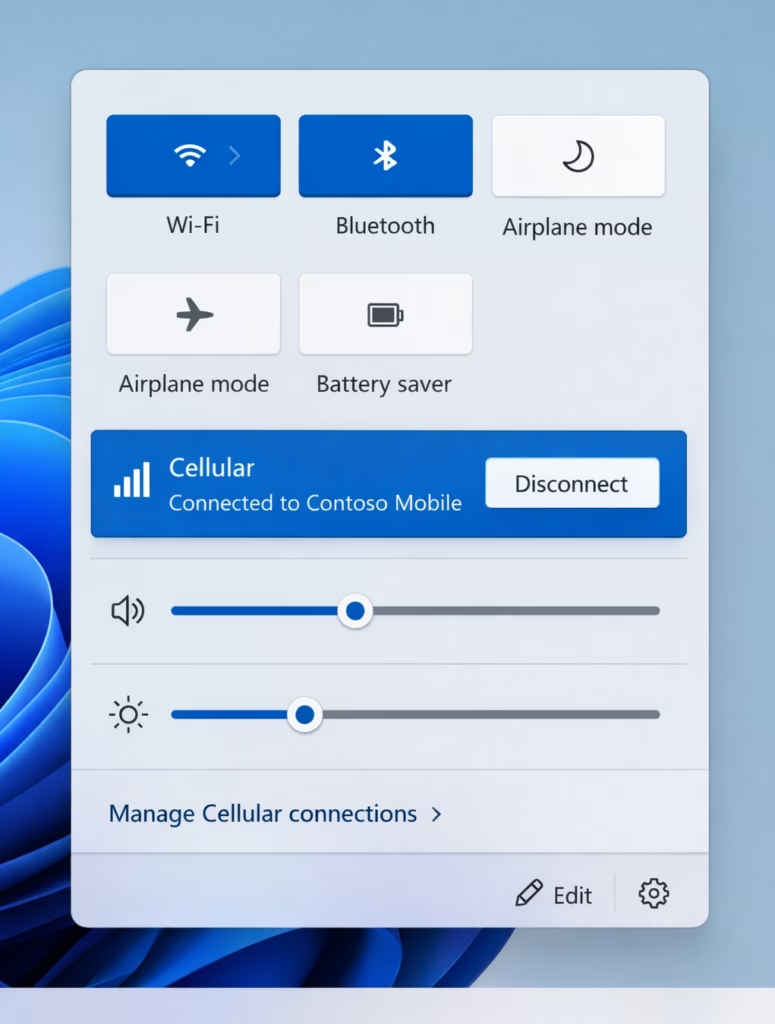
Look for the Network icon in the bottom-right corner of your screen. It often looks like a Wi-Fi symbol or a small globe. Click on it.
You should see a quick setting for “Cellular.” If it’s not there, or if it’s off, click the arrow next to “Manage Wi-Fi connections” to reveal more quick settings. You might need to click the “Cellular” quick setting itself to turn on your cellular connection; it needs to be on for you to connect.
Warning: If the “Cellular” quick setting is off, your device’s cellular hardware is effectively turned off. You won’t be able to connect. Make sure it’s switched on.
Initiate the Connection
Once the “Cellular” quick setting is visible and turned on, you might see your phone company’s name. If “Let Windows keep me connected” is already active, Windows will try to connect automatically when you’re not using Wi-Fi or a wired internet connection. If you prefer to connect manually, or if it’s not connecting on its own, click “Connect” under the “Cellular” quick setting.
Enter Your Details (If Asked)
Sometimes, Windows will ask for a username, password, and Access Point Name (APN). Your phone company provides this information to verify you’re allowed to connect. If you don’t have these details handy, check the documentation that came with your SIM card, your device, or visit your phone company’s website. Keep in mind, this information might already be configured, meaning you won’t have to enter anything.
Managing Your SIM for Cellular Data
For devices equipped to handle both a physical SIM card and an eSIM, Windows offers the flexibility to choose which one you’d like to use for your cellular data connection. This is incredibly useful if you have different plans or profiles you might want to switch between.
Choosing Your SIM Slot
This setting proves particularly valuable if you travel frequently or juggle separate SIM cards for work and personal use. It empowers you to dictate whether your primary cellular data connection originates from your physical SIM card or your eSIM.
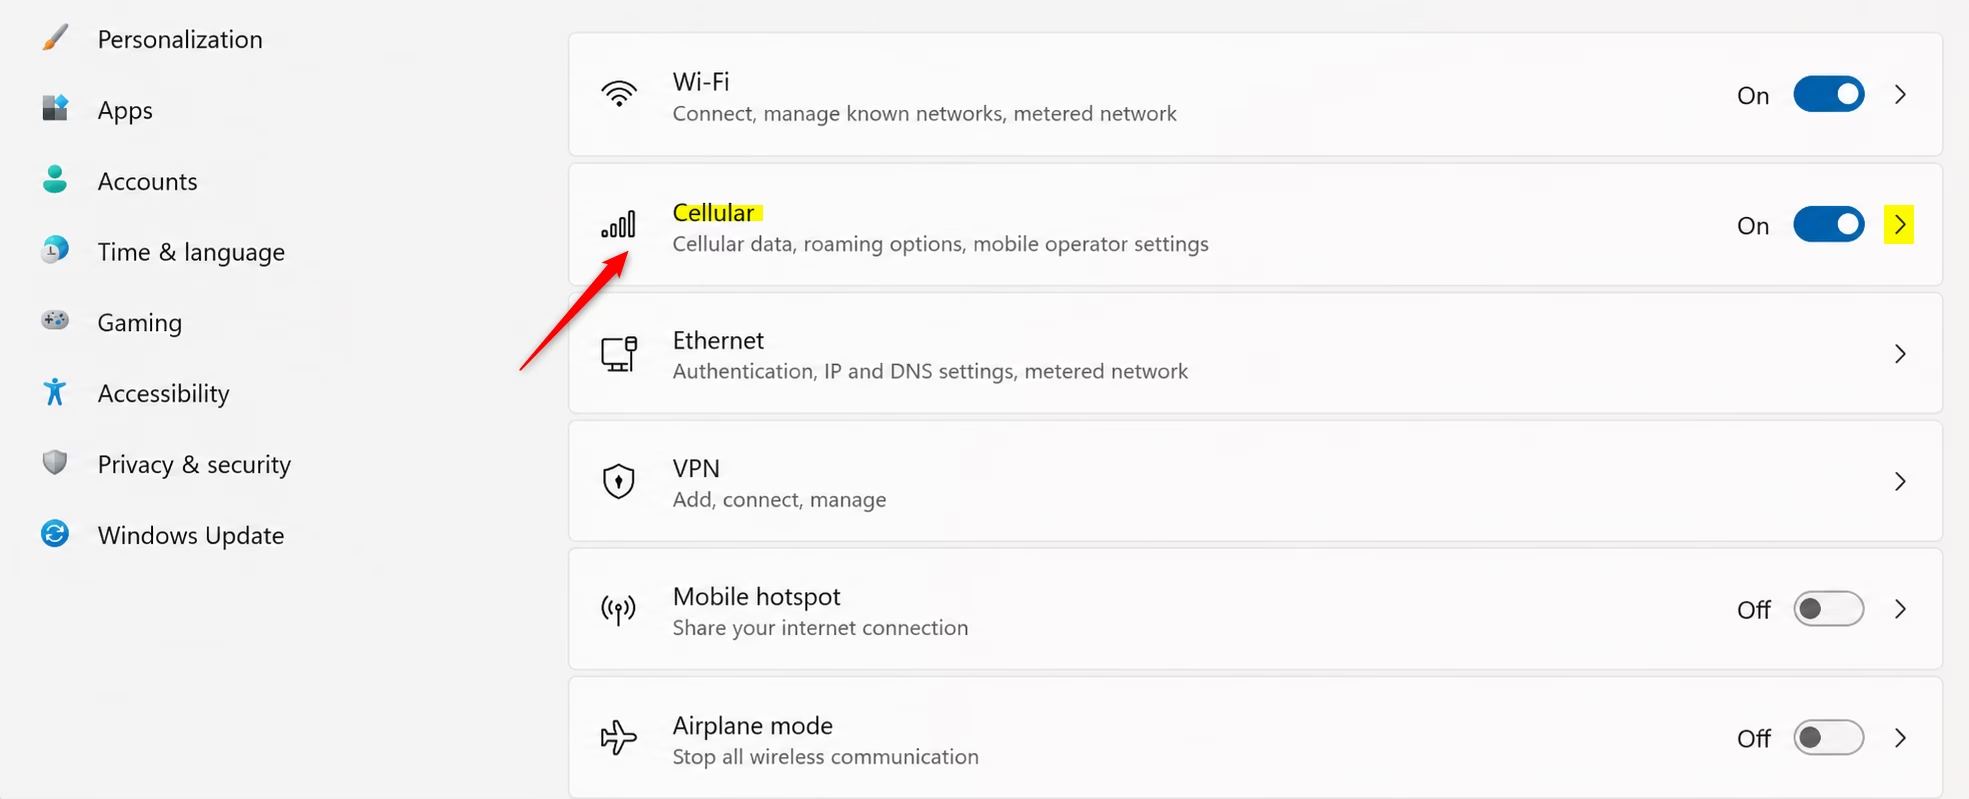
Navigate to Cellular Settings
Click the Start button. Type “Settings” and open the Settings app. Navigate to “Network & internet,” and then select “Cellular.”
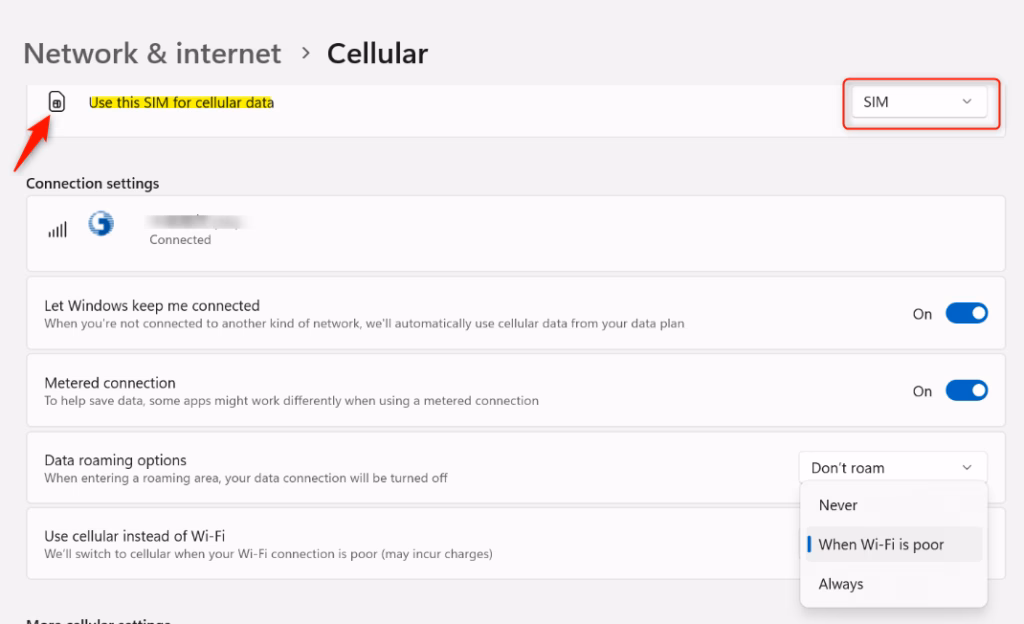
Select the SIM
Locate the option labeled “Use this SIM for cellular data.” Click on it. A dropdown menu will then appear. You can choose between your physical SIM card and your eSIM. Select the one you intend to use for your internet connection.
Warning: This particular option will only appear if your device is equipped with both a physical SIM card slot and an eSIM. If you only have one or the other, this setting won’t be visible.
Reference:
Summary
Leveraging a SIM or eSIM for cellular data in Windows 11 grants you the freedom to stay connected without relying on Wi-Fi. The setup process is quite manageable: insert your SIM or configure your eSIM, then fine-tune the settings within Windows. If your device supports both, you even have the ability to choose which SIM to prioritize. This provides adaptable internet access wherever a cell signal can be found. [Your Mobile Operator Name]
Was this guide helpful?

About the Author
Richard
Tech Writer, IT Professional
Richard, a writer for Geek Rewind, is a tech enthusiast who loves breaking down complex IT topics into simple, easy-to-understand ideas. With years of hands-on experience in system administration and enterprise IT operations, he’s developed a knack for offering practical tips and solutions. Richard aims to make technology more accessible and actionable. He's deeply committed to the Geek Rewind community, always ready to answer questions and engage in discussions.

No comments yet — be the first to share your thoughts!