Did you know you can turn off or restart your Windows 11 PC right from the sign-in screen without logging in? That power button is there by default. But sometimes, you might want to hide it for security or personal reasons.
This guide will show you simple steps to add or remove the power button from the Windows 11 sign-in screen using easy tools built into Windows.
What Does the Power Button on the Sign-In Screen Do?
On the sign-in screen, the power button lets you:
If you want to control whether people can shut down your PC without signing in, you can change this setting using the steps below.
Method 1: Use the Local Security Policy Editor
This tool lets you change security settings on your PC. Here’s how to show or hide the power button on the sign-in screen:
- Press Windows key + R on your keyboard to open the Run box.
- Type secpol.msc and press Enter to open the Local Security Policy Editor.
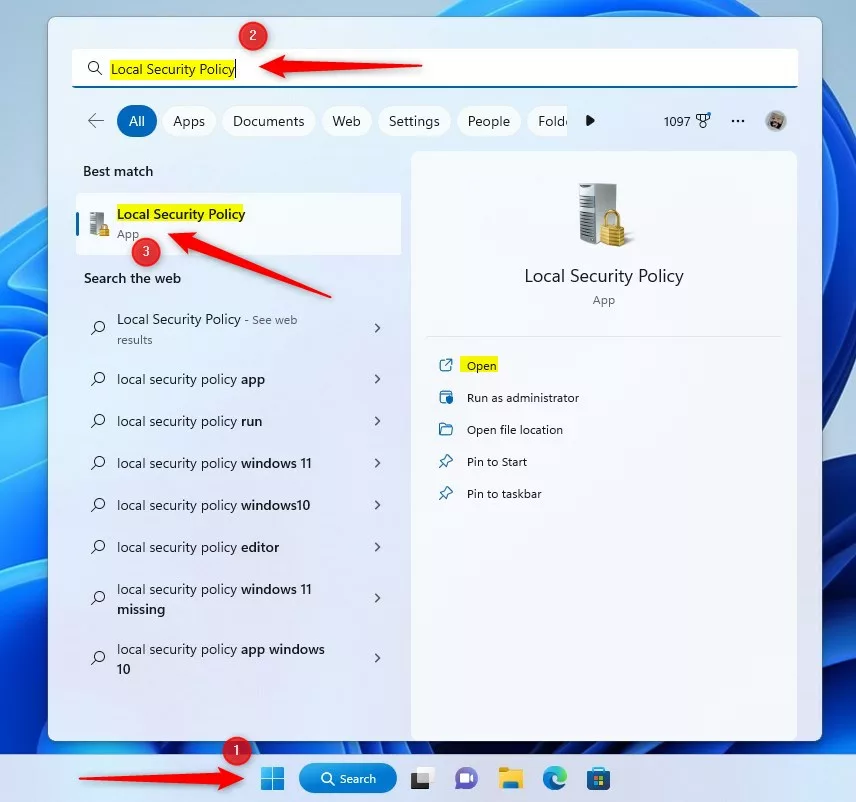
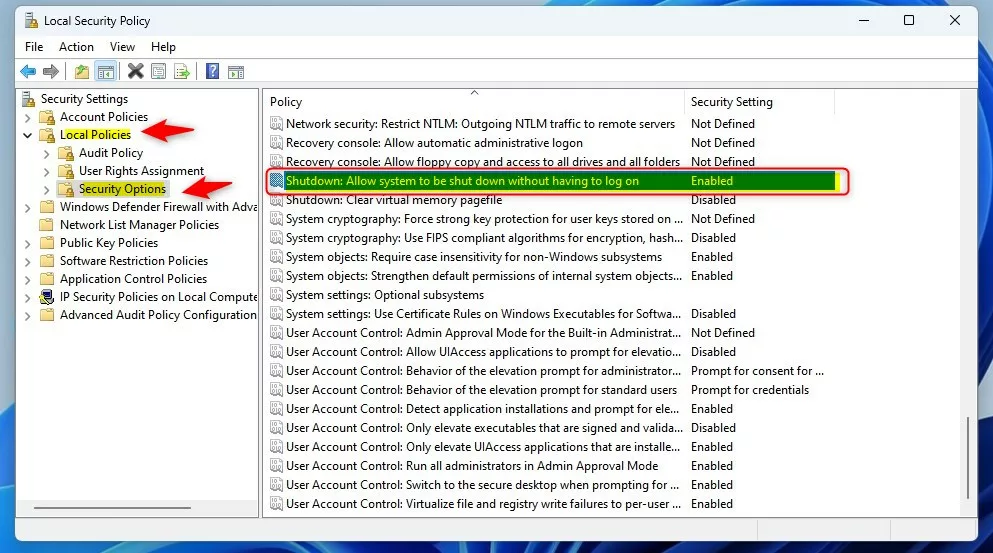
Opening Local Security Policy Editor - In the left pane, click the arrow next to Local Policies to expand it.
- Select Security Options.
- In the right pane, find and double-click “Shutdown: Allow the system to be shut down without having to log on”.
Find the shutdown policy setting - Choose one of these options:
- Enabled – Power button will be shown on the sign-in screen.
- Disabled – Power button will be hidden on the sign-in screen.
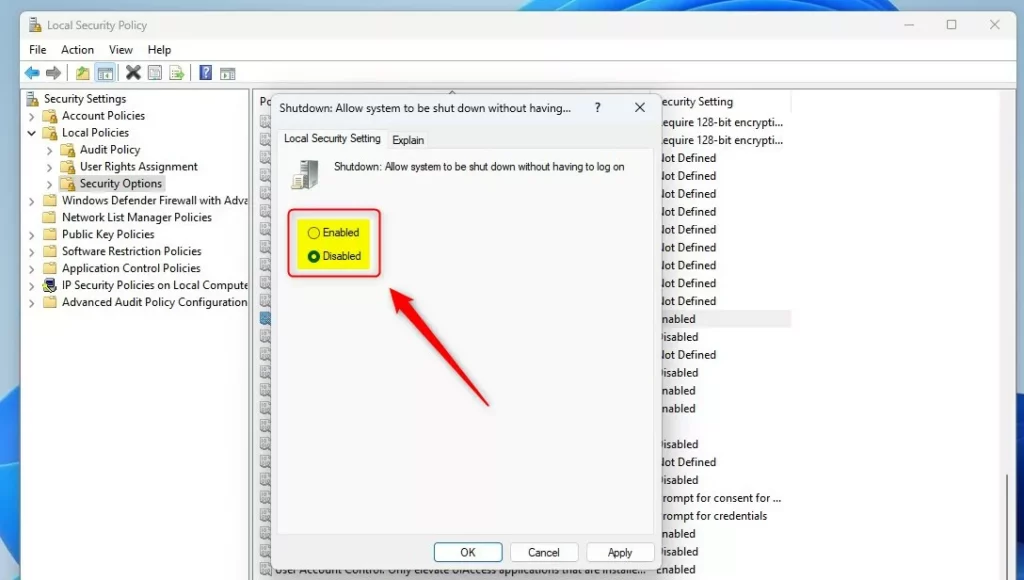
Enable or disable the power button - Click OK to save your changes.
- Close the Local Security Policy Editor.
- Restart your PC to see the change.
Method 2: Use the Windows Registry Editor
If you prefer, you can also change this setting using the Windows Registry. Be careful when using the Registry Editor. Making wrong changes can affect your PC.
Follow these steps:
- Press Windows key + R, type regedit, and press Enter to open the Registry Editor. If prompted by User Account Control, click Yes.
- In the Registry Editor, go to this location:
HKEY_LOCAL_MACHINESOFTWAREMicrosoftWindowsCurrentVersionPoliciesSystem
- If you don’t see the System folder, right-click the Policies folder, choose New > Key, and name it System.
- Click the System folder to select it.
- On the right side, right-click and select New > DWORD (32-bit) Value.
- Name the new value shutdownwithoutlogon.
- Double-click shutdownwithoutlogon, and set the Value data to:
- 1 to show the power button
- 0 to hide the power button
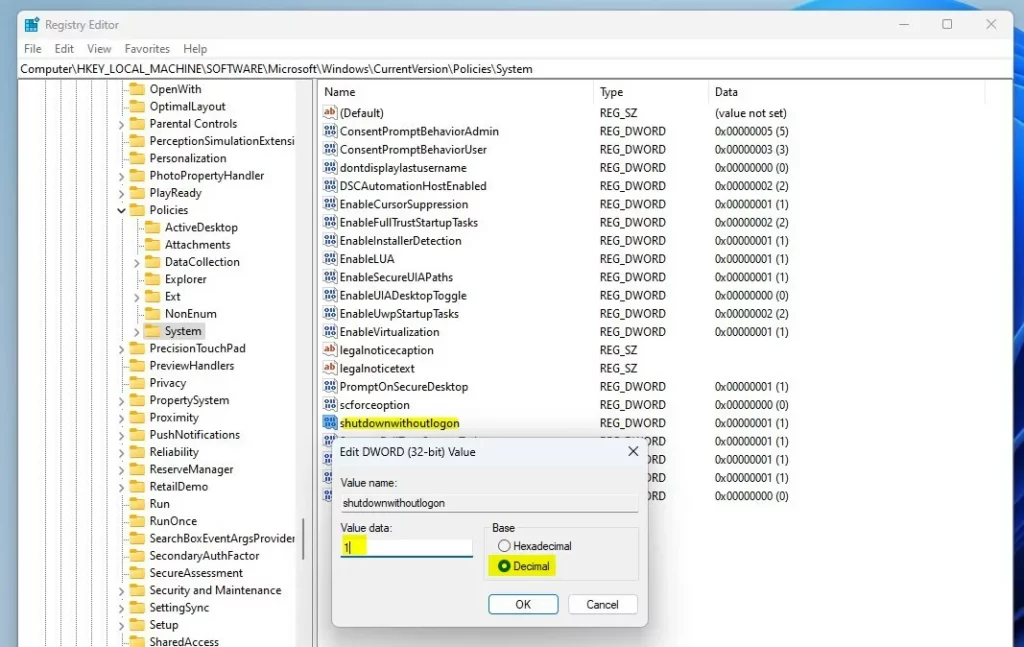
Set the value to show or hide the power button - Click OK, then close the Registry Editor.
- Restart your PC to apply the change.
How It Looks
Here’s how the sign-in screen looks when the power button is shown and hidden:


Summary
- You can easily add or remove the power button on the Windows 11 sign-in screen using either the Local Security Policy Editor or the Registry Editor.
- Showing the power button lets users shut down or restart without logging in.
- Hiding it can add an extra layer of security or prevent accidental shutdowns.
For official details, see Microsoft’s documentation.
If you try these steps and have questions or suggestions, please leave a comment below. We’d love to hear from you!

Leave a Reply