
Windows 11 can automatically manage Active Hours — the time when you usually use your computer — so it doesn’t restart your PC to install updates while you’re busy. This guide will help you turn this automatic feature on or off, so updates happen when they won’t interrupt you.
What Are Active Hours?
Active Hours is a setting that tells Windows when you are usually working on your PC. During these hours, Windows tries not to restart your computer for updates. If you don’t want to set these hours yourself, Windows can watch your usage and adjust them automatically.
Why does this matter? Windows Update keeps your computer safe and running well by installing important fixes. Usually, it does this quietly in the background, and sometimes it needs to restart your PC to finish installing updates.
If you want to learn more about Windows Update and how to manually download updates, check out this helpful article: How to Manually Download Updates for Windows 11.
How to Turn On or Off Automatically Adjust Active Hours in Windows 11 (Using Settings)
Follow these simple steps to change this setting using the Windows Settings app:
- Open Settings: Click the Start menu (the Windows icon at the bottom left) and then click Settings. Or press Windows key + I on your keyboard to open Settings quickly.
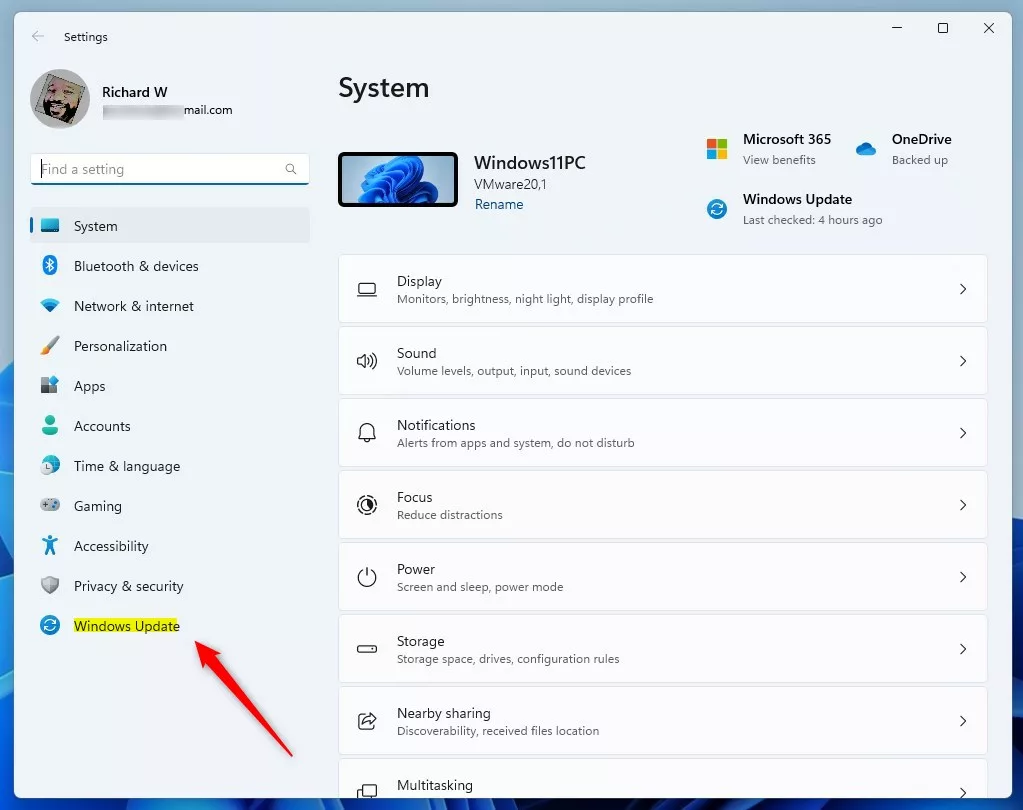
- In Settings, click Windows Update on the left side.
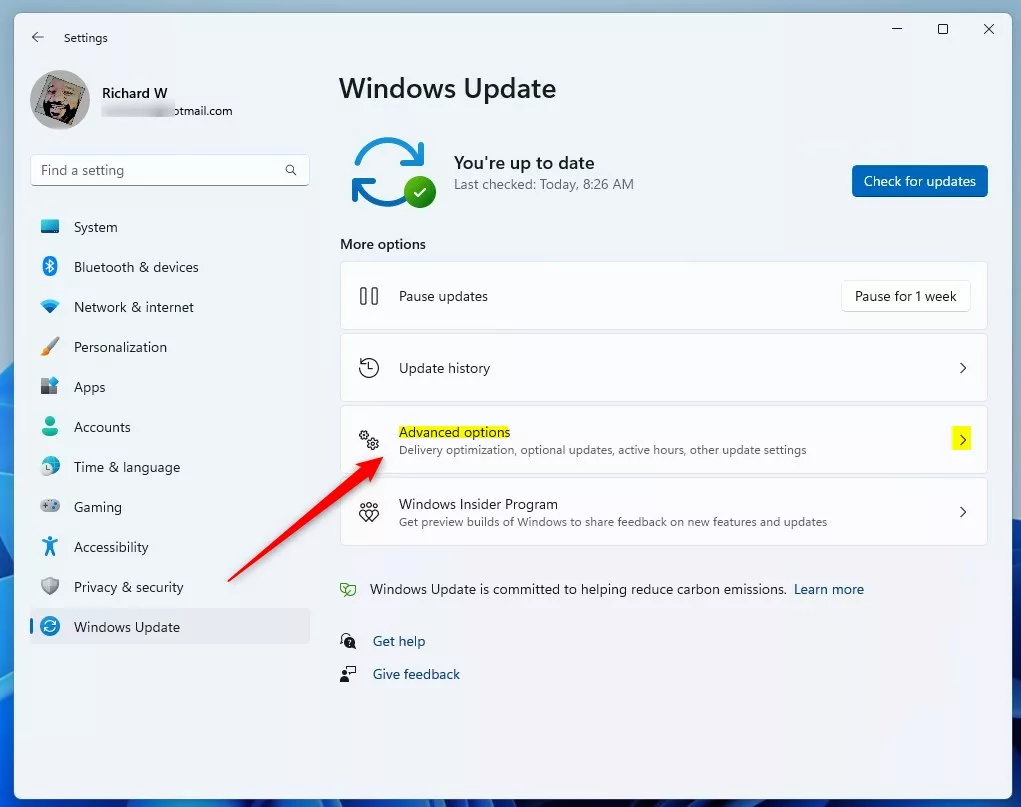
- On the right side, click Advanced options.
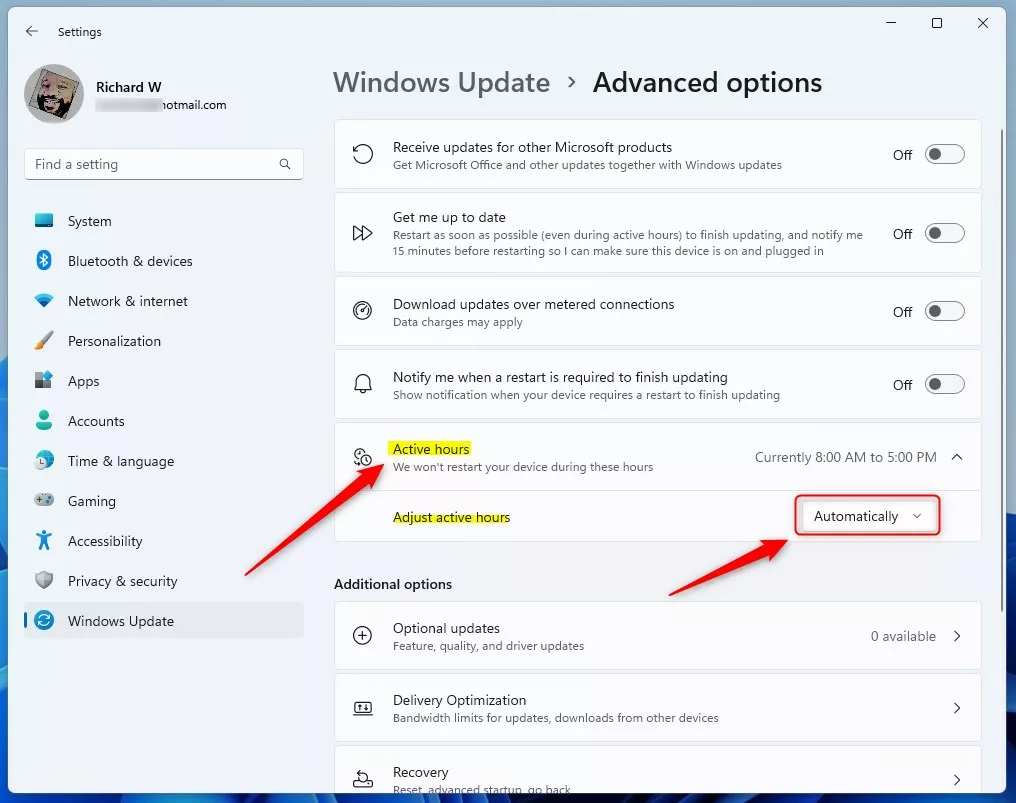
- Scroll down to find Active hours and click it to open.
- Use the drop-down menu under “Automatically adjust active hours based on activity” to turn it On or Off.
- Close the Settings app when you’re done.
What happens when you turn this on? Windows will monitor how you use your computer and automatically adjust when it thinks you’re working. This way, updates won’t interrupt you during your busy hours.
How to Turn On or Off Automatically Adjust Active Hours Using Registry Editor (Advanced Users)
If you’re comfortable making changes inside Windows, you can also turn this feature on or off through the Registry Editor. This is a tool that controls many hidden Windows settings.
Important: Be careful when using Registry Editor. Changing the wrong settings can cause problems. It’s a good idea to back up your PC before you start.
Here’s how to do it:
- Open Registry Editor:
- Press Windows key + R to open the Run box.
- Type
regeditand press Enter. - [Admin] If asked by User Account Control, click Yes to allow.
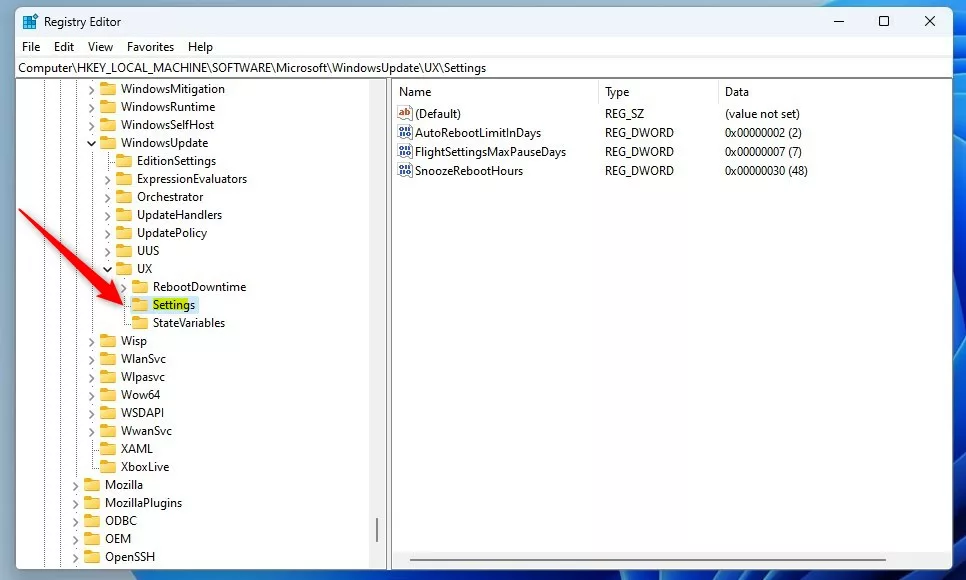
- In Registry Editor, navigate to this folder (key) path:
HKEY_LOCAL_MACHINE\SOFTWARE\Microsoft\WindowsUpdate\UX\Settings - If you don’t see the Settings folder, right-click on the UX folder, choose New > Key, and name it Settings.
- Click on the Settings folder.
- On the right side, right-click and select New > DWORD (32-bit) Value.
- Name the new value
SmartActiveHoursState. - Double-click
SmartActiveHoursStateand set the Base to Decimal. - Change the Value data to:
1to turn the feature on0to turn the feature off
- Click OK, close Registry Editor, and restart your computer.
What happens when you change this value? Windows will either enable or disable the automatic active hours adjustment based on the number you enter. A restart makes sure the change takes effect.

Summary
- Automatically adjust active hours helps Windows pick the best time to install updates without bothering you.
- You can turn this feature on or off in the Settings app or by using the Registry Editor (for advanced users).
- Setting this right means fewer surprises from unexpected restarts while you’re working.
- Follow the easy steps above to customize how Windows 11 handles updates around your schedule.
- If you want to learn more about setting active hours manually, here’s a helpful guide: Set Active Hours in Windows 11.


Leave a Reply