

This article explains how to free up disk space using OneDrive in Windows 11.
Why Use OneDrive?
The OneDrive app lets you sync files and folders on your computer with Microsoft Cloud. It allows you to access them anywhere on your mobile devices and other computers using the service.
You can automatically back up your essential folders (your Desktop, Documents, and Pictures folders) on your device with the OneDrive app.
Files stored in OneDrive are automatically downloaded to the computer when you open them for the first time. The more files you open, the more files that are downloaded to your computer.
What Happens When You Free Up Disk Space?
If you have many files on your computer, you can change your OneDrive settings to keep them online. This frees up disk space on your computer.
Changing OneDrive files to online-only can help free up your device’s disk space. When you make files online only, they are no longer stored on your local device. You can access them only when you are connected to the internet.
This means you can still view and work on your files. But they don’t take up valuable space on your device. This can be particularly useful if you have many large files you don’t use frequently. You still want to keep them for future reference.
How to Free Up Disk Space with OneDrive
Step 1: Accessing OneDrive
The OneDrive app is pre-installed on Windows 11. To access it:
- Click on the Windows Start menu
- Search for “OneDrive” in the start menu
- Click on the OneDrive icon to open the app
Step 2: Logging into OneDrive Account
Before we move forward, we need to log into OneDrive. First, ensure you have signed up for a Microsoft account.
Once you have your account, use the steps below to sign into the OneDrive app.
- Click on the “Sign In” button
- Enter your Microsoft email and click “Next”
- Enter your password and click “Sign in”

Step 3: Moving Files to OneDrive
Now that you’re logged into OneDrive, we can offload some files to free up disk space.
- Open File Explorer by clicking its icon in the taskbar or pressing Windows Key + E
- Browse your folders and select the files you wish to move to OneDrive
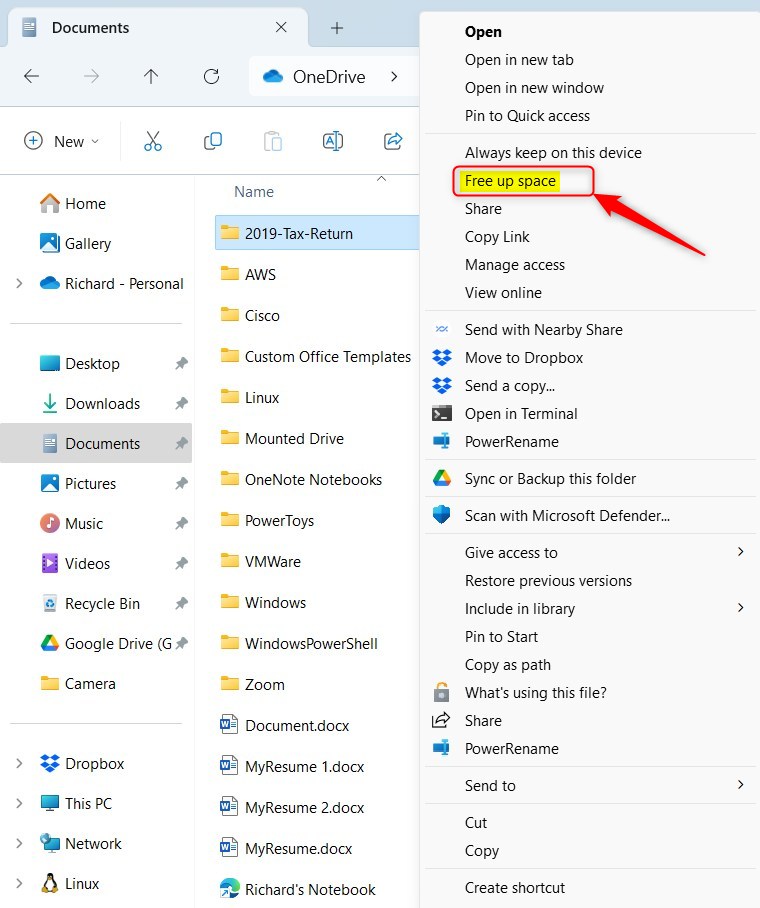
- Right-click on the selected files, then choose “Move to OneDrive” or “Free up space”

Step 4: Adjusting OneDrive Settings for Disk Space Management
OneDrive offers an amazing feature called “Files On-Demand.” This feature allows you to access all your files in OneDrive without downloading them and using storage space on your device.
Use the steps below to free up disk space on your computer and only keep files online.
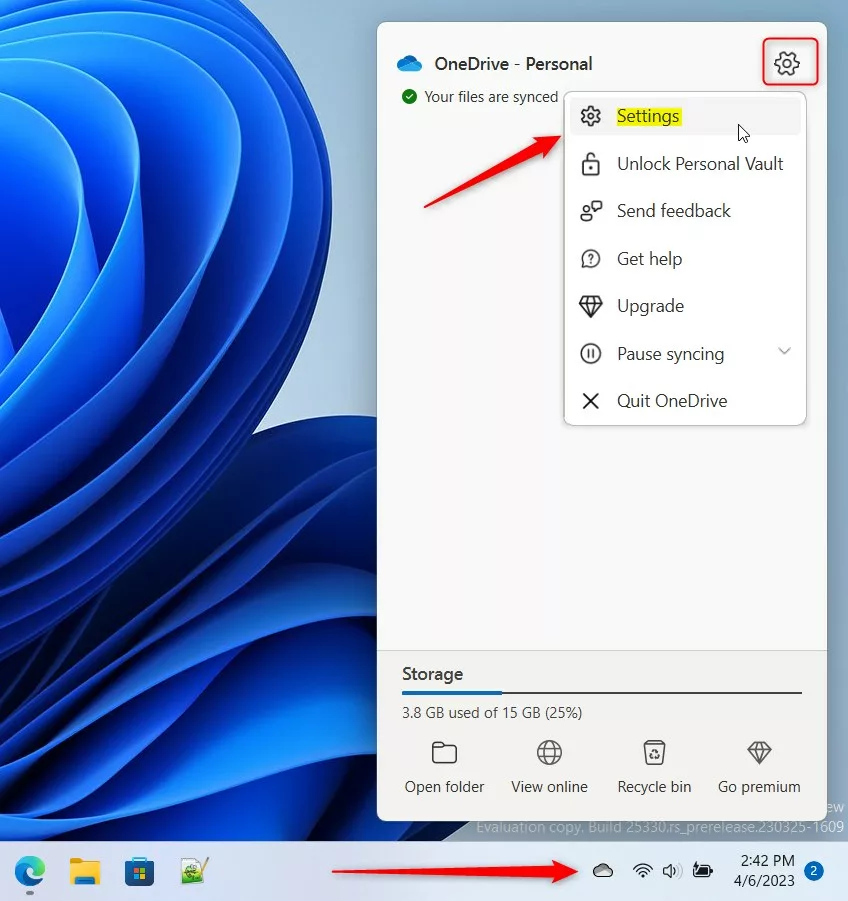
- Right-click on the OneDrive cloud icon in your system tray
- Click on “Help & Settings” and then choose “Settings” from the drop-down menu
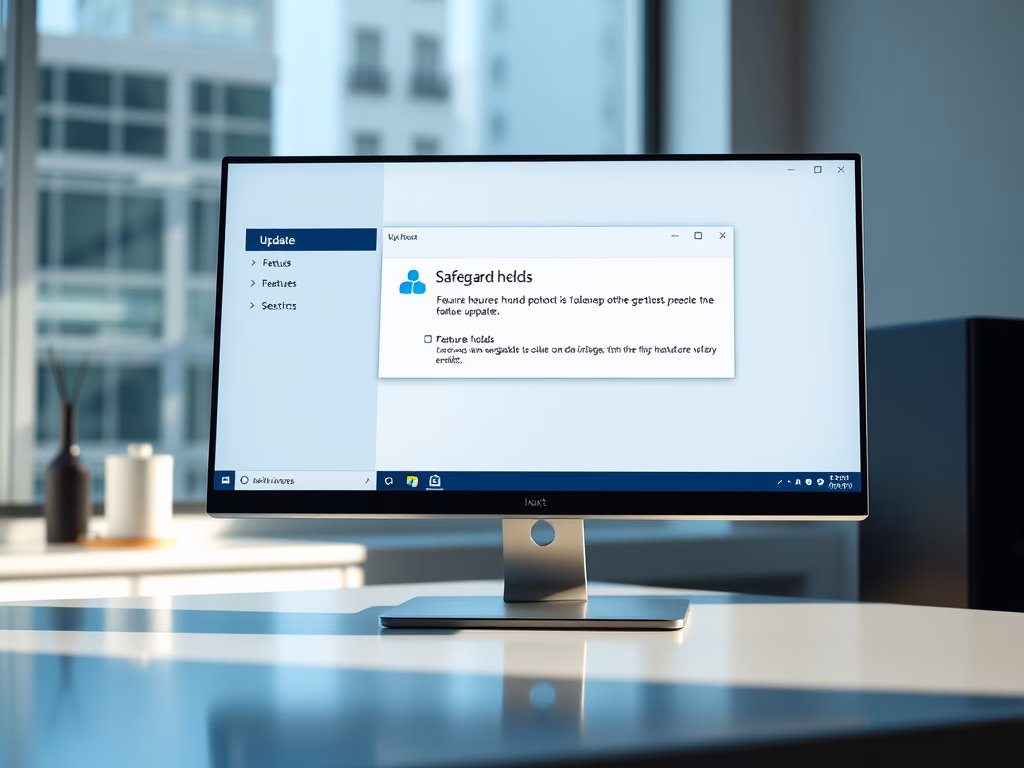
- On the “Sync and backup” tab, expand Advanced settings. Under the “Files On-Demand” section, click the “Free up disk space” button.

That should do it!
Summary
OneDrive helps you free up disk space on your Windows 11 computer. You can move files to the cloud and use the Files On-Demand feature to keep them online only. This saves valuable storage space on your device while still letting you access your files anywhere. Just sign into your OneDrive account, move your files, and adjust your settings to use online-only storage. Remember to explore the advanced settings in OneDrive to make the most of the disk space management features available.
Leave a Reply