OrientDB is an open-source NoSQL database management system written in Java. As a result, it can be used with fewer systems to handle other data types, which increases performance and security while supporting scalability.
OrientDB works with a native graph database and databases built on SQL. It comes in two flavors: Enterprise and Community editions. For this post, we will install the community edition on Ubuntu.
It is used by major corporations and businesses looking for high-performance database systems. Most people will tell you something or two about MySQL and MariaDB; however, OrientDB is fast, secure, and scalable for professionals.
This brief tutorial shows students and new users how to install the OrientDB database server on Ubuntu 16.04 | 18.04 LTS Servers. To install OrientDB, follow the steps below:
Install Java
OrientDB requires Java to function. To get Java installed, run the commands below
sudo add-apt-repository ppa:webupd8team/java
After running the commands above, you should see a prompt to accept the PPA key onto Ubuntu… accept and continue.
Now that the PPA repository has been added to Ubuntu, run the commands below to download the Oracle Java 8 installer…. the installer should install the latest Java JDK 8 on your Ubuntu machines.
sudo apt update
sudo apt install oracle-java8-installer
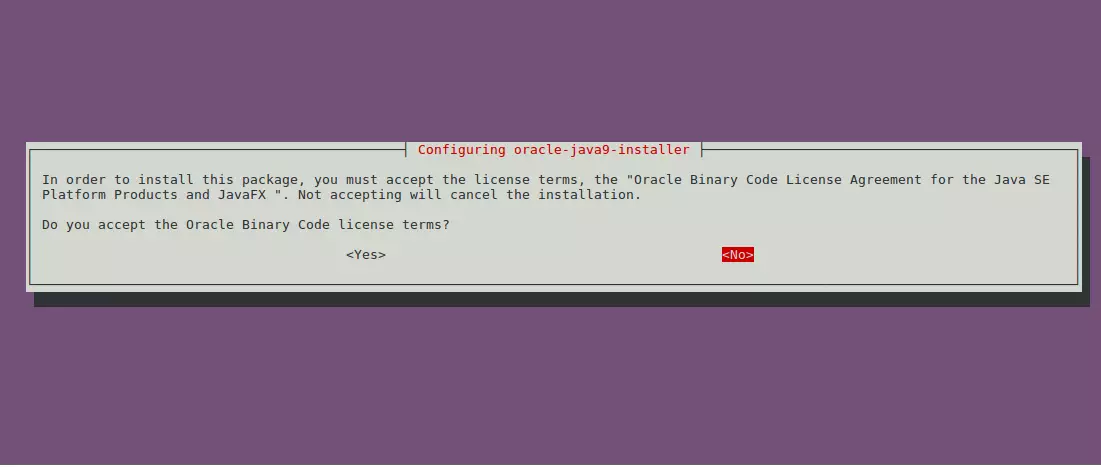
When you run the commands above, you’ll be prompted to access the software’s license terms, accept and continue.
Set Oracle JDK8 as default; install the oracle-java8-set-default package to do that. This will automatically set the JAVA env variable.
sudo apt install oracle-java8-set-default
Now that JAVA is installed run the commands below to set its home directory.
sudo nano /etc/environment
Then copy and paste the highlighted line below and save the file.
PATH="/usr/local/sbin:/usr/local/bin:/usr/sbin:/usr/bin:/sbin:/bin:/usr/games:/usr/local/games"
JAVA_HOME=/usr/lib/jvm/java-8-oracle
export JAVA_HOME
After that, run the commands below.
source /etc/environment
When you run echo $JAVA_HOME, you should see the Java home directory.
Install OrientDB
Now that Java has been installed run the commands below to download the OrientDB package. Replace the release number with the latest available one.
cd /tmp/
wget https://s3.us-east-2.amazonaws.com/orientdb3/releases/3.0.4/orientdb-3.0.4.tar.gz
Next, move the OrientDB package to its home directory.
tar xvf orientdb-3.0.4.tar.gz
sudo mv orientdb-3.0.4 /opt/orientdb
Then, add a user and group for orientdb.
sudo groupadd -r orientdb
sudo useradd --system -g orientdb orientdb
sudo chown -R orientdb:orientdb /opt/orientdb
After that, change into the /opt/orientdb/bin directory and run the commands below to install
cd /opt/orientdb/bin
sudo ./server.sh
It would be best if you were prompted to create a root password. Create one and continue.
Create OrientDB Service
After the steps above, run the commands below to create a service for OrientDB.
sudo cp /opt/orientdb/bin/orientdb.service /etc/systemd/system/
Then run the commands below:
sudo nano /etc/systemd/system/orientdb.service
Copy and paste the lines below into the file and save.
[Unit]
Description=OrientDB Server
After=network.target
After=syslog.target

[Install]
WantedBy=multi-user.target

[Service]
User=orientdb
Group=orientdb
ExecStart=/opt/orientdb/bin/server.sh
Save and exit.
Finally, run the commands below to start the service.
sudo systemctl daemon-reload
sudo systemctl start orientdb.service
To check the status, run the commands below.
sudo systemctl status orientdb.service
You should see the info below:
● orientdb.service - OrientDB Server
   Loaded: loaded (/etc/systemd/system/orientdb.service; disabled; vendor preset
   Active: active (running) since Thu 2018-09-13 15:48:05 CDT; 8s ago
 Main PID: 5203 (java)
    Tasks: 13 (limit: 4663)
   CGroup: /system.slice/orientdb.service
           └─5203 java -server -Xms2G -Xmx2G -Djna.nosys=true -XX:+HeapDumpOnOut

Sep 13 15:48:12 ubuntu1804 server.sh[5203]:         at sun.nio.fs.UnixException.
Sep 13 15:48:12 ubuntu1804 server.sh[5203]:         at sun.nio.fs.UnixException.
Sep 13 15:48:12 ubuntu1804 server.sh[5203]:         at sun.nio.fs.UnixException.
Sep 13 15:48:12 ubuntu1804 server.sh[5203]:         at sun.nio.fs.UnixFileSystem
Sep 13 15:48:12 ubuntu1804 server.sh[5203]:         at java.nio.channels.FileCha
Sep 13 15:48:12 ubuntu1804 server.sh[5203]:         at java.nio.channels.FileCha
Sep 13 15:48:12 ubuntu1804 server.sh[5203]:         at com.orientechnologies.ori
Sep 13 15:48:12 ubuntu1804 server.sh[5203]:         at com.orientechnologies.ori
Sep 13 15:48:12 ubuntu1804 server.sh[5203]:         at com.orientechnologies.ori
Sep 13 15:48:12 ubuntu1804 server.sh[5203]:         . 9 more
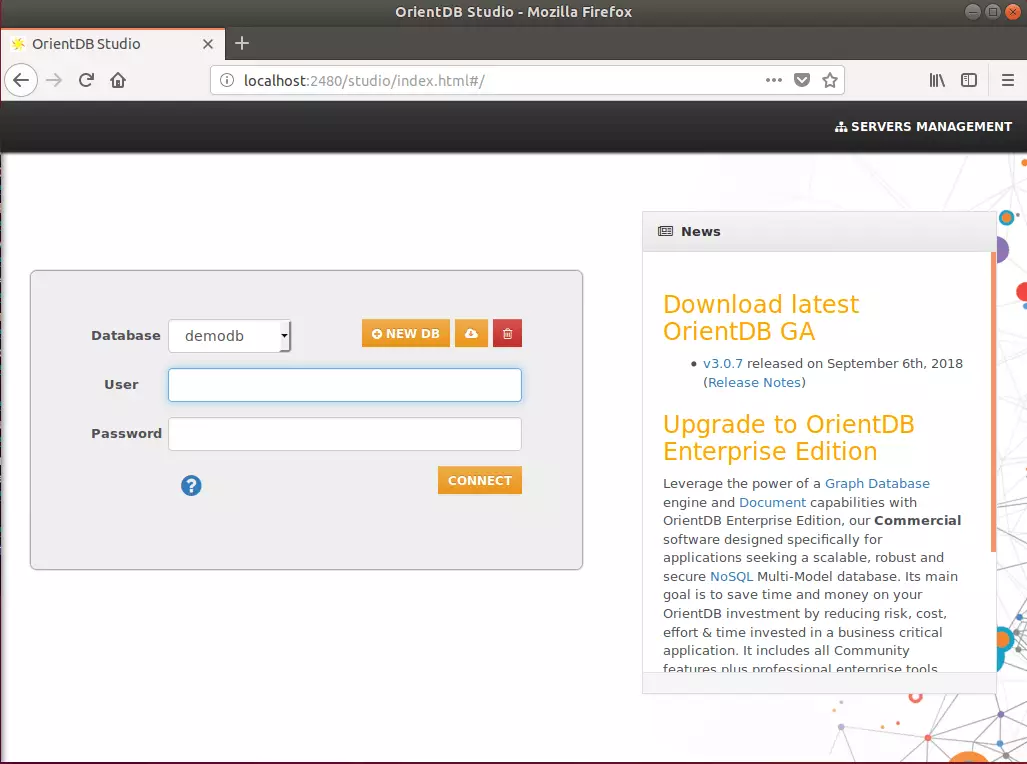
Now, you must open your browser and browse to the server hostname or IP address.
http://localhost:2480/studio/index.html
Log on with the root account and password. username: root
You may also like the post below:

Leave a Reply to Oncu Cancel reply