How to Unpair Bluetooth Devices on Windows 11
You unpair a Bluetooth device on Windows 11 by removing it from your list of connected devices.
Unpairing severs the connection between your PC and the Bluetooth peripheral, like a mouse, keyboard, or headphones, preventing automatic re-establishment.
This action is crucial when you no longer use a device or wish to prevent Windows 11 from attempting to reconnect, saving battery life and avoiding unwanted pairing attempts.
For example, if you’ve replaced your old wireless mouse, unpairing it ensures Windows 11 doesn’t continuously try to connect to the outdated peripheral.
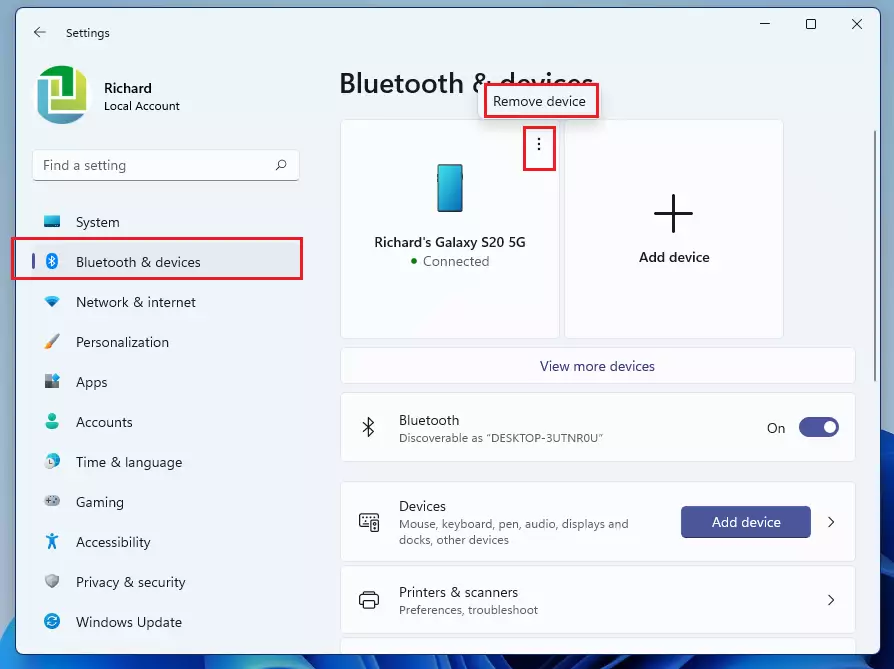
Open Settings, go to Bluetooth & devices, click the three dots next to the device, and select Remove device. If the device is not nearby, click View more devices and remove it from the Other devices section.
Standard Removal Method
You can easily unpair Bluetooth devices on Windows 11 using the built-in Settings app, which is the quickest way to remove a connected item.
Once the Settings window is open, click on Bluetooth & devices in the left sidebar. You will see a list of all devices currently connected to your computer.
To remove a device that is currently in range:
- Find the device in the list.
- Click the three dots (the ellipse) next to the device name.
- Select Remove device.
If you need to remove a device that is not currently nearby, follow these steps:
- Click on View more devices.
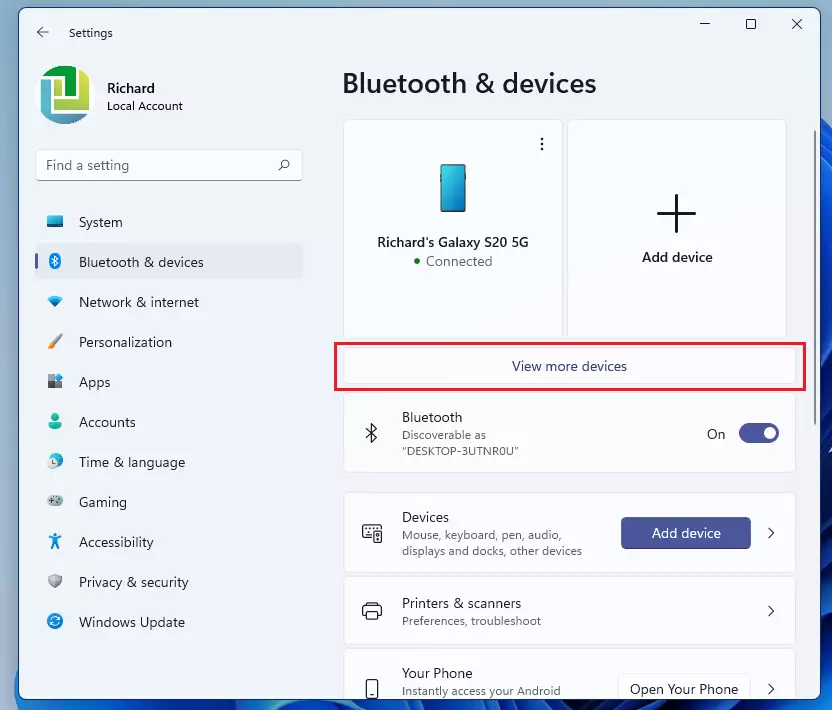
- Scroll down to the Other devices section.
- Click the three dots next to the device you want to delete.
- Select Remove device.

Troubleshooting Failed Removals
If you see a ‘Remove Failed’ error when trying to unpair Bluetooth devices on Windows 11, don’t worry.
If that fails, check the Bluetooth Support Service:
- Press Windows key + R, type services.msc, and press Enter.
- Find Bluetooth Support Service in the list.
- Right-click it and select Restart.
Advanced Removal Methods
If the standard Settings app doesn’t let you unpair Bluetooth devices in Windows 11, try using Device Manager or Command Prompt for more advanced removal options.
- Right-click the Start button and select Device Manager.
- Click View and select Show hidden devices.
- Expand the Bluetooth section.
- Right-click your problematic device and select Uninstall device.
You can also use the Command Prompt to force removal. [Requires Admin Privileges]
devcon.exe remove *YourDeviceID*
Summary
- Open Settings using Windows key + I.
- Go to Bluetooth & devices to remove standard connections.
- Use services.msc to restart the Bluetooth Support Service if removal fails.
- Use Device Manager to uninstall stubborn drivers.
- Always restart your computer after making deep system changes.
Why does my Bluetooth device say ‘Remove Failed’?
This error usually occurs when the Bluetooth driver is stuck or the device is actively trying to reconnect during the removal process. It can also happen if the Bluetooth Support Service has stopped responding. Restarting your computer or the service in services.msc often resolves this communication conflict.
What should I do if the Bluetooth toggle is missing?
If the toggle is missing, your computer may not detect the Bluetooth hardware. Check Device Manager to see if the Bluetooth adapter is listed under hidden devices. If it shows a yellow warning icon, right-click it to update the driver or reinstall the device to restore functionality.
Was this guide helpful?

About the Author
Richard
Tech Writer, IT Professional
Richard, a writer for Geek Rewind, is a tech enthusiast who loves breaking down complex IT topics into simple, easy-to-understand ideas. With years of hands-on experience in system administration and enterprise IT operations, he’s developed a knack for offering practical tips and solutions. Richard aims to make technology more accessible and actionable. He's deeply committed to the Geek Rewind community, always ready to answer questions and engage in discussions.


No comments yet — be the first to share your thoughts!