
This article explains how to turn your status on or off in the Messenger Desktop app on Windows 11.
The Messenger Desktop app is a standalone messaging app developed by Facebook that allows users to send and receive messages, make audio and video calls, and share files and media with other users without going through a web browser.
When you use the Messenger app on Windows, it will automatically start and open when you start your computer. You can turn it off so it doesn’t do that every time you start your computer.
The app also has a setting to turn your status on or off. When your status is off, Facebook will see that you are inactive or available to chat.
The option to turn on or off your status in the Messenger app allows you to control your availability to other users. If your status is turned on, other people will see you are active and available to chat.
If you turn off your status, other users will see you are unavailable now. This can be useful if you want to take a break from chatting or not want to be disturbed. Additionally, turning off your status can be helpful if you want to use the Messenger app without being interrupted by notifications.
Turn Messenger status on or off
As mentioned above, you can turn your status in the Messenger app to On or Off anytime.
When your status is off, you signal to users that you are unavailable and unable to chat. If your status is on, users can reach you to chat or send you a message.
Here’s how to do that.
First, launch the app by clicking the Start menu and selecting it on the All Apps list.

You can also launch the app from the Taskbar or Taskbar overflow.

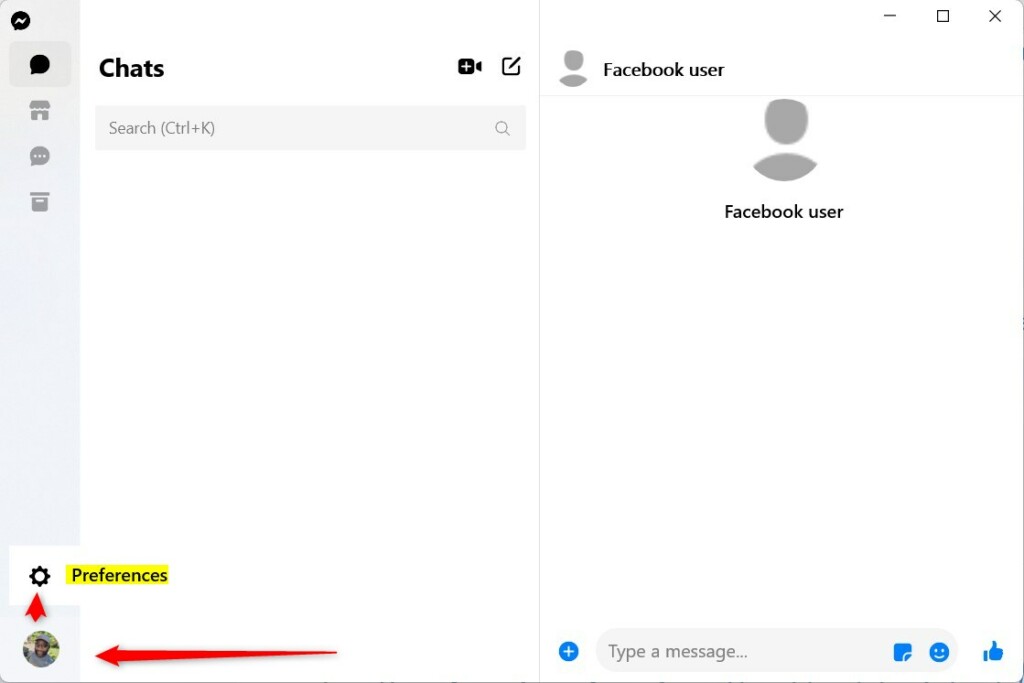
When the app opens, click your profile image and select Preferences at the bottom left of your screen.
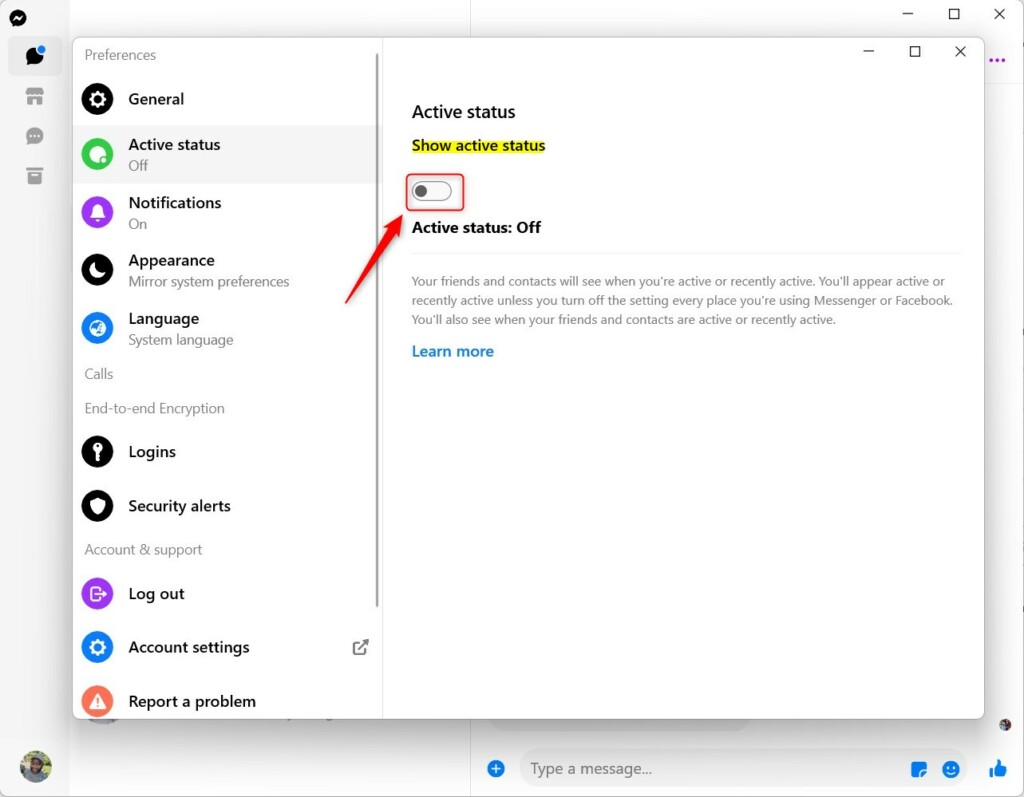
Next, select the Active status tab on the left. Under “Show active status,” toggle the switch button below it to the On position to change your status to active.
To disable it, toggle the switch button to the Off position to show your status as inactive.
That should do it!
Conclusion:
- In this article, we explored the process of changing your status in the Messenger app on Windows 11, providing a detailed step-by-step guide.
- Whether you want to signal your availability for a chat or take a break from notifications, managing your status can enhance your messaging experience.
- We hope this comprehensive guide helps you effectively control your availability and make the most of your Messenger experience on Windows 11.

Leave a Reply