How to Enable or Disable WiFi autoSwitch on Windows 11
You can control WiFi autoSwitch on Windows 11 to manage how your PC selects between available wireless networks.
WiFi autoSwitch is a Windows 11 feature designed to automatically connect you to a stronger or preferred Wi-Fi network when one becomes available, ensuring you maintain a stable connection.
For example, if you’re within range of both your home and work Wi-Fi networks, Windows 11 with autoSwitch enabled intelligently chooses the network with the best signal strength.
Sometimes, you might want to manually manage your Wi-Fi connections or prevent Windows from automatically switching networks. This guide shows you exactly how to enable or disable this feature on your Windows 11 PC.
⚡ Quick Answer
Enable or disable WiFi autoSwitch in Windows 11 by checking or unchecking “Look for other wireless networks while connected to this network” in your WiFi’s Wireless Properties. You can also manage this via Command Prompt by setting the autoswitch parameter to Yes or No.
How to enable or disable WiFi autoSwitch using Settings
You can easily turn WiFi autoSwitch on or off in Windows 11 right from the Settings app, but you’ll need to be an administrator to make these changes.
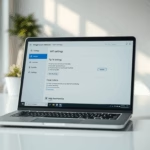
windows 11 start settings
1. Open your settings by pressing the Windows key + I or by clicking Start then Settings.
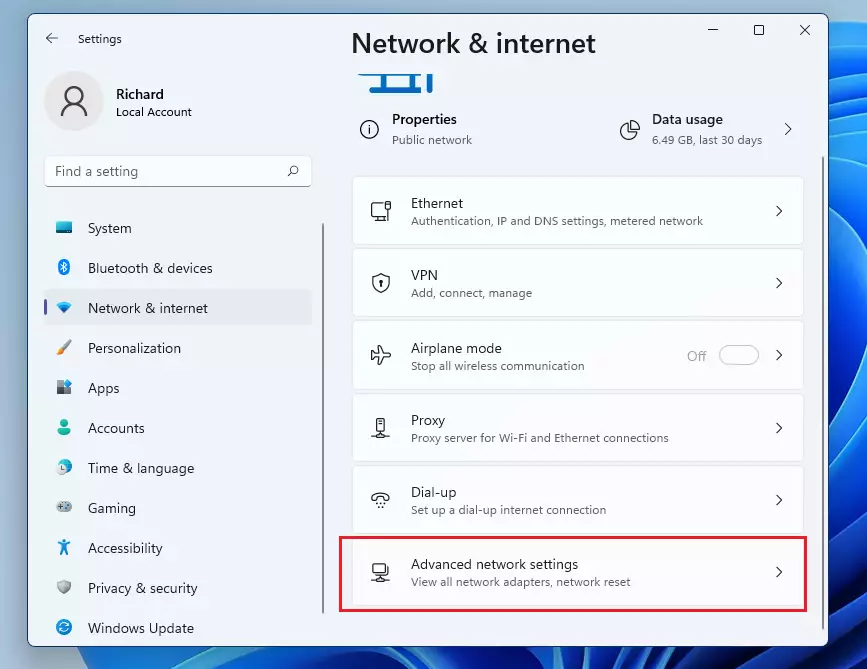
windows 11 advanced network settings
2. Click Network & internet on the left, then select Advanced network settings on the right.
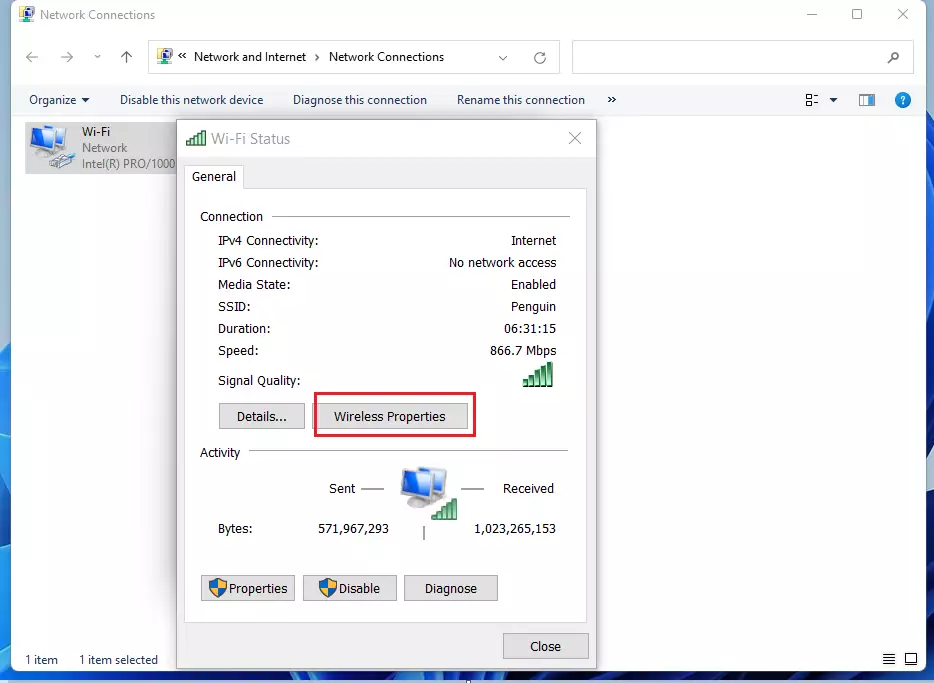
4. A new window will open. Right-click on your WiFi connection and select Status.
windows 11 wireless properties button
5. Click the Wireless Properties button.
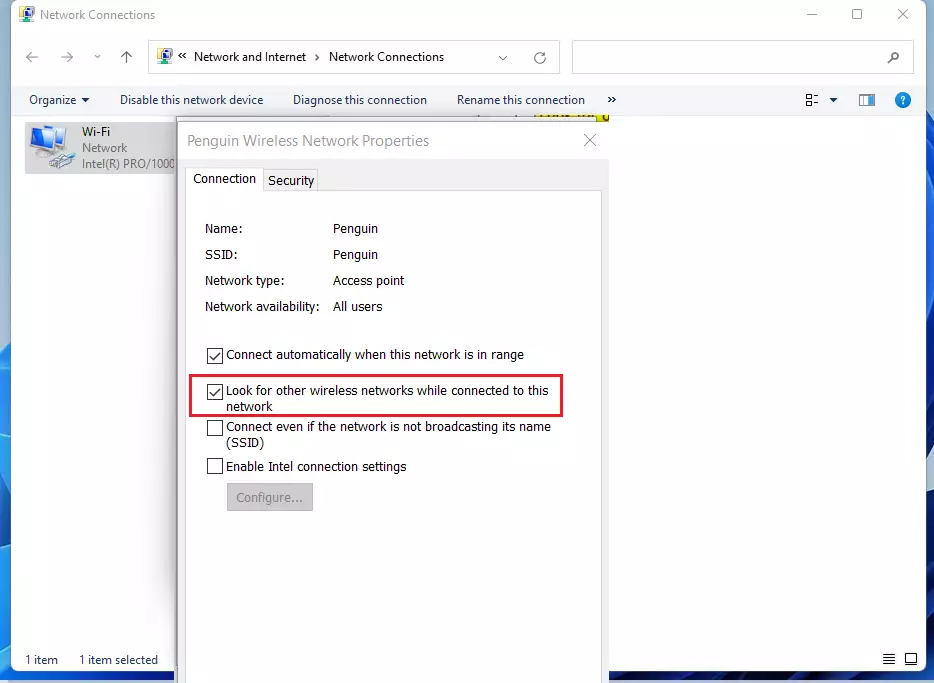
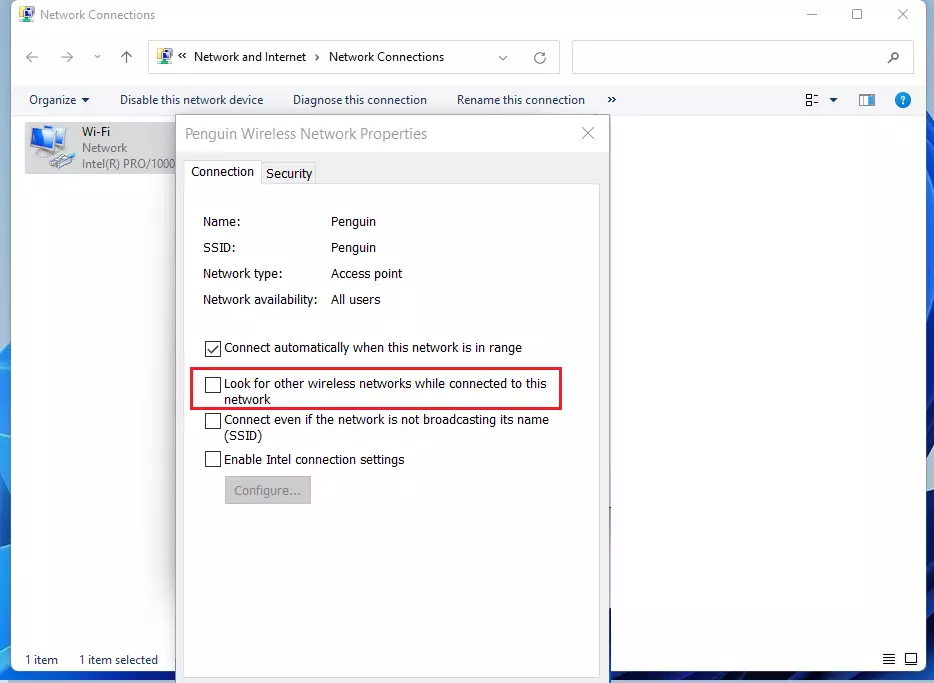
6. Look for the checkbox labeled “Look for other wireless networks while connected to this network”.
Check this box to enable autoSwitch.
Uncheck this box to disable autoSwitch.
windows 11 enable look for other wireless networks while connected to this network
7. Click OK to save your changes.
How to use Command Prompt
You can also control WiFi autoSwitch in Windows 11 using the Command Prompt, but be careful because changing network settings this way can mess with your connection.
2. To see all your saved WiFi networks, type the following command and press Enter:
💻Code
netsh wlan show profiles
3. To enable the feature for a specific network, use this command (replace “NetworkName” with your actual WiFi name):
💻Code
netsh wlan set profileparameter name="name" connectionmode=auto autoswitch=Yes
4. To disable the feature for a specific network, use this command:
💻Code
netsh wlan set profileparameter name="name" autoswitch=No

windows 11 disable look for other wireless networks while connected to this network
Troubleshooting and Network Prioritization
If your Windows 11 computer keeps switching to a weak WiFi signal, you can troubleshoot by checking your preferred networks and restarting the WLAN AutoConfig service.
Summary
The WiFi autoSwitch feature in Windows 11 helps your computer connect to the strongest available WiFi network automatically.
Does 🪟 Windows 11 prioritize 5GHz over 2.4GHz networks?
Yes, Windows 11 generally prioritizes 5GHz networks because they offer faster speeds and less interference. If both bands have the same SSID, the operating system will attempt to connect to the 5GHz band by default, provided the signal strength is sufficient for a stable connection.
How do I stop 🪟 Windows 11 from connecting to open public hotspots?
Go to Settings > Network & internet > WiFi. Click on Manage known networks and remove any public hotspots from the list. Additionally, ensure the option to connect to suggested open hotspots is turned off in your WiFi settings to prevent automatic connections to unsecured networks.
Richard, a writer for Geek Rewind, is a tech enthusiast who loves breaking down complex IT topics into simple, easy-to-understand ideas. With years of hands-on experience in system administration and enterprise IT operations, he’s developed a knack for offering practical tips and solutions.
Richard aims to make technology more accessible and actionable. He's deeply committed to the Geek Rewind community, always ready to answer questions and engage in discussions.


No comments yet — be the first to share your thoughts!