How to Turn On or Off Shared Experiences in Windows 11
This simple guide will help you turn on or off Shared Experiences on your Windows 11 computer. Shared Experiences let your PC connect and share things like files or continue activities with other nearby Windows devices.
What Are Shared Experiences?
Shared Experiences let you do things like Nearby Sharing (quickly sharing files with nearby devices) and Share Across Devices (picking up where you left off on another device).
If you don’t want your PC to share or receive information from other devices, you can turn Shared Experiences off.
Note: You need to be signed in as an administrator on your computer to change these settings.
Option 1: Turn Shared Experiences On or Off Using Local Group Policy Editor
⚠️ Admin privileges required
Who can use this? This tool is available on Windows 11 Pro, Enterprise, and Education editions.
- Press Windows key + R to open the Run box.
- Type
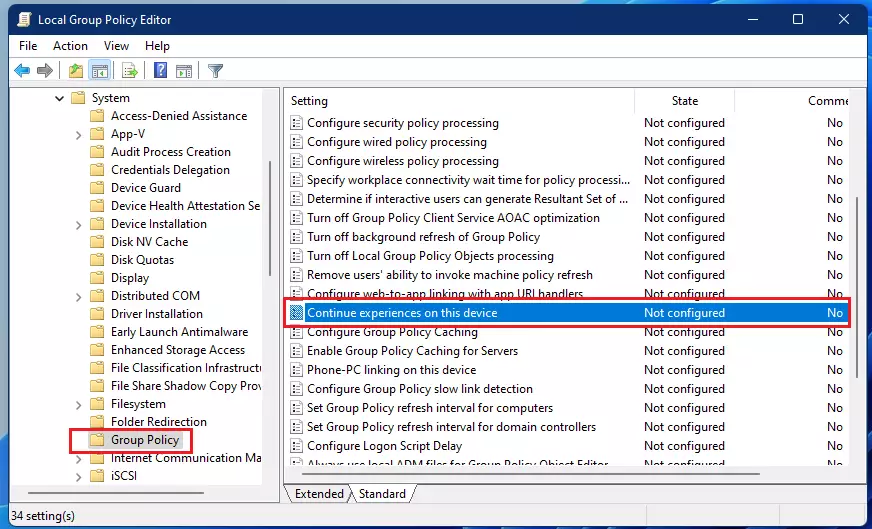
gpedit.mscand press Enter. - In the window that opens, go to: Computer Configuration > Administrative Templates > System > Group Policy
- Find the policy called “Continue experiences on this device” on the right side.
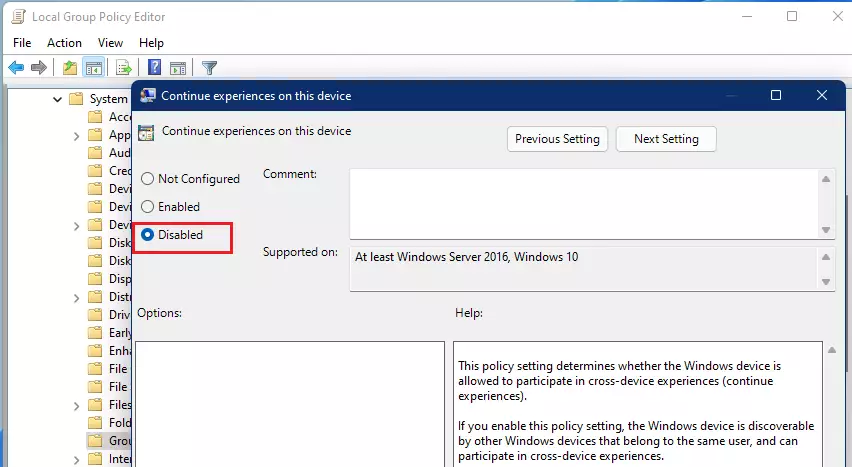
- To enable Shared Experiences: Double-click it, select Not Configured (which is the default), then click OK.
- To disable Shared Experiences: Double-click it, select Disabled, then click OK.
- Close the Local Group Policy Editor window.
Option 2: Turn Shared Experiences On or Off Using Registry Editor
⚠️ Admin privileges required
Warning: Editing the registry can cause issues if done incorrectly. Please follow the steps carefully and consider backing up your registry first.
- Press Windows key + R, type
regedit, and press Enter. - In Registry Editor, navigate to:
HKEY_LOCAL_MACHINE\SOFTWARE\Policies\Microsoft\Windows\System - To enable Shared Experiences: Find the value named EnableCdp and delete it if it exists. (Or create it as a DWORD and leave it empty)
- To disable Shared Experiences: Create or modify the DWORD value EnableCdp and set its value to 0.
- Close Registry Editor and restart your computer to apply changes.
Here is how the registry code looks if you want to create a file to apply the changes:
Enable Shared Experiences (default)
reg delete "HKLM\SOFTWARE\Policies\Microsoft\Windows\System" /v EnableCdp /fDisable Shared Experiences
reg add "HKLM\SOFTWARE\Policies\Microsoft\Windows\System" /v EnableCdp /t REG_DWORD /d 0 /fSummary
- Shared Experiences help your PC share things and continue activities with other Windows devices.
- You must be an administrator to change these settings.
- Use Local Group Policy Editor if you have Windows 11 Pro, Enterprise, or Education.
- If you don’t have those editions, use Registry Editor instead.
- Turning off Shared Experiences stops your device from being found by others for sharing.
- Always double-check your changes before closing the tools.
If you want to learn more about Shared Experiences and how they work, check out the official Microsoft blog: Shared Experiences explained.
Was this guide helpful?


Leave a Reply Cancel reply